Advertisement
Quick Links
Advertisement

Related Manuals for TROJAN PRO PRIAM STUDIO WORKSTATION

Summary of Contents for TROJAN PRO PRIAM STUDIO WORKSTATION
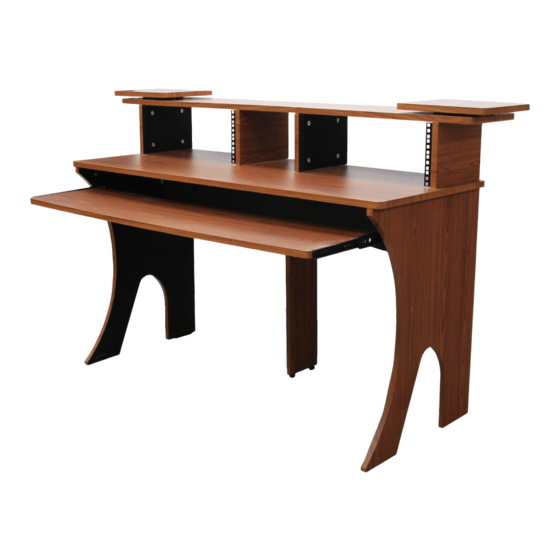
- Page 1 PRIAM STUDIO WORKSTATION Assembly Instructions...
- Page 2 Assembly Instructions Studiospares Europe Ltd. 19 Bilton Way, Luton LU1 1UU, UK www.studiospares.com support@studiospares.com +44 (0)20 8208 9930...
- Page 3 Components: Tapping Screw (x24) Mid-Leg Support (x1) Bolt (x22) Left-Leg Support (x1) Bolt (x6) Nut (x6) Right-Leg Support (x1) Eccentric Nut (x32) Rear Brace Support (x1) Derrick Screw (x32 ) Dial Pad (x8) Work Surface (x1) Feet Pad (x2) Upper Shelf (x1) Support Bracket (x3) TYPE-R (x32) Junction Plate (x4)
- Page 4 You will receive three boxes. Contents of box 1 Contents of box 2...
- Page 5 Contents of box 3 1) Screw 2 x Foot Pads (Z8) to Mid-Leg Support (A).
- Page 6 2) Attach Rail (Z12) to Left- Leg Support (B) using screws (Z2). Repeat for the Right-Leg Support. First disassemble double-folded rail by extending the rail, lifting the latch and seperating the two sections of the rail.
- Page 7 Then continue attaching the rail.
- Page 8 When installing this screw, you may need to use a washer. The washers are included with the Priam in a small postage bag. 3) Then fit Derrick screws (Z6) in the appropriate holes.
- Page 9 4) Fit the Rear Support Brace (D) using Derrick Screws (Z6)
- Page 10 5) Install Eccentric nuts (Z5) to Read Support Brace (D) 6) Using the installed Derrick Screws (Z6) and Eccentrc Nuts (Z5) attach the Left and Right- Leg Supports.
- Page 12 7) Attach Mid-Leg Support (A) using Derrick Screws (Z6) and Eccentric Nuts (Z5)
- Page 13 8) Fit both sides of Work Surface (E) with Derrick Screws (Z6)
- Page 14 9) Attach Work Surface (E) to Leg Supports. 10) Connect the two sets of 4U Rack Strips (z13) to Junction Plates (G) using Tapping Screws (Z1).
- Page 15 11) Fit the Junction Plates (G) with Eccentric Nuts (Z5) and attach them to the Work Surface (E).
- Page 16 12) Attach the Dial Pads (Z7) using Tapping Screws (Z14), then install Dial Wheel (Z11) using Bolt (Z14).
- Page 17 13) Connect Speaker Tray (H) using Bolt (Z2) in the upper holes of the Upper Shelf. It’s easiest to turn the shelf upside down to do it this. 14) Add Derrick Screws (Z6) to Upper Shelf (F).
- Page 18 15) Connect Upper Work Shelf (F) to the Juncton Plates (G) using Eccentric Nuts (Z5). 16) Attach the 3 x Support Brackets (Z9) using Tapping Screws (Z1).
- Page 19 17) Install Keyboard Tray (I) with Rails (Z12) using Bolts (Z3) and Nuts (Z4).
- Page 20 18) Fit Keyboard Tray into the Priam Studio Workstation.
- Page 21 19) If desired apply TYPE-R (Z10) Protection Pads to cover Eccentric Nuts (Z5).
Need help?
Do you have a question about the PRIAM STUDIO WORKSTATION and is the answer not in the manual?
Questions and answers