Table of Contents
Advertisement
Quick Links
Advertisement
Table of Contents

Summary of Contents for Chronologic uAttend MN Series
- Page 1 USER GUIDE For The MN Range Of Clocking Terminals...
-
Page 2: Table Of Contents
Table of Contents 1.0 INTRODUCTION ..........................3 2.0 SETTING UP YOUR uATTEND ACCOUNT .................... 4 3.0 ADDING DEPARTMENTS ........................6 4.0 ADDING EMPLOYEES & OTHER USERS ....................7 5.0 SETTING UP THE MN1000/2000 ....................... 9 6.0 LINKING THE MN1000/2000 TO YOUR uATTEND ACCOUNT ............10 6.1 CONNECTING TO YOUR ACCOUNT .................... -
Page 3: Introduction
1.0 Introduction Thank you for purchasing the MN Series Timeclock, part of the uAttend Employee Management System by Workwell Technologies, Inc. This document will guide you through the steps of setting up your uAttend account, setting up your Timeclock, and linking the Timeclock to your uAttend account. It will also give an overview of the features and functionality of the Timeclock PLEASE NOTE: The MN1000 and MN2000 Timeclocks share common functionality. -
Page 4: Setting Up Your Uattend Account
2.0 Setting Up Your Online uAttend Account This section describes the steps you will take to create a new uAttend account and set up departments and employees. 1. Open your web browser and visit: http://trackmytime.co.uk/signup You will be prompted to enter the Dealer ID, which can be found on a sticker on the outside of the Timeclock box (see the back cover of this guide for details). - Page 5 address). You might wish to use a shortened version of your company name. The URL extension cannot be longer than 20 letters or numbers and cannot contain special characters or spaces. Enter Company Name—Here you can add your Company Name as it will appear in your digital billing information.
-
Page 6: Adding Departments
3.0 Adding Departments After you have created your uAttend account, you will need to set up at least one department and one employee. There is no limit to the number of departments you can set up. However, the number of employees is limited, based on the price plan you selected in Section 2.0. -
Page 7: Adding Employees & Other Users
4.0 Adding Employees and Other Users Follow these steps to add a User to your uAttend account: 1. Click the Users tab on the main menu. 2. Click Add User. 3. From the Role drop-down menu, select the role that you wish to assign to the user. Employee—users who are assigned to departments within uAttend and will be clocking in and out of the system. - Page 8 NOTE: Each uAttend account is licensed for one administrator. If you wish to add more administrators, there will be an additional fee of £4.00 per month, per administrator. 4. To add a user who will be using the system to clock In and Out, Select Employee. 5.
-
Page 9: Setting Up The Mn1000/2000
5.0 Setting Up The MN2000 Now that you have set up your uAttend account, you can install your Timeclock and link it to your account.. Tips for successful Facial Scanning Make sure you mount your Timeclock low enough on the wall (1.1M recommended), so that the camera can take photos of all employees regardless of height. -
Page 10: Linking The Mn1000/2000 To Your Uattend Account
6.0 Linking the MN2000 to Your uAttend Account 6.1 How to Connect the MN2000 to Your uAttend Account Follow these steps to link the MN2000 to your uAttend account: 1. Attach an Ethernet cable between the Timeclock and your network point, then plug the Timeclock into a power outlet and turn on the power. - Page 11 5. Confirm your Default Timezone, by tapping the up and down arrows at the top of the screen. 6. Your Clock is now setup and has been automatically added to your uAttend account After the confirmations message, you will see the Home Screen showing “System Ready”...
-
Page 12: Solving Network Issues During Setup
6.2 Solving Network Issues During MN2000 Setup If you do not see the “Enter Company ID” screen during setup, your Timeclock has been unable to reach the uAttend servers due to a local networking issue. You can amend your network settings by following the following onscreen wizard. -
Page 13: Overview Of The Timeclock Features
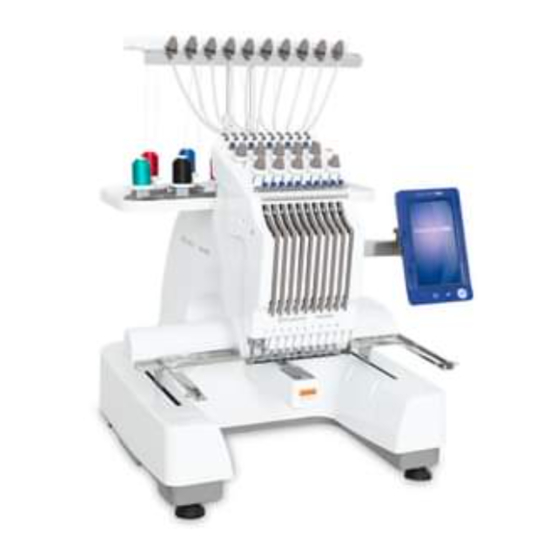
7.0 Overview of the Timeclock Features The Timeclock is a touchscreen biometric time-recording device that allows employees to clock in or out using facial recognition, an RFID card, or a PIN. The MN1000 can store up to 100 user templates, the MN2000 up to 200. -
Page 14: Registering Face Ids & Transferring Templates To Other Timeclocks
7.2.2 Supervisor User Menu The Supervisor User menu allow the User to add and delete templates and is comprised of three sub- menus: User Management, Template, and System Management. User Management (“User Mgt”)—From the User Management menu, super users can add new user templates. -
Page 15: Troubleshooting
Follow these steps on each Timeclock that you selected to receive the templates: Tap the Menu key. Enter the default password (53178) if it has not been changed, then tap OK. Select the Template menu. Select Download Templates. Tap OK. Wait for the templates to download to the Timeclock. - Page 16 Please Note: Your Dealer ID can be found in the orange label on the uAttend product box. If you have already purchased a uAttend subscription, your Dealer ID was emailed to you. uAttend, brought to you by: Chronologic Ltd Unit 20-24 Fourth Avenue Westfield Industrial Estate...
Need help?
Do you have a question about the uAttend MN Series and is the answer not in the manual?
Questions and answers