Table of Contents
Advertisement
Quick Links
Advertisement
Table of Contents

Summary of Contents for Collins SC-M-1514
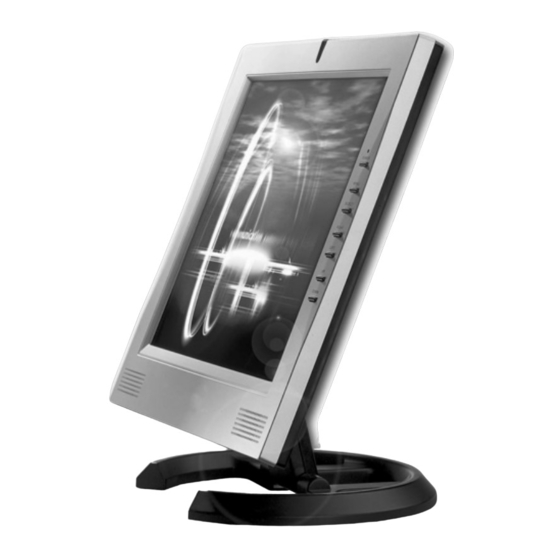
- Page 1 All manuals and user guides at all-guides.com ser’s Manual MODEL : SC-M-1514...
- Page 2 All manuals and user guides at all-guides.com p a r t s Please make sure the following items are included with your monitor. If any items are missing, contact your local dealer or Collins service center. 220V AC Adapter Cord AC/DC Power Adapter...
- Page 3 All manuals and user guides at all-guides.com The warranty period of the products is ONE YEAR. PRODUCT WARRANTY CARD Collins Inc. warrants its products to be free for ONE YEAR from the original purchasing date. Model Serial No. SC-M-1514 Purchaser's Name...
-
Page 4: Table Of Contents
All manuals and user guides at all-guides.com Table of Contents INSTALLATION Connecting the Monitor Monitor Driver Installation Auto Installation Manual Installation ADJUSTMENT Front Panel Easy Adjustment OSD Menu ETC. Product Features Troubleshooting Safety Precautions Specifications Standard Signal Mode Standard Certification Logos Warranty Card... -
Page 5: Connecting The Monitor
All manuals and user guides at all-guides.com CONNECTING THE MONITOR Make sure that both the computer and the monitor are switched off before connecting. 1 Connect the power cord to the AC/DC adaptor and connect the adaptor plug to the DC power connector on the back of the monitor. Caution) Make sure that you use supplied adapter only. - Page 6 All manuals and user guides at all-guides.com SC-M-1514 INSTALLATION...
-
Page 7: Monitor Driver Installation
All manuals and user guides at all-guides.com MONITOR DRIVER INSTALLATION If you install the monitor driver, the resolution and frequency are suitable for the monitor and you can experience the clear screen. Auto Installation If the installation does not work automatically, install the driver manually First, turn the computer and the monitor on and insert the installation disk into the floppy disk drive. -
Page 8: Manual Installation
All manuals and user guides at all-guides.com Adjust the resolution and vertical frequency and then click "OK" This screen shot is for the mode reset. Click "OK" Click "Yes" If you want to change the resolution, click "No". Repeat the above steps and set the optimal resolution. Manual Installation First, turn the computer and the monitor on and insert the installation disk into the floppy disk drive. - Page 9 All manuals and user guides at all-guides.com Manual Installation Click "Settings" Click "Advanced" Click "Next" Click "Display a list of all the drivers in a specific location, so you can select the driver you want" Click "Next" Select model and click "Next" Click "Next"...
- Page 10 All manuals and user guides at all-guides.com Click "Monitor" Click "Change.." Click "Have Disk" Select the driver and click 'OK'. Driver installation has been completed. Click "Finish" and then reboot the Windows. INSTALLATION...
- Page 11 All manuals and user guides at all-guides.com Manual Installation IF YOU HAVE WINDOWS NT.. Click "Start" button. Select "Settings" tab and then click "Control Panel". Double click "Display" icon. Click "Settings" bar. Click "All display modes". Select a mode (resolution, colors, vertical frequency). Click "OK".
-
Page 12: Adjustment
All manuals and user guides at all-guides.com FRONT PANEL If you perform auto adjustment in advance of manual adjustment when you install the monitor, the screen appears more stable. Basic functions of the buttons Power Turns ON/OFF the monitor. Menu Opens the main OSD menu and selects the highlighted function. -
Page 13: Easy Adjustment
Each button has an additional function and if you press two buttons simultaneously, you can easily adjust the screen. You can adjust the following functions without OSD menu. SC-M-1514 1 Exit : if you press the button once, displays the recent setting values and if you press and hold the button, performs the factory reset. -
Page 14: Osd Menu
All manuals and user guides at all-guides.com OSD MENU To exit from OSD menu, press ( ) button once or twice. After OSD menu disappears, the monitor automatically saves any adjustment you have made. SC-M-1514 SETTING SEQUENCE PC mode Brightness Contrast... - Page 15 All manuals and user guides at all-guides.com UTILITY mode Brightness Information Factory Reset Power ON / OFF AUTO mode ADJUSTMENT...
-
Page 16: Product Features
All manuals and user guides at all-guides.com PRODUCT FEATURES Radio Frequency Compatibility Registration (Class B digital device) This product has been approved for non-business purposes and may be used in any environment, including residential areas. (Class A devices are for business purposes and Class B devices radiate less radio frequency than Class A devices) Power Saving Feature Display Power Manager Signaling (DPMS) -
Page 17: Troubleshooting
All manuals and user guides at all-guides.com TROUBLESHOOTING High voltage flows inside of this product and may create a danger of electric shock. Never disassemble or open the monitor. If doing so, you cannot get any warranty, repair and substitution. When the following troubles are occurred, follow the troubleshooting in this manual. - Page 18 All manuals and user guides at all-guides.com Display image is not centered. -Perform AUTO menu on the OSD or adjust the horizontal and vertical position. Image is not stable and appears to vibrate. -Check the display resolution and frequency from the computer or video board is an available mode for your monitor.
-
Page 19: Safety Precautions
All manuals and user guides at all-guides.com SAFETY PRECAUTIONS The following information is to prevent damages and secure user's safety. Please read the following information carefully and use the monitor properly. Power 1.Do not hold the plug with your 2. Never disconnect it by pulling the 3.Do not force to bend the cord or put hands wet. -
Page 20: Specifications
All manuals and user guides at all-guides.com SPECIFICATIONS SC-M-1514 Model 38.1cm Screen size Contrast Scailing 300 : 1 Display Area 304 mm(W) * 228.1mm(H) Pixel Pitch 0.297 mm(W) * 0.297mm(H) Type SAMSUNG SMART TFT LCD Viewing Angle 75 / 75 / 55 / 65 (left/right/up/down) 25ms Typ. -
Page 21: Standard Signal Mode
All manuals and user guides at all-guides.com Standard Signal Mode Resolution Horizontal Vertical Pixel Clock 720x400 31.47KHz 70.0Hz 28.322MHz 640x480 31.47KHz 60.0Hz 25.175MHz 640x480 35.00KHz 66.7Hz 30.240MHz 640x480 37.86KHz 72.8Hz 31.500MHz 640x480 37.50KHz 75.0Hz 31.500MHz 800x600 35.16KHz 56.3Hz 36.000MHz 800x600 37.88KHz 60.3Hz 40.000MHz... -
Page 22: Standard Certification Logos
All manuals and user guides at all-guides.com FCC INFORMATION NOTE: This equipment has been tested and found to comply with the limits for a Class B digital device, pursuant to part 15 of the FCC Rules. These limits are designed to pro-vide reasonable protection against harmful interference in a residential installation. - Page 23 All manuals and user guides at all-guides.com Memo etc.