Advertisement
Quick Links
Advertisement

Summary of Contents for Air Vise and Workholding AirVice
-
Page 2: Table Of Contents
TABLE OF CONTENTS SAFETY NOTICES ............2 INTRODUCTION ............3 SETUP OF THE AIR VISE ..........5 SETTING UP YOUR KIT ..........7 OPERATING THE VISE ..........9 CLAMPING FORCE ........... 10 WARRANTY ..............11 PARTS LIST ..............12 EXPLODED VIEW ............15... - Page 3 SAFETY, WARNINGS AND HAZARDS Observe all SAFETY warnings, signs, placards, notices and manuals, before, during, and after operating equipment. Failure to read operation manual could result in serious injury or destruction of machinery. BEWARE of moving components. This unit is comprised of jaws that slide back and forth.
-
Page 4: Introduction
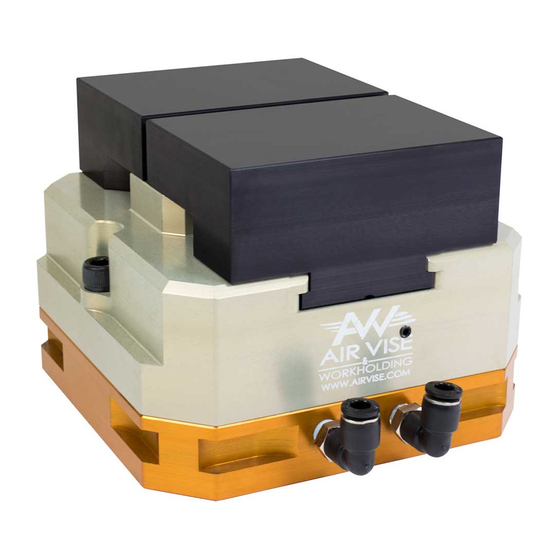
INTRODUCTION Finally, a vise as fast and versatile as modern machining. Welcome to the cutting edge of vise technology. We know you won’t be disappointed with the speed and agility this vise will bring to your operations. The ability to swap jaws in mere seconds will give you an unmatched capability to pivot to market demands, while the push button or electronic open/close feature will... - Page 5 SETUP OF YOUR AIR VISE Your new Air Vise will come ready for installation of the pneumatic fittings. Install the 90º elbow fitting until tight. The Air Vise will need to be mounted to a clean, flat surface. Ensure that you have removed all chips and fragments from past work and use a solvent...
- Page 6 The included T-Slot nuts and vise keys will assist you in ensuring accurate alignment and security on the table. Install the vise keys to your desired configuration and align the vise with the table. Fit the T- Slot nuts into the table slots, align with the mounting holes on the vise and tighten to your chosen specification.
- Page 7 The switch box provides you the capability to operate the vise in a manual mode. Ensure it is set in your desired configuration. With the regulator supplied with shop or machine air, set the pressure to the desired clamping force. See the “Clamping Force”...
- Page 8 OPERATING YOUR VISE ELECTRICAL With your vise and kit now set up and connected, you can begin to actuate the jaws. Ensure you have air provided to the Air Vise and via a regulator and set the PSI to the desired clamping force rate.
-
Page 9: Clamping Force
the open position and slide your jaws to the rear to remove them. Install your new jaws in the reverse manner and you’re ready to go. CLAMPING FORCE The below charts show the clamping force at different air pressures. *These forces are subject to change with various influences from utilized air supply. -
Page 10: Warranty
WARRANTY Air Vise and Workholding will guarantee Air Vise & Workholding manufactured products to be free from material defects and workmanship flaws spanning one year from the original invoice date. Within that period Air Vise & Workholding will repair or replace defective parts with new parts at no cost to you. -
Page 11: Parts List
PARTS LIST AV-T-4 BASE ...... 2001 1/4” TUBE X 1/8” NPT ELBOW FITTING ........2108 AV-T-4 BODY ..... 2004 1/4” TUBE X 1/4” NPT STRAIGHT FITTING ........2124 AV-T-4 PISTON ....2003 1/4” TUBE X 1/8” NPT STRAIGHT AV-T-4 JAW ...... 2005 FITTING ........ -
Page 12: Exploded View
EXPLODED VIEW...
Need help?
Do you have a question about the AirVice and is the answer not in the manual?
Questions and answers