Advertisement
Advertisement

Related Manuals for LiteBee Wing EDU

Summary of Contents for LiteBee Wing EDU
- Page 1 LiteBee Wing EDU Drone Instruction Manual www.litebee.com...
-
Page 2: Table Of Contents
Contents Introduction Installation Functions APP Operation Programming Extension function Disclaimer... -
Page 3: Introduction
Introduction Thank you for purchasing the Litebee Wing EDU Drone from Makerfire. Please read this instruction manual carefully before use. The information contained in this manual is subject to change without notice. Litebee Wing is designed for STEAM/STEM education, suitable for kids age over 8, best for home, middle school, high school, college, and summer camp, etc. -
Page 4: Installation
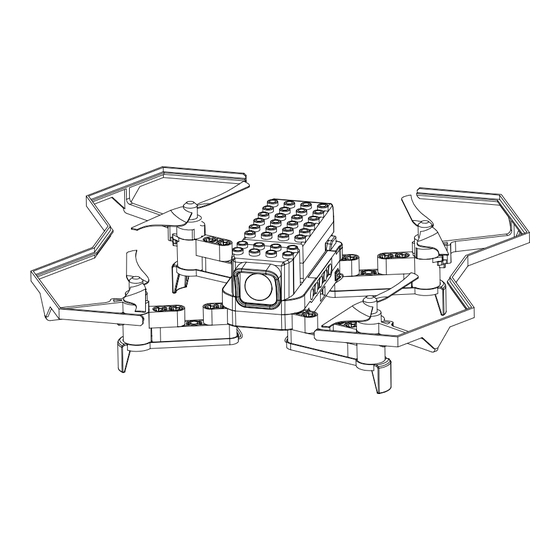
Installation... - Page 5 Installation...
- Page 6 Installation Finish...
- Page 7 Arm Extension Seven-hole arm extension Shape stretch arm extension Nine-hole arm extension...
-
Page 8: Functions
12. Antenna On / Off: Long press 1 seconds Power Button to power on litebee Wing, long press 3 seconds to power off litebee Wing. (Long press the Power Button 1 second to power on LiteBee Wing, and long press 3 seconds to power off) - Page 9 Remote Control Overview 0: Programming Mode Switch 1/2 /3/4: Customized Programming Button LED Indications: L1 Off: Left throttle/ Mode 2 L1 Solid Green: Right throttle/Mode 1 L2 Off: Success to connect with aircraft L2 Solid Red: Not connect with aircraft L3 Off: Not in Binding Mode Take off/Land Calibration...
- Page 10 Operation Guide Mode2: Forwards Towards Right Towards Left Left rotate Right rotate Down Backwards Left stick Right stick...
- Page 11 Binding 1. Power on the radio transmitter; 2. Press the key K0 while pushing the right throttle to the top right at 45°, the L3 is solid green. 3. Power on the aircraft, L3 light will be off after calibrate. (L3 light off indicates bind successfully) L1 L2 L3 L5 L6...
- Page 12 Flight Controller Indications Solid green light: Ready to take off (altitude hold and fixed-point) Slow blinking green light: One-key to take-off/land (aircraft moving status: fixed-point moving) Blinking blue light once: Photo-taking mode Slow blinking blue light: Record mode (video recording) Slow blinking red light: Fail to connect (fail to connect with a radio transmitter or APP, not binding, lost signal) Fast blinking red light: Low voltage alarm, aircraft land automatically Solid red light: System crash/system failure...
- Page 13 Aerobatics One-key 360° rotation mode Press the button"6”, aircraft rotate 360 °at the point slowly, then finish rotating automatically. (The aircraft will rotate 360 °clockwise then quit mode) Bounce Mode Press the button"7" to enter bounce mode, aircraft bounce up and down between 1-1.5m from the takeoff point, press button "7"...
- Page 14 Charging Put the battery into the battery holder, Use the micro USB cable to charge (Max input 8.4V,600mAh) The fully charged time is about 1 hour with a 5V/2A charger. Solid red light: in charging Solid green light: full charged Connector Red light Green light...
-
Page 15: App Operation
APP Operation 1、 Search "LiteBee" in Huawei, Baidu, Tencent, and 360 application market for Android system; Search "LiteBee" in IOS APP store, download the APP. 2、 Open the App and click "LiteBee Wing" to enter into the operation interface. 3、 The App control is based on WIFI communication, which supports operating and image transmitting. - Page 16 APP Operation Firmware Version WiFi signal display Aircraft power capacity indication Connection Aerobatics Taking photo Operation mode switch Calibration Return Recording video Set up Right joystick Mode1 Mode2 Connection Left joystick Firmware Version About Folder Lock/Unlock Setting...
-
Page 17: Programming
Programming Computer Programming: Connect the radio transmitter to the computer with a USB cable, find the corresponding port on the computer, and then switch the radio transmitter to the programming mode. Mobile phone programming: Search and connect with WIFI, and enter into the APP programming interface. -
Page 18: Extension Function
Expansion modules LiteBee Wing supports expansion modules like LED, buzzer etc. for programming. Top installation diagram for expansion module Bottom installation diagram for expansion module... - Page 19 Case1 -LED module 1.Start the program by click (take 1 sec) 2.Calibrate the aircraft by 5 secs 3.Take off after finished calibration(take 3 secs) 4.Turn on the first LED to White(last 2 secs) 5.Turn on all LED to Red(last 2 secs) 6.Turn on all LED to Green(last 2 secs) 7.Turn on all LED to Blue(last 2 secs) 8.Turn off all LED, 2 secs later, land automatically...
- Page 20 Case 2 -Buzzer module Musical Note: a symbol used to record processing of different length notes. Most common notes: Whole note, half note, quarter note, one eighth note, and one sixteenth note. Musical note consists of three components: Head, Stem and Tail. It is also divided by beats, such as: Whole Note is four beats;...
- Page 21 Case 3 -Buzzer module For more programming guide, pls. feel free to contact us by sales@makerfire.com or visit www.litebee.com.
-
Page 22: Faq
Q3:LiteBee Go programming can not recognize the radio transmitter? A3:Install the radio transmitter driver in LiteBee Go for the first-time use, after finishing the installation, select the corresponding device ports. Q4: How to switch the radio transmitter from Mode2 to Mode1? A4:Connect the radio transmitter to the computer via the USB cable, and download Mode1 program on Litebee Go software. -
Page 23: Disclaimer
Disclaimer Litebee Wing is a multi-rotor drone. Children over 8 years are recommended. Children under the age of 8 are required to be accompanied by adults. Please be careful when operating the product in the presence of children. The product provides an easy flight experience when the power supply is working properly and the components are not damaged.
Need help?
Do you have a question about the Wing EDU and is the answer not in the manual?
Questions and answers