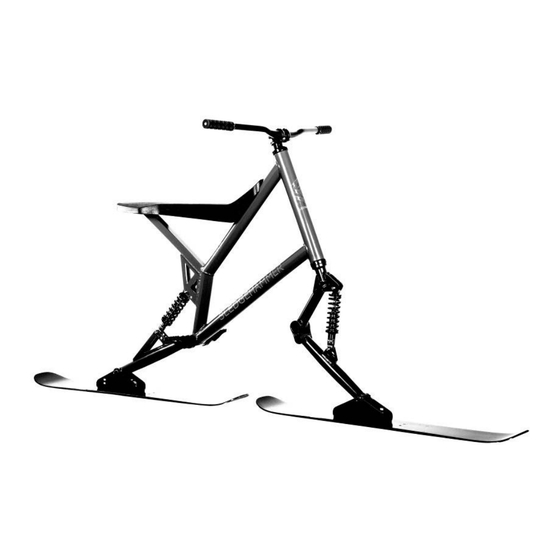
Summary of Contents for SLEDGEHAMMER Freerider 5.3
- Page 1 Thanks for buying our product! Instructions for Use and Assembly for model Sledgehammer Freerider 5.3 Please read the instructions for proper assembly and use.
-
Page 2: Scope Of Delivery
If anything in this document remains unclear please contact us via email, phone or by using the contact form on the website www.sledgehammer.at or contact your local dealer. Please read this document carefully and you will get the best performance of our product. - Page 3 B) Assembling your Skibike After unpacking all parts please follow the instructions in the sequence described. This will make the assembly easier. 1) Mounting the fork You will need the parts 15-21 and the stem according to the parts description on page 1 and the front fork.
- Page 4 2) Mounting the shock absorbers Therefore you need the two shock absorbers. Please note that they have different coil springs! The spring rate is printed on the coil. For front 350 LBS and for rear 650 LBS. Also you need these parts: (A) 4 bolts 34mm with screw M6, (C) 2 adapter plates alloy (B) 1 bolt 24mm with screw M6,...
- Page 5 The low setup is recommended for beginners. It makes the foot pegs lower by 50mm, leading to a safer ride feeling. Additionally the Skibike becomes more agile and easier to ride stand up. B) Mounting the rear shock for the higher Skibike position For the higher position you will need to assemble the shock adapter to prolong the rear shock.
- Page 6 Adapter mounted and an alternative position See the short bolt (B) and the sleeves (D) But for the higher position you will also need to adjust the ski leveling. Due that the whole Skibike gets into a more upright position you will have to adjust the ski retention to ensure that the skis are flat on the ground again.
- Page 7 4) Mounting the handle bar Take out all bolts of the stem with the packed by Allen key. See fig 3. Now put the handle bar in place and close the stem. Tighten the four bolts using a cross pattern so that the gap in between the cap and the stem remains parallel and even.
- Page 8 5. Mounting the skis 5.1. Mounting the brackets on the skis Put the rubber plate (12) on the skis and the brackets (11) one ski and the Edge Power Plate (14) on the other ski. Screw in two of the 6 flat head bolts (10) to each ski (the two rear bolts of the front ski and the two front bolts of the rear ski.
- Page 9 wrong right As soon as their position is perfect screw in the outer bolts and tighten them with a force of 3 Nm (27 LBF) - the Skibike still standing on the skis. This is equal the force of 3kg or 6 pounds provided on an Allen key of 10 cm (4 inch) length.
- Page 10 5.2 Mounting the Ski brackets The brackets are now mounted on the skis. We show the next step without the skis for better visibility. First please assemble the First you will need to assemble the rubber cushion. For this step you need some parts of (9): (E) 2 pcs.
- Page 11 5.3. Mounting the rear bracket for the higher Skibike position You will need to assemble your rear ski differently. The front ski will be assembled as shown under 5.2. For the rear ski you will need to slide in the T-Plates (13) to the rear square holes and in between the rubber cushion (8) and the T-plates you need to put two washers (G).
- Page 12 Now close the quick release system by pushing the lever towards the bracket facing the rear - see the left picture above. When pushing the lever, you should feel that the force is fairly tight and snug. If not, reopen the lever and tighten the nut on the opposite side (see right picture below) on the axle and try again.
- Page 13 Be aware that the foot pegs will have the same angle position the brackets have when you tighten the bolts. For a horizontal position you can lay some ruler on top of the brackets and align it with the down tube as shown in the picture below. Now tighten the bolts. Assemble the pegs fully again.
-
Page 14: Before Every Ride
E) Instructions for use The Sledgehammer is built for everyone from 14 to 99 years old taller than 4' 9" and a weight limit of 280 lb. We explicitly want to mention that this Skibike is NOT suitable for kids and children younger... - Page 15 When riding slow, steer the Sledgehammer the same way you do when riding a bicycle. The faster you are going the more you should keep the handlebar straight and steer by shifting your weight to the side you want to go.
-
Page 16: Guarantee, Warranty
Please make sure that you are able to stop before riding in steep terrain or on public slopes. I) Guarantee / Warranty Sledgehammer will replace broken components (spare parts) under our 2 year manufacturer’s warranty as long as there is correct use.

Need help?
Do you have a question about the Freerider 5.3 and is the answer not in the manual?
Questions and answers