Table of Contents
Advertisement
Quick Links
EN_Lite NX Manual
Notice
Brief
Included in the Box
Specifications
Processor
I/O
Power Supply
Mechanical
Environmental
Certification
Install Dimension
Service and Support
Support
Warranties
Interfaces
Interfaces
Front panel
Back Panel
Expansion
Expansion device installation
Fixed Plate installation
General Setting
General Setting
System
System Image and Flashing Tool
Power on
MiiVii Setting
Power Mode Setting
IO
GPIO
UART
Use GPS To Give Time To The Device
CAN
Expansion Setting
SSD Setting
Wireless Setting
WiFi Setting
4G Setting
Demo and application
Appendix
Exception Handling
Images Burning
1.Function Introduction
2.Prepare Software And Hardware
3. The Operation
Notice
RS485 Pin Assignment
RS232 Pin Assignment
UART Port Device Node
Debug Port
GPS Support Model
Connection Mode
Check Whether The Timing Was Successful
Troubleshooting
1. Check If The GPS Has Output
2. Check The OUTPUT of THE GPS PPS Signal
3. Identify Methods
2.1. Burn The Host Ready
2.2. Prepare Miivii Burn Tools And Miivii Device Images
2.3. Prepare The Hardware
3.1 Hardware Connection
3.2 Use of Software
3.2.1. Images Burn
3.2.2. Images Clone
Attached 1. Kernel and DTB burn
Attached 2. Self-test For Burning Problems
Advertisement
Table of Contents

Summary of Contents for MiiVii Lite NX
- Page 1 Exception Handling Images Burning 1.Function Introduction 2.Prepare Software And Hardware 2.1. Burn The Host Ready 2.2. Prepare Miivii Burn Tools And Miivii Device Images 2.3. Prepare The Hardware 3. The Operation 3.1 Hardware Connection 3.2 Use of Software 3.2.1. Images Burn 3.2.2.
-
Page 2: Included In The Box
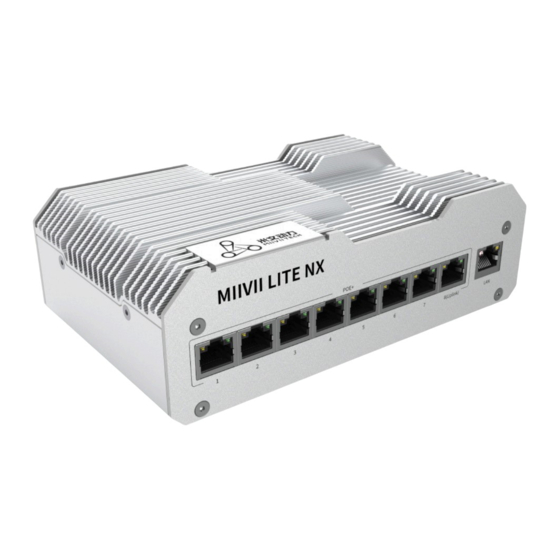
Lite NX working in wide temperature range. With shock resistance and TVS, ESD protection, Lite NX is suitable for industrial usage. In addition, Lite NX is equipped with multiple PoE+ port which make it easier for field deployment. -
Page 3: Power Supply
Interface Quantity Note Recovery Button Function Key Network/Camera Ethernet 1×Gigabit Port PoE+ IEEE 802.3at protocol 8×PoE+ 100M Port single port maximum output 30W Video output HDMI 1×HDMI 2.0 TYPE A 5V 1A 1×USB 3.0 TYPE A USB 5V, 1A 1×USB 2.0 TYPE A Lower USB as a Flashing Port UART 1xRS232... - Page 4 Certification Status CCC, CE, FCC, RoHS, SRRC Processing [ ] 1 According to GB/T 2423-2008 [ ] 2 According to GB/T 2423.10-2008 [ ] 3 According to IEC 61000-4-2Level 3 [ ] 4 According to IEC 61000-4-5Level 3 5 According to GB/T3482-2008 Install Dimension Dimensions and mounting hole position as below: Up view(Unit:mm)
-
Page 5: Service And Support
Left view(Unit:mm) Mounting Hole(Unit:mm) Service and Support... -
Page 6: Front Panel
Support MiiVii is glad to help you with any questions you may have about our product, or about the use of the technology for your application. The fastest way is sending us an email: helpdesk@miivii.com. Or you could visit our developer forum: http://forum.miivii.com... -
Page 7: Back Panel
Back Panel Figure Lite NX Back view Interface Name Description PWR1 Power interface 1 3Pin Terminal block52V DC IN PWR2 Power interface 2 Round socket52V DC IN PWR Led Carrier board status indicator White light: After power on, the power is... -
Page 8: Rs232 Pin Assignment
Figure RS485 Pin Assignment RS232 Pin Assignment Port Name Pin Signal Description RS485_1 RS_485A RS485_1 A RS_485B RS485_1 B Figure RS232 Pin Assignment Port Name Pin Signal Description RS232_1 UART0_RXD RS232_1 recieve UART0_TXD RS232_1 transmit UART Port Device Node Relation of UART Port and device node as follow: UART Port Name Device Node RS232_1... - Page 9 The Debug Port(RS232) of Lite NX located on the PCBA, please refer to the folowing figure. PIN 8 RX, PIN 10 TX Figure Debug Port Figure Debug Port Signal Expansion Expansion device installation Lite NX provides M.2 M Key, mini PCIe port for storage and communication expansion...
- Page 10 Figure Lite NX Screw Position1 Figure Lite NX Screw Position2...
- Page 11 Figure Lite NX Screw Position3...
- Page 12 Figure Remove Bottom Cover Expansion port position as follow:...
- Page 13 Figure Expansion Port Position Install expansion device based on demand. Please note that if you need 4G module, insert nano SIM card into nano SIM socket before install 4G module. Figure Moudle Please install WiFi/4G antenna to ensure signal stability.
- Page 14 Figure Antenna Installation1 Figure Antenna Installation2 Please refer to the first step, and restore Lite NX after install expansion device. Fixed Plate installation Please install fixed plate first if you need to securing Lite NX on another system. Figure Fixed Plate 1...
-
Page 15: General Setting
Connect the included AC adapter to power socket. Plug AC adapter into an appropriately rated electrical outlet. Figure Startup Power off: Use the following command in terminal. For MiiVii device with entity PWR button, you can also press and hold PWR button. sudo poweroff Reset: Use the following command in terminal. - Page 16 MiiVii Setting introduction. Figure Version Info You can set up GMSL camera here. MiiVii Device Apex has two groups of GMSL camera GMSL_A and GMSL_B, while MiiVii Device S2Pro has only one group GMSL_A.
-
Page 17: Power Mode Setting
MiiVii device has several power modes. You can set up power mode through the green NVIDIA icon on the upper right corner. Figure Power mode Icon For MiiVii device equipped with NVIDIA Jetson Xavier NX, the following table shows details of each power mode . The default mode is 3 MODE 10W 2CORE. -
Page 18: Connection Mode
#config UART $ sudo stty -F /dev/<ttyTHS1> speed 115200 cs8 -parenb -cstopb -echo #send data through UART $ sudo echo “miivii tty debug” > /dev/<ttyTHS1> #receive data from UART $ sudo cat /dev/<ttyTHS1> Use GPS To Give Time To The Device... -
Page 19: Troubleshooting
GPS for testing If the output of "1"&"2" is normal, check whether the MiiVii Setting configuration is in GPS mode. If not, change the mode and restart it After the above operation, GPS timing is still unsuccessful, enter the command... -
Page 20: Expansion Setting
The terminal has hexadecimal data output, such as: 0000400 02fe 9f40 490e 562d 1647 004e 0000 0000 If there is no data output, it may be that there is no matching brush tool and mirror brush. It is recommended to check the mirror and the brush tool to re-brush If there is data output, it may be a hardware problem,it is recommended to contact after-sales maintenance treatment Please check cansend.c and candump.c from... - Page 21 /dev/nvme0n1 Figure SSD UUID Setting method of automatic mounting SSD Create a systemd service in the /etc/systemd/system path to automatically mount the SSD when booting, such as: miivii_mount_ssd.service #Create miivii_mount_ssd.service vim miivii_mount_ssd.service [Unit] Description=MIIVII specific script After=udev.service [Service] ExecStart=/etc/systemd/miivii_mount_ssd.sh...
- Page 22 WiFi Setting MiiVii S2, S2Pro and EVO TX2 EVO TX2 GMSL2 has WiFi function.While Apex Xavier MiiVii EVO Xavier, Lite NX and Lite Nano provides WiFi function via a expansion module. Please refer to the information in [Expansion] to intall WiFi module. Click the network icon in upper-right corner of the desktop.
- Page 23 4G Setting 4G module is not included in MiiVii device package. Please refer to the information in [Expansion] to intall 4G module. Instructions for 4G module configuration are shown as below, using QUECTEL EM05 as an example. EM05 4G driver is included in MiiVii system. This SIM card could be detected automatically.
- Page 24 Change country to 'China'. Then choose network provider. If your network provider is not included in the list, then enter it manually. Choose your Plan China Mobile choose 'Internet'China Unicom and China Telecom choose default APN settings: China Mobile: cmnet; China Unicom: 3gnet; China Telecom: ctnet...
- Page 25 Click the network icon in upper-right corner of the desktop. Then connect to your network. If you need auto connection, please edit Network connections: Select 'General', then check 'Automatically connect to this network when it is available' Reset MiiVii device, you can automatically connect to 4G network...
-
Page 26: Exception Handling
Miivii burning tool, suitable for Miivii series products.The tool has two main functions: burn images and clone images. You can burn the official image of Miivii power for Miivii devices using an X86 architecture PC as the burn host. After developing a Miivii device for some time, you can save your progress by cloning an existing device images and burning it to other Miiivii devices. - Page 27 2.1. Burn The Host Ready It is necessary to connect the writing host to the Miivii device to burn the images. The recommended figuration of the write host is as follows: CPU uses Intel core series processors with X86 architecture...
- Page 28 In the device model on the right, select the device you want to burn and the Images version. Click the "Burn file" button to select the specific image for burn Click the "burn" button to enter the burn process: Images burning usually takes more than 15 minutes to complete. Please be patient:...
- Page 29 3.2.2. Images Clone Enter the FORCE_Recovery mode of the Miivii device to be cloned according to method 3.1, and open the burn tool Click [Enter upper computer password] button, enter the current burning host boot password Click the "Clone file" button to modify the path and name of the clone file saved in the write host : Note: The file storage path cannot contain Chinese characters or special characters Click the "clone"...
- Page 30 Note: if you encounter problems in the cloning process, please contact Miivii power for help: helpdesk@miivii.com Attached 1. Kernel and DTB burn Miivii device burn tool can burn system kernel and DTB separately, click [more] in the upper right corner to choose.
- Page 31 Note: before you do this in meters, power after confirmation: helpdesk@miivii.com Attached 2. Self-test For Burning Problems If you encounter burning problem, please first conduct self-test according to the following items: Check whether the upper computer boot password is entered in the upper left corner of the burn tool...
Need help?
Do you have a question about the Lite NX and is the answer not in the manual?
Questions and answers