Table of Contents
Advertisement
Quick Links
Advertisement
Table of Contents

Summary of Contents for KILN care Hobbyfuser 3
- Page 1 Instructions...
- Page 2 KCR2 instructions. Trouble shooting. Contact us. Your Notes. CE Certificate. Safety notices Your Hobbyfuser 3 is designed and built to meet all European Directives and British Standards. In addition, your kiln is designed specifically for Sweden. Page Hobbyfuser 3 Manual...
-
Page 3: Hot Surfaces
However, as with all kilns, there are certain measures that you must take to achieve optimum safety. Electricity The Hobbyfuser 3 meets all Electrical Safety Directives, including a lid safety switch. However, the kilns are electric and as such certain measures should be taken. -
Page 4: Optional Stand
The floor or bench must be capable of carrying the weight of the kiln. The Hobbyfuser 3 does have air clearance under it and so there should be no need to protect the bench top, however, if your firings are to be prolonged then it is advisable to sit the kiln on a heat resistant material. -
Page 5: Electrical Connection
Once the kiln is in its final position the locking nuts can be fully tightened. Electrical connection The Hobbyfuser 3 comes fitted with a Euro Schuko plug top fitted. It is designed to work from standard 230v socket outlets. It is not advisable to use the kiln from an extension lead. -
Page 6: Initial Firing
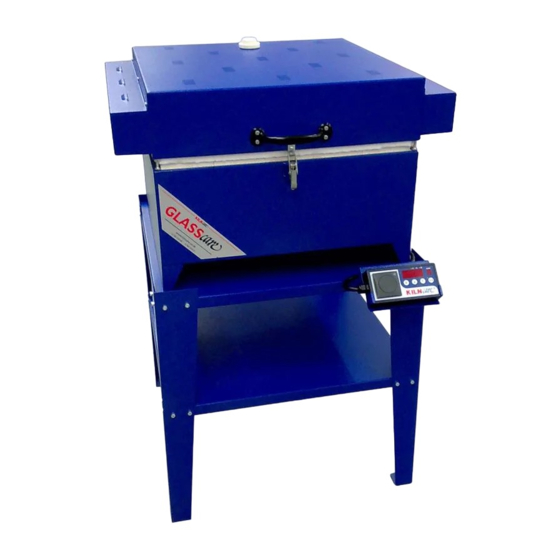
Once fitted close the clamp to ensure sound connection. The small blue stand supplied in your Hobbyfuser 3 is for the KCR2. It can be used to sit the controller at a convenient angle on a bench top or to mount the controller to an adjacent wall using the fixing holes in the rear of the stand. - Page 7 The glass will need a separator between itself and the batt for the same reasons as it need to be separated from the brick. The kiln bricks do not need to be painted with battwash, just protect the area Hobbyfuser 3 Manual Page 7...
- Page 8 When shutting the kiln lid, gentle operation will also prevent accidents. The lid insulation of your Hobbyfuser 3 is press cut and then machined together under pressure to ensure that the insulation is fitted to its maximum strength and to ensure many years of service. This process does mean that extra care is needed to keep the brick tops clear of objects when closing the lid as repairs to the lid seal are difficult and may result in the lid needing to be re-lined.
- Page 9 Brick 9 in the Hobbyfuser 3 has the thermocouple passing through it. To remove the thermocouple, firstly remove the rear box cover, then undo the thermocouple retention bracket and slide out the thermocouple.
-
Page 10: Element Replacement
When it is determined which element has blown, (for this a circuit tester may be required). There are three elements in the Hobbyfuser 3, each element consists of a pair of tubes. Disconnect both ends of the elements from their porcelain connector blocks. - Page 11 “50” degrees per hour. Whilst a fast firing would be set to reach temperature as quickly as possible so the rate required would be “FULL”. “FULL” is above “1000” on the display. Hobbyfuser 3 Manual Page 11...
- Page 12 As the kiln fires the main display will show the kiln temperature and the segment display will show the segment number. If the kiln is climbing, the upward facing ramp triangle will illuminate, the downward facing triangle will Page Hobbyfuser 3 Manual...
- Page 13 Press “start” Use ”up” or “down” keys to select a delay time of “14.00” hours. Main display will show “14.00” with a flashing dot as the time counts down. After 14 hours the kiln will start. For more detailed KCR2 instructions consult the KCR2 manual supplied separately. Hobbyfuser 3 Manual Page 13...
- Page 14 Page Hobbyfuser 3 Manual...
- Page 15 A crackling noise can be heard when the kiln is firing. This will be a loose connection and needs to be fixed immediately by a competent person. Continued use will almost result in the connection failing. Hobbyfuser 3 Manual Page 15...
- Page 16 Contact us at Kilncare ltd, The Kiln Works, 907 Leek New Road, Baddeley Green, Stoke on Trent, Staffordshire, ST2 7HQ, Tel 01782 535915, Fax 01782 535338 E-mail sales@kilncare.co.uk, Web www.kilncare.co.uk Page Hobbyfuser 3 Manual...
- Page 17 Notes ————————————————————————————— ————————————————————————————— ————————————————————————————— ————————————————————————————— ————————————————————————————— ————————————————————————————— ————————————————————————————— ————————————————————————————— ————————————————————————————— ————————————————————————————— ————————————————————————————— Hobbyfuser 3 Manual Page 17...
- Page 18 ————————————————————————————— ————————————————————————————— ————————————————————————————— ————————————————————————————— ————————————————————————————— ————————————————————————————— ————————————————————————————— ————————————————————————————— ————————————————————————————— ————————————————————————————— ————————————————————————————— ————————————————————————————— Page Hobbyfuser 3 Manual...
-
Page 19: European Declaration Of Conformity
We do not give any assurance that the equipment is suitable for any purpose other than that listed below and must be operated and maintained in accordance with our operating instructions. Products. Hobbyfuser 3 kiln. Directives. LVD - Low Voltage Directive 2006/95/EC. EMC - Electromagnetic Compatibility Directive 2004/108/EC#... - Page 20 Hobbyfuser 3 Instruction Manual 2019...

Need help?
Do you have a question about the Hobbyfuser 3 and is the answer not in the manual?
Questions and answers