Advertisement
Installation & Operation Instructions
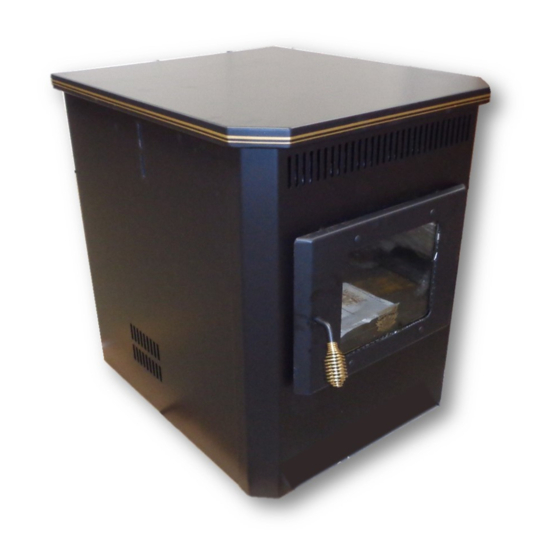
Models 2100 / 4100 / 7100
Read thoroughly before starting installation.
Save this manual for future reference.
SAFETY NOTICE
If this stove is not properly installed, a house fire may result. For
safety follow the installation directions.
Contact your local building or fire officials about restrictions and
installation requirements in your area.
Retain this information for future reference.
MODEL #________ SERIAL #_______ MFG. DATE __________
Working With Nature to Warm Your World
MANUFACTURED BY NESCO, INC. U.S.A.
Natural Energy Systems Company
Cookeville, TN
1
Advertisement

Subscribe to Our Youtube Channel
Summary of Contents for AmaizablazE 2100
- Page 1 Installation & Operation Instructions Models 2100 / 4100 / 7100 Read thoroughly before starting installation. Save this manual for future reference. SAFETY NOTICE If this stove is not properly installed, a house fire may result. For safety follow the installation directions.
-
Page 2: Table Of Contents
General Freestanding Installation/Direct Venting Instructions ..3 Mobile Home Installation .............. 7 General Operation Instructions ............8 Routine Maintenance Instructions ..........12 Model 2100 Unit Preparation ..............13 Replacement Parts List ............14 Unit Specifications ............. 15 Unit Bimonthly Maintenance ..........16 Electrical Wiring Diagram .......... -
Page 3: General Safety Requirements
GENERAL SAFETY REQUIREMENTS • SAFETY NOTICE: If this stove is not properly installed, a house fire may result. For your safety, follow the installation directions. Contact your local building or fire officials about restrictions and installation requirements in your area. •... -
Page 4: General Freestanding Installation/Direct Venting Instructions
General Freestanding Installation/ Direct Horizontal Venting Instructions NOTE: For direct horizontal venting, use only manufacturer’s zero-clearance venting system. SAFETY: Carefully read and follow all safety requirements previ- ously set forth under the SAFETY REQUIREMENTS before continuing with the following information. CAUTION: When cutting through walls make sure you do not interfere with wiring or pipes. - Page 5 2. Temporarily position the stove on the floor protector in its final location. Be sure to adhere to minimum clearance to combustibles. For minimum clearance requirements, and floor protection requirements, for Model 2100 see page 15, for Model 4100 see page 19, and for Model 7100 see page 25.
- Page 6 General Freestanding Installation/ Direct Horizontal Venting Instructions Continued C. VENT KIT INSTALLATION PROCEDURES Note the placement of the parts in order to facilitate reassembling. 1. From outside the building, caulk around the hole to ensure a durable seal to prevent air and moisture from passing through. 2.
- Page 7 General Freestanding Installation/ Direct Horizontal Venting Instructions Continued 4. Now back inside, apply a small bead of silicone around the outside of the stove’s 3 inch exhaust pipe; apply bead about 1/4 inch or less from end of pipe. (If this is a corner installation, remove elbow temporarily installed in Section B Step 4.) Slide the flex pipe connector over the...
-
Page 8: Mobile Home Installation
(One in each room air blower compartment.) Model 2100 and 7100 A. The stove must be anchored to the floor of the home. This may be accomplished by using the 11/32” holes located at the botom of the stove. -
Page 9: General Operation Instructions
General Operating Instructions NOTE: Stove is designed to burn clean - pieces of stalk or cob can block auger and reduce feed rate of corn. Too much dust can cause blockage at feed tube opening over burner box. A. CONTROL DESCRIPTIONS AND FUNCTIONS POWER SWITCH •... - Page 10 General Operating Instructions Continued B. NEW INSTALLATION/FIRST TIME START UP 1. Fill hopper with clean shelled corn. NOTE: Stove is designed to burn clean corn only - pieces of stalk or cob can block auger and reduce feed rate of corn. 2.
- Page 11 General Operating Instructions Continued 2. Fill burner box half full with easy-light solid fire starter blocks with starter log pieces. (Can be purchased at grocery stores, or see coupon in samples supplied with stove.) NOTE: More starter may be required on colder days to preheat the intake air and warm the stove body to operating temperature.
- Page 12 General Operating Instructions Continued F. REMOVING THE CLINKER During the combustion of corn, what is known as a clinker will form in the bottom of the burner box. A clinker is best described as a solid chunk of fused ash, conforming to the shape of the bottom of the burner box.
-
Page 13: Routine Maintenance Instructions
Routine Maintenance Instructions A. GLASS DOOR CLEANING Although the stove is equipped with a glass wash system, and burns clean, the glass will cloud up over time. For best results when hot, use dry paper towel to clean glass. (Using liquid cleaner or a wet rag when the glass is hot will cause the ash to sear to the glass.) For best results when cold, use a glass cleaner. - Page 14 Model 2100 Unpacking/Unit Preparation Check stove for possible shipping damage. If damage is found, notify the dealer from whom the stove was purchased. 1. Remove all protective materials which have been applied to the stove for shipment. 2. Open hopper (slide top forward). Remove all items from hopper.
- Page 15 Model 2100 Replacement Parts List...
- Page 16 Model 2100 Specifications A = 20.5 INCHES B = 4.25 INCHES C = 23.0 INCHES D = 24.0 INCHES E. = 8.0 INCHES EXHAUST - 3 INCHES WEIGHT - 150 POUNDS MINIMUM CLEARANCE TO COMBUSTIBLES Sides 5 inches Back 2 inches...
- Page 17 Model 2100 Bimonthly Maintenance NOTE: The frequency for the following cleaning will depend on the usage. CLEANING THE HEAT CHAMBER AND EXHAUST PIPE 1. Shut down the stove. Wait until stove completely cools off. 2. Remove burner box and ash pan.
- Page 18 Model 2100 Electrical Wiring Diagram...
- Page 19 Model 4100 Unpacking/Unit Preparation Check stove for possible shipping damage. If any damage is found, notify the dealer from whom the stove was purchased. Open door, remove brass knob, then assemble to hopper lid. Remove clinker tool from hopper. Use the hole on top left side of stove to store clinker tool when not in use.
- Page 20 Model 4100 Specifications Continued MODEL 4100 MINIMUM CLEARANCES TO COMBUSTIBLES Sides 5 inches Back 2 inches Front 16 inches Above 12 inches Floor Protection Requirements The floor protector should be 40 x 48 inches minimum and must be 3/8 inch minimum thickness non-combustible material and has been listed to UL standards.
- Page 21 Model 4100 Fireplace Installation Continued ATTACHING A FIREPLACE KIT NOTE: Before attaching the upper trim panel to the stove, measure to be sure that the trim panel will cover the opening of the fireplace. If the trim panel does not cover the entire opening, a panel of greater height or width is available.
- Page 22 Model 4100 Replacement Parts List...
- Page 23 Model 4100 Bimonthly Maintenance NOTE: The frequency for the following cleaning will depend on the usage. HEAT EXCHANGER/EXHAUST CLEANING 1. Shut down the stove. Wait until stove completely cools off. 2. Open door, remove burner box. 3. Remove clean-out cover plate. 4.
- Page 24 Model 4100 Electrical Wiring Diagram...
- Page 25 Model 7100 Unpacking/Unit Preparation Check stove for possible shipping damage. If damage is found, notify the dealer from whom the stove was purchased. 1. Remove all protective materials which have been applied to the stove for shipment. 2. Open hopper. Remove the clinker tool and all other items from the hopper. 3.
- Page 26 Model 7100 Unit Specifications A = 29 1/4 inches B = 37 1/2 inches C = 29 1/8 inches D = 6.25 inches E = 20 inches F = N/A G = 45 1/2 inches (optional) H = 32 3/8 inches I = 24 1/4 inches MINIMUM CLEARANCE TO COMBUSTIBLES...
- Page 27 Model 7100 Replacement Parts List º 5 º 5...
- Page 28 Model 7100 Bimonthly Maintenance NOTE: The frequency for the following cleaning will depend on the frequency of the usage of the stove and/or the amount of corn burned per month. As soot builds up, it will insulate the heat exchanger, causing it to be less efficient. It can also block the exhaust track, causing poor burn quality and possibly forcing exhaust into the corn hopper.
- Page 29 Model 7100 End of Season Maintenance EXHAUST TRACK/COLLECTOR BOX CLEANING NOTE: Perform bimonthly maintenance steps before proceeding to these steps. 1. Open secondary heat exchanger hood. 2. Using a 5/16” allen wrench or nut driver, remove the 3/8”-16 socket head bolt and washer holding secondary heat exchanger onto exhaust collector box.
- Page 30 Model 7100 Electrical Schematic...
- Page 31 Problems/Troubleshooting l l i e l l l l u l i t n i l t s i l l i l l i n i l d l i r i f l l a , y l t l i l i t .
- Page 32 Limited Warranty PLEASE READ CAREFULLY WARRANTY IS NOT TRANSFERABLE PRODUCTS NOT COVERED This warranty does not cover the following: Standard or optional gold, glass, gasket material, and will not cover damage and/or failure caused by abuse or improper use or improper installation of the product covered. (A) Period I For the period of the first one (1) year from the date of purchase, we will replace or repair, at our option, any part defective in materials or workmanship affecting...
-
Page 34: Model 2100
All required informa- tion must be completed. Last Name ___________________ First Name _______________ Address ________________________________________________ City ____________________ State ________ ZIP ____________ Phone (_____)____________ Model #: 2100 4100 7100 (Circle one) Style: Freestanding Insert...
Need help?
Do you have a question about the 2100 and is the answer not in the manual?
Questions and answers