
Summary of Contents for APOLLO3D SATURN 10
- Page 1 USER GUIDE APOLLO3D SATURN10/10Plus This guide only applicable to Apollo3D Saturn 3D printer...
- Page 2 Note: Each device must be tested before leaving factory. If there are some residues in extruder or some tiny scratches on the build tape, it is normal and won’t affect the printing quality. On the completion of this User Guide, thanks all Apollo3D engineers and the Apollo3D printer users for their unremitting efforts and sincere assistance.
- Page 3 FILAMENT REQUIREMENTS Do not abuse the filament. Please make sure you use the Apollo3D filament or the filament from the brands accepted by Apollo3D. FILAMENT STORAGE All polymers degrade with time. Do not unpack until filament is needed. Filament should be stored at clean and dry conditions.
-
Page 4: Table Of Contents
Content 1.Introduction .................................4 1.1 Accessories .............................5 1.2 Product Parameters ..........................5 1.3 Terms ................................5 1.4 Unpacking ...............................6 2.First Installation ..............................7 2.1 Leveling ..............................7 2.2 loading and Unloading filament ......................7 2.2.1 Loading Filament ........................7 2.2.2 Unloading filament ........................8 3.Operation ................................8 3.1 Filament ..............................8 3.1.1 Filament Compatibility ......................8 3.1.2 Print Setting ..........................9 3.2 Print Start-up ............................9... -
Page 5: Introduction
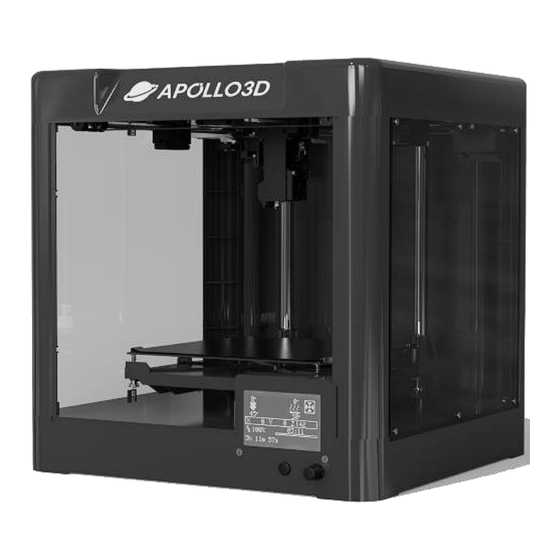
1.Introduction Saturn10 used Saturn10 plus push-bottom used touch screen 1.Touch screen 4.Extruder 7.Nozzle 10.Power switch 2. Reset 5.Build Plate 8.Extruder Fan 3. USB stick input 6.Leveling Nut 9.Power input... -
Page 6: Accessories
445 x 435 x 460mm/8.9kg Power Requirements 100-240V, 50-60Hz Connectivity USB Stick by Saturn 10 / SD card by Saturn 10 plus Print File Type Gcode 1.3 Terms The three dimensional amount of space that an object will use once Build Volume it is completed. -
Page 7: Unpacking
Scraper A tool that used for picking up your printed object. A tool that used for Conducting residual filament. you have to adjust Needle for Nozzle the extruder temperature up to 190℃. Allen Wrench and Sleeve A tool that used for seizing the nozzle’s metal cube. PTFE Tube A material that help the filament load or unload to your 3D printer. -
Page 8: First Installation
2.First Installation 2.1 Leveling To actually level the heat-bed is really simple, it just takes some practice to get it right. (1) Start by tightening down all the screws so you have more room to work with. (2) Home to Z minimum, then send it to Z 0 manually, the Z parameter is 0 in the touchscreen. (3) Use the touch screen to move X-axis and Y-axis for top left (point 20,20), bottom left (point 160,20), top right (point 20,160) and bottom right (point 160,160), one leveling one point. -
Page 9: Unloading Filament
Saturn is equipped with patent extruder, which is suitable for PLA, ABS, PETG, Nylon. While Saturn is adopted with open type filament system, we still suggest using Apollo3D filament. All the Apollo3D filament is tested professionally, and are possessed of optimized configuration files, which... -
Page 10: Print Setting
3.1.2 Print Setting Each type of filament needs different setting for best print effect. If using prepared models of Apollo3D, setting completed automatically under the circumstance of choosing correct extruder and filament. For better adhesiveness of print product, we suggest applying a thin layer of glue before printing. - Page 11 If necessary, remove build plate from the printer, then remove model from build plate with a scraper. Use water If glue stick is used when printing, and neither of above methods is effective, wash build plate with warm water to dissolve the glue after taking build plate from the printer.
-
Page 12: Introduction Of Touch Screen
4.Introduction of Touch Screen-Saturn10 Main Info screen: the information of your printing. Prepare: Move axis, Auto home, Set home offsets, Disable steppers, Preheat PLA, Preheat ABS. Control: Temperature, Motion, Filament, Restore failsafe, Print from SC: Prepare-1 Main: back to homepage. Move axis: Increase/ Reduce the distance from the x-axis/y-axis/z-axis to the origin. - Page 13 4.Introduction of Touch Screen-Saturn10P Ready Print homepage Preheat: set the extruder or heat-bed temperature. Move: move X-axis/Y-axis-Z-axis. Home: Printer zeroing. Printing: select what you want to print. Extrusion: load/ unload the filament. Leveling: leveling the heat-bed. Settings: Option. More: N.A. Preheat Add: Set temperature up.
- Page 14 Home All: x-axis/y-axis/z-axis to the origin. X: x-axis to the origin. Y: y-axis to the origin. Z: z-axis to the origin. Back: back to homepage. Leveling Setting FlieSys: select the storage type(SD/USB) WIFI: N.A. Fan: set the speed of fan. Continue: N.A.
- Page 15 Add: Increase fan speed. Dec: Reduce fan speed. Back: back to homepage. language Set different language. ChooseFile Touch Select your 3D model to print. Printing/Operation/Pause...
-
Page 16: Slicer Software Suggestion
Beginners, Advanced Browser, Windows, 3DPrinterOS Freemium Users Beginner, Advanced SelfCAD Free trial, $9.99/month Browser Users Tinkerine Suite Beginners Free Windows, Mac Apollo3D printer could apply all of the slicer software, there is a suggestion of introduction for Cura slicer software. -
Page 17: Installation And Setting
5.1 Installation and Setting (1) Software Acquisition: To get the installation package from our linked. (2) Software Installation and start-up: Settings—Printer—Add Printer—Custom—Insert your 3D printer name, such as Saturn. Printer and Extruder1 setting parameters as the picture below. - Page 19 Settings—Printer—Mange Printers. Profiles—Import—“Saturn10.curaprofile” Saturn10.curaprofile :To get the file from our linked.
-
Page 20: Save To File
5.2 Save to File File—Open Files: select your 3D model, STL Type. All free 3D models download from online. To help you find the perfect fit, here’s a list of the top 3D printing 3D models. 3D Printable Site Type Price Models ★★★★★... - Page 21 Rotate—Press red line, make the bottom parallel to platform. Save to file, and insert your USB stick or SD card to your 3D printer.
-
Page 22: Maintenance
6.Maintenance 6.1 Maintenance and Service Problem Cause Corrective Action Send the extruder to the home The device has lost track of position will recalibrate Saturn. Extruder head building extruder’s exact location and is Cancel your object, clear build off center. failing to build. -
Page 23: Daily Maintenance And Use Suggestion
6.3 Daily Maintenance and Use Suggestion 1. Please cover the top to prevent the device from falling into dust when not using the device. If the device has not been used for a long time, it is recommended to use the original packaging. 2. -
Page 24: Support And Service
7.Support and Service Apollo3D team is on standby and ready to help you with any challenges you may have with your Saturn. If the issues or questions are not covered in this User Guide, you can seek for solutions on our official website or contact us via e-mail.
Need help?
Do you have a question about the SATURN 10 and is the answer not in the manual?
Questions and answers