
Related Manuals for LIGHT OBJECT Falcon


Summary of Contents for LIGHT OBJECT Falcon
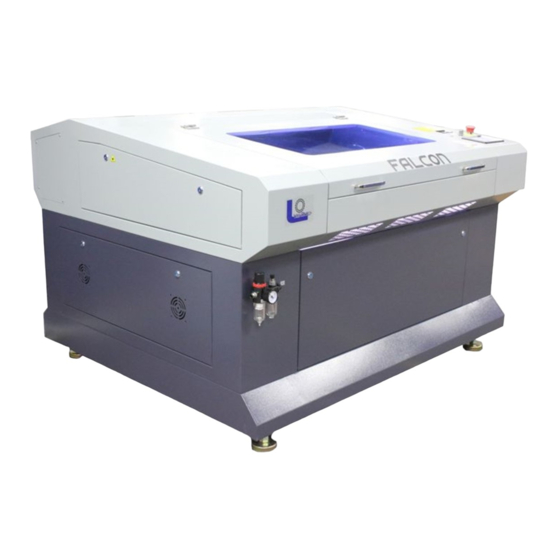
- Page 1 LASER MACHINE Operation Manual Model: Falcon,Legend,Barracuda,Sapphire Address: 21 Blue Sky Court, Sacramento CA 95828 Phone: (916) 383- 8166 Email: contactus@lightobject.com...
- Page 2 Read and understand the operation manual before using this machine. Failure to follow operating instructions could result in death or serious injury. P. 2 rev. 0.1...
-
Page 3: Table Of Contents
Contents CO₂ Laser Safety & Policies ......................4 Accessories ............................. 6 First Time Laser Setup ........................7 Installing Other Accessories ......................13 Connecting Laser Machine to Computer ..................15 Sending Files to Laser Machine ....................19 Control Panel Keypad ........................20 Laser Current Control ........................ -
Page 4: Co₂ Laser Safety & Policies
CO₂ Laser Safety & Policies WARNING: The safety precautions below are mandatory guidelines that must be followed. LightObject will not be held responsible for damages or injuries resulting from improper use of the laser machine. DO NOT operate the laser machine until you have been properly trained. DO NOT make contact with any exposed wires on the machine. - Page 5 Vinyl Fumes produced by above materials can cause irritation to eyes, skin and the respiratory tract. This material should not be exposed to elevated temperatures. Laser Safe Materials: Acrylic, Wood, Leather, Plastics (ABS, POM, Polyimide, PP, Styrene), Fabric, MDF, Cardboard, Paper, Foam, Fiberglass, rubber P.
-
Page 6: Accessories
Accessories Air Exhaust Fan Air Pump (optional) (optional) Air Exhaust Hose Exhaust Hose (6” dia.) Clamps Tubing for Water Laser Tube Chiller Air compressor Water Chiller regulator pressure (sold separately) gauge moisture filter Other accessories Spare tubing Ethernet Network LAN cable Sets of Keys USB cable Other tools for adjustment... -
Page 7: First Time Laser Setup
First Time Laser Setup The following components are required for operating the laser machine: Air Assist: to blow smoke away from the beam, preventing damage to the lens and preventing burning the material. Water Chiller: to circulate cool water into the laser tube to prevent the tube from overheating. The laser tube needs to be at a cool temperature of 15C - 25C or else the laser tube may overheat and potentially crack. - Page 8 Place the laser tube on the laser tube mounts. Connect the water tubing to the laser tube. P. 8 rev. 0.1...
- Page 9 Be sure to connect the silicone tubing on both sides of the laser tube. Connect water tubing between chiller and machine. Chiller’s outlet goes to machine’s inlet. Machine’s outlet goes to Chiller’s inlet. The correct direction of water flow is from high voltage side (red wire) of the laser tube to the low voltage side.
- Page 10 Check air bubble trapped in the laser tube. Squeeze the water tubing or tilt the laser tube carefully to get rid of the big bubble. Small bubbles are acceptable. IMPORTANT: the tube can overheat quickly if large bubbles are present when the laser is firing which can cause the tube to crack.
- Page 11 11) For screw type connection, clamp the wire under the screw. Put the rubber cap back on the tube on the high voltage side. For wire type connection, make a secure twist. Then shield it with a piece of silicone tubing to prevent arcing.
- Page 12 Twist For pin type connection: Wrap the wire around the tube’s metal pin. Fix the connection by proper soldering OR applying silicon glue. Make sure to shield it with a piece of silicone tubing to prevent arcing. 12) Hookup the power cord of the machine and power up the machine. Flip the main switch to ON position.
-
Page 13: Installing Other Accessories
Installing Other Accessories Exhaust Fan Installation Some materials such as leather or wood generate larger amounts of smoke than other materials. An exhaust is necessary to remove harmful fumes and smoke. The exhaust must be ducted to the outside and away from any area where animals or humans congregate. Connect the air exhaust hose by using the hose ring clamps provided, connecting the exhaust hose is done in the rear or underneath (varies based on machine). - Page 14 Air Pump / Air Compressor The Air Compressor (sold separately) are used to blow air through the laser head. This will blow away debris and smoke from the laser beam while allowing for a cleaner cut and protecting the lens. The air compressor on/off switch should be close by and preferably on the same circuit as the water chiller and exhaust fan to ensure it is in operation while running the laser machine.
-
Page 15: Connecting Laser Machine To Computer
Connecting Laser Machine to Computer The laser machine controller works with these software a) LaserCAD for Trocen, RDWorks for Ruida (for Windows only) b) LightBurn (for Mac and Windows) Set up with RDworks Download and install the software RDWorks from http://www.rd-acs.com/ Connect the USB cable. - Page 16 Follow the instruction from the screen, and it will guide you connecting the computer to the laser machine. P. 16 rev. 0.1...
- Page 17 If machine origin is not set correctly, the job file sent to the controller could be mirrored. NOTE: Please refer LightBurn instruction manual and tutorials in their site for configuration and usage. Some controllers need to be set to USB instead of Serial/USB. P.
- Page 18 If you are using LAN connection, input the same IP address set on the laser controller. NOTE: Please make sure LAN cable is connected between computer and laser machine. 4) Press Menu on the controller panel 5) Select “System config” 6) Select “Read”...
-
Page 19: Sending Files To Laser Machine
Sending Files to Laser Machine Once you have established the connection between the computer and the laser machine, job files can be transferred. To do this, click on the “Send” button(LightBurn) OR “Download” button (RDWorks) located on the right side of the laser software. Alternatively, save the file as UFile and put in a USB stick. -
Page 20: Control Panel Keypad
Control Panel Keypad Note: Since the laser cutter can be connected to different controllers (e.g. Ruida RDC644XG), please always refer to the controller manuals for details. Functions of typical keypad: Reset: Reset the whole system; Origin: Set the relative origin; Laser: Fire the Laser temporary;... -
Page 21: Laser Current Control
Laser Current Control It is important that the laser tube does not run with over current as it could damage the laser tube. Normally, we will limit the maximum current output by using software or laser power supply’s potentiometer before it is shipped. On the new model, there is a Manual/Auto switch. -
Page 22: Focusing The Lens
Focusing the Lens The lens should be adjusted and focused according to the thickness and type of material. To adjust the focus, adjust the height of the cutting head to accommodate the thickness of the material. Burn some dots on a piece of material, and try to find the smallest burn on the material by adjusting the height of the cutting head. -
Page 23: Engraving Adjustment
Engraving Adjustment: The timing between laser firing and motors movement can be finetuned. Draw a 20mm by 5mm rectangle, and set the scan gap to be 1mm. Enable the offset adjustment, then send the job to the laser machine. It will mark five lines on the material. Keep adjusting the “offset” value until the lines line up. -
Page 24: Troubleshooting
Mirrors: Mirrors should be cleaned at least every three months. The first mirror (next to the laser tube) usually does not get dirty easily. Laser Alignment WARNING: DO NOT obstruct the path of the laser, beam is invisible! NOTE: Due to transportation, the alignment may be off. To make sure that the laser is properly aligned, place an adhesive note around the alignment housing next to the mirror.
Need help?
Do you have a question about the Falcon and is the answer not in the manual?
Questions and answers