
Related Manuals for ROBOTIKA PROVAC-4


Summary of Contents for ROBOTIKA PROVAC-4
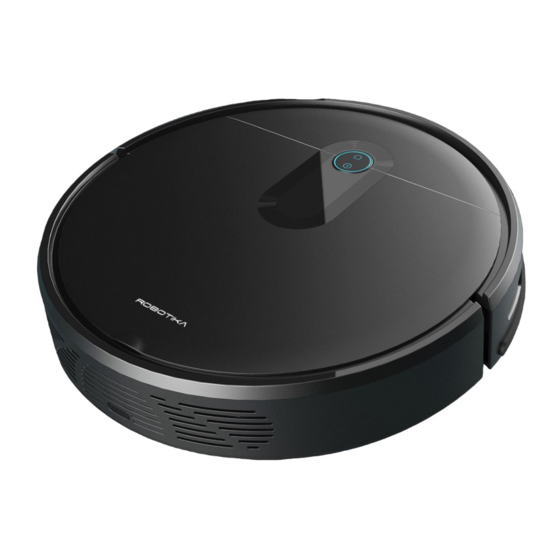
- Page 1 ROBOTIC VACUUM CLEANER PROVAC-4 INSTRUCTION MANUAL Please read this manual carefully before using, and keep it for future reference.
-
Page 3: Table Of Contents
CONTENTS General Safety Product Overview Product Operation First Time Setup Installing Mop for Mopping mode How to Use Cleaning Modes App / Wi-Fi Control Add app to Google Home Add app to Amazon Alexa Account Cleaning and Maintenance Specifications Customer Helpline Last Page... -
Page 4: General Safety
GENERAL SAFETY Read this manual thoroughly before you start using the vacuum. Store this manual, the completed warranty card, your receipt and the product packaging. To reduce the risk of injury: • Avoid rain, high temperature products or direct exposure to sun. IMPORTANT INFORMATION •... - Page 5 GENERAL SAFETY (CONT.) PLEASE READ BEFORE USE • This appliance is not intended for use by persons (including children) with reduced physical, sensory or mental capabilities, or lack of experience and knowledge, unless they have been given supervision or instruction concerning use of the appliance by a person responsible fortheir safety.
- Page 6 GENERAL SAFETY (CONT.) • Please beware that Dust could accumulate over time on the unit and cause it to generate heat and or deteriorate insulation, which in turn may result in an electrical fire. • Batteries from the remote control must be only removed by an adult, the adult must ensure to keep them out of reach of infants and children.
-
Page 7: Product Overview
PRODUCT OVERVIEW Water Tank Mopping Cloth Support Charging Dock HEPA Filter Adaptor 2x Mopping Cloth Controller Side brush Left x 2 Cleaning Brush Side brush Right x 2... - Page 8 PRODUCT OVERVIEW (CONT.) SENSOR AND STRUCTURE Mopping Cloth...
- Page 9 PRODUCT OVERVIEW (CONT.) CHARGING DOCK REMOTE CONTROL...
-
Page 10: Product Operation
PRODUCT OPERATION FIRST TIME SETUP 1. Decide on which area you want to place the charging base and the Robot Vacuum Cleaner you want cleaned in your residential home. - Place the charging base up against the wall and please ensure 0.5m spare is clear on the sides and the front has a space clearance of 1.5m. -
Page 11: Installing Mop For Mopping Mode
PRODUCT OPERATION (cont.) INSTALLING MOP FOR MOPPING MODE 1. Place the mopping cloth (included) onto the Mopping Support (plastic base with strapping material). (shown below) - NOTE: Make sure the cloth is placed as flat as possible. 2. Install the Mopping Cloth Support into the installation holes underneath the robot vacuum cleaner. - Page 12 PRODUCT OPERATION (cont.) 3. Take the water tank out of inside the robot vacuum, and fill with water. 4. Put the water tank back inside carefully. Slightly press when placing back inside so that it clicks back into place. 5. When you close the top cover of the robot vacuum, Tap the button on the main unit to enable mopping mode.
-
Page 13: How To Use
HOW TO USE POWER ON/OFF Press and hold the button for 3 seconds Follow the same process to turn off the robot vacuum. START VACUUM/PAUSE Now that the robot vacuum is powered on, Tap the button on the main unit or the remote control to start cleaning. CAUTIONS: - The robot vacuum cannot clean liquid - Make sure the robot vacuum is 100% charged before using. -
Page 14: Cleaning Modes
CLEANING MODES AUTO SWEEP When you power on the robot vacuum and action it to start cleaning it will use AUTO cleaning mode. Which is a ZIG ZAG cleaning method until its finished and then it will automatically go back to charge at the charging station. - Page 15 CLEANING MODES (cont.) SCHEDULED SWEEPING You can use the SMART LIFE app to set a time for sweeping. The robot vacuum will automatically start sweeping at selected time and then will return to charging dock to charge. (refer to page 22).
-
Page 16: App / Wi-Fi Control
APP / Wi-Fi Control Working with your mobile device, using your home Wi-Fi network router to communicate with the Robot Vacuum Cleaner and control it. CONTROLLING THE ROBOT VACUUM CLEANER REMOTELY IS VERY SIMPLE. YOU WILL NEED: - Android smartphone or tablet, or an Apple iPhone or iPad - Internet connection at your home - Wi-Fi network router set up at home. - Page 17 APP / Wi-Fi Control (Cont.) Before you log in, please press SIGN UP and register your account using (3 and 4) an email address. GET VERIFICATION CODE Once entered email address, tap and an email will be sent your email address with a verification code. Enter this code. Now you can enter a password for your account.
- Page 18 APP / Wi-Fi Control (Cont.) Tap the plus ( + ) or ADD DEVICE to add your device. (7). 2. Select the product which in this case is: CLEAN > ROBOT VACUUM. 3. Select Wi-Fi network then enter in the password to connect. Note: Make sure to select 2.4GHz - DO NOT select a 5GHz Wi-Fi network.
- Page 19 APP / Wi-Fi Control (Cont.) IMPORTANT Before you can control your Robot Vacuum remotely, you must reset the To do so please follow instructions: Wi-Fi module on the unit. Press and hold the buttons on the Robot Vacuum Unit “Connected” for 3 seconds and wait for a voice prompt.
- Page 20 APP / Wi-Fi Control (Cont.) Now that the device is being added, progress screen will now appear as to below: (11, 12, 13). Once completed, it will show your product is now added. click DONE. Click on the device name and you can now start navigating the controls of the app.
-
Page 21: Add App To Google Home
APP / Wi-Fi Control (Cont.) Edit Robot vacuum name Status Cleaning time (minutes) Battery charge remaining Start or Pausing Cleaning mode. Send to charging dock. Select Cleaning Mode Extra Options such as Scheduling More Options MORE OPTIONS - ADHESION - This is the Strength of the Vacuum Suction. - Page 22 APP / Wi-Fi Control (Cont.) SCHEDULE VACUUM WITH APP 1. Press SHEDULE on app dashboard. 2. Select (shown below) 4. Select time, how often (repeat) and notification if you want to receive a phone notification when schedule has started.
- Page 23 APP / Wi-Fi Control (Cont.) Add the SMART LIFE app to your Google Home app. Open your Google home app. (Before you link your app to your Google Home app, you will have to have a Google Home account already set up. 2.
-
Page 24: Cleaning And Maintenance
CLEANING & MAINTENANCE ROLLER SUCTION BRUSH Flip the robot vacuum upside down and press the buckle on the roller suction brush, and remove the brush cover. Then lift and take our the roller suction brush. 2. Use the cleaning brush that comes with the machine to remove the dust in the main brusher and the roller brush cavity, and then clean the objects entangled on the roller brush. - Page 25 CLEANING & MAINTENANCE (CONT.) SIDE BRUSH Flip the robot vacuum upside down and pull out the side brushes. 2. If anything is entangled on the side brush make sure to remote it 3. Reinstall the side brushes by alinging (L) with L marked side brush and (R) with R marked side brush.
- Page 26 CLEANING & MAINTENANCE (CONT.) DUST BOX AND FILTER Flip the robot vacuum upside down and lift the handle for the dust box and pull out the dust box. 2. Press the switch on the side of the dust box to open it.
- Page 27 CLEANING & MAINTENANCE (CONT.) CHANGING THE FILTERS After cleaning out the dust box, you can press the Side button to open the dust box and have access to the filters. 2. Remove the filter cover, then you can take out the PREFILTER and HEPA FILTER.
- Page 28 CLEANING & MAINTENANCE (CONT.) CLEAN SENSORS AND CHARGING CONTACTS Clean the Infrared anti-collision sensors monthly. Clean the Cliff sensors, this is for detecting stairs or steps.
- Page 29 CLEANING & MAINTENANCE (CONT.) Clean the charging contacts located underneath the robot vacuum...
-
Page 30: Specifications
SPECIFICATIONS Charging Input 19Vdc 0.6A Li-ion Cylindrical 14.4Vdc, 2600mAh Rechargeable Battery: Rating Power 42W Max. Dust Box 450ml Water Tank 520ml Working Time 65-90 mins Charging Time up to 5 hours Dimensions 315 (w) x 315 (d) x 76 (h) mm Net: 2.4 kg Weight Gross: 5 kg... - Page 31 THIS PAGE HAS BEEN LEFT BLANK ON PURPOSE.
- Page 32 CUSTOMER SUPPORT: info@ayonz.com DISTRIBUTED BY: Ayonz Pty Ltd...
Need help?
Do you have a question about the PROVAC-4 and is the answer not in the manual?
Questions and answers