Table of Contents
Advertisement
Quick Links
Advertisement
Table of Contents

Related Manuals for CHARITY MOBILE TCL FLIP PRO

Summary of Contents for CHARITY MOBILE TCL FLIP PRO
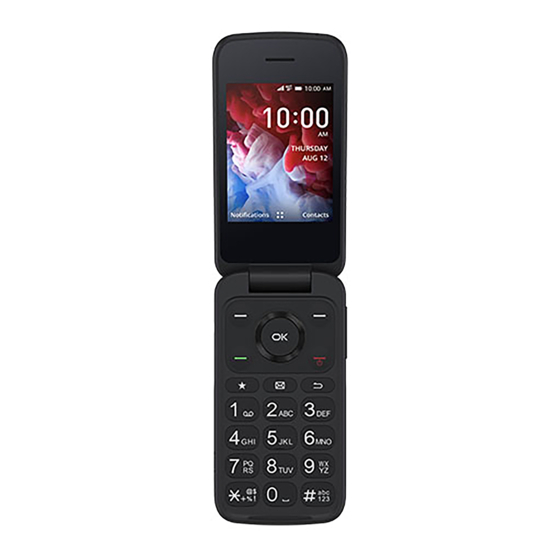
- Page 1 TCL FLIP PRO USER GUIDE...
-
Page 2: Table Of Contents
Note: This is a user manual for TCL FLIP Pro (TCL-4056S and TCL-4056SPP). Table of Contents Your Device ..................6 Overview ....................6 Setting up your phone ..............9 Power on your phone ..............13 Power off your phone ..............13 Home Screen .................. - Page 3 Messages ...................26 Sending a Text Message .............. 26 Sending a Multimedia Message ..........28 E-Mail ....................29 Setup E-Mail ..................29 Send E-Mail ..................29 Camera ....................32 Tools ....................34 Using Voice Assistant ..............34 Utilities ....................36 Gallery ....................37 Clock ...................... 38 Music ......................
- Page 4 Personalize Your Phone ..............48 Language ..................... 48 Change font size ................48 Date & Time ..................48 Sounds ....................49 Wallpaper, Brightness and Screen Timeout ....... 49 Security ....................51 10.1 Lock/Unlock your screen ............. 51 10.2 SIM Security ..................52 10.3 Anti-Theft .....................
- Page 5 This product meets applicable national SAR limits of 1.6 W/kg. The specific maximum SAR values can be found in the Radio Waves section. When carrying the product or using it while worn on your body, either use an approved accessory such as a holster or otherwise maintain a distance of 15 mm from the body www.sar-tick.com to ensure compliance with RF exposure...
- Page 6 This phone has been tested and rated for use with hearing aids for some of the wireless technologies that it uses. However, there may be some newer wireless technologies used in this phone that have not been tested yet for use with hearing aids. It is important to try the different features of this phone thoroughly and in different locations, using your hearing aid or cochlear implant, to determine if you hear any interfering noise.
-
Page 7: Your Device
Your Device Overview Headset Connector Camera Volume Key Charging Port External display Microphone... - Page 9 Left Soft Key • Press: to access Notifications Call Key • Press: Make a call • Press from idle screen to enter call log Favorite Contacts • Press: Access Favorite Contacts Internal display Navigation Key (up, down, left, right) • Menu selection moves up, down, right, and left •...
-
Page 10: Setting Up Your Phone
Messages • Press: Access Messages Symbols and Emojis • Press then choose a symbol. • Press the Center Soft Key to insert a symbol or emoji in message or email Text input • Press to add # in number. • Repeat press of to change text input method from ABC to Abc, 123 or Predictive text... - Page 11 1. Remove the back cover. With the device facing down, remove the back cover from the bottom left corner. Use your fingernail to carefully lift the cover away from the device body. Optional: Insert the microSD card or replace the SIM card. To insert SIM card or microSD card, push the SIM card or microSD card into the card slot with the gold-colored contacts facing down.
- Page 12 To remove the SIM card or microSD card, press down on the small plastic tab ( ), then slide out the card ( ). Do not use force or any sharp objects. 2. Insert the battery Insert the battery by aligning the gold contacts of the battery with the gold contact points of the device.
- Page 13 4. Charge your phone Charge your phone fully before turning it on and starting the set up process. Insert the small end of the charging cable into the charger port on the phone. Insert the other end of the cable into your wall charger and plug it into a wall outlet.
-
Page 14: Power On Your Phone
Power on your phone Press and hold the End/Power Key until the phone powers on. Setup your phone for the first time The first time you power on the phone, you will be guided through the following steps: • Select the phone’s language, then press the Right Soft Key go to the next step. -
Page 15: Home Screen
Home Screen Status bar • Status/Notification indicators Press the Center Soft Key to enter all app list Press the Left Soft Key Press the Right Soft Key to show Notifications to enter Contacts From the status bar, you can view both phone status (to the right side) and notification information (to the left side). -
Page 16: Phone Call
Phone call Making a Call Dial the desired number then press the Call Key or the Center Soft Key to make the call. If you make a mistake, you can delete the incorrect digits by pressing the Back/Delete Key Press the Center Soft Key to Call the entered number Press the Left Soft Key Press the Right Soft Key... - Page 17 Press the Right Soft Key to display more Options: • Add to existing contact: Add the entered number to replace the existing contact number. • Create new contact: Create a new contact with the entered number. Make a call from your call log From the Home screen, press the Call Key , or press the Center Soft Key...
- Page 18 Calling your voicemail Press and hold key to call and listen to your voicemail. Setting up voice mail 1. Dial *86 and press the Call Key or the Center Soft Key 2. When you hear a greeting, press to interrupt. 3.
-
Page 19: Answering Or Rejecting A Call
Answering or rejecting a call During an incoming call: • Open the flip to answer, if Settings > Personalization > Answer Mode > Flip open to answer is On. Otherwise, • Press the Left Soft Key or Call Key to answer. •... -
Page 20: Hang Up A Call
Hang up a call During a call: • Open the flip and press the End/Power Key to end the call. • Open the flip and close the flip to end the call. -
Page 21: Contacts
Contacts......Contacts enables quick and easy access to the contact you want to reach. From the Home screen, press the Center Soft Key and select Contacts to enter Contact list. Add a Contact On the contacts list screen, use the Navigation Key and press the Left Soft Key to create a New Contact and input the contact information. -
Page 22: View A Contact
View a Contact On the contacts list screen, use the Navigation Key to select a Contact, then press the Center Soft Key to access the detail screen. Press the Left Soft Key to send an SMS/MMS to the contact you selected. Press the Center Soft Key to make a call. -
Page 23: Edit A Contact
Edit a Contact On the contacts list screen, using the Navigation Key to select a Contact, then press the Right Soft Key to access Options, select Edit contact and press the Center Soft Key to edit. When finished, press the Center Soft Key to save. -
Page 24: Delete Contacts
Delete Contacts On the contacts list screen, press the Right Soft Key to access Options, select Delete contacts, use the Navigation Key to view available contacts and the Center Soft Key to make your selection, and then press the Right Soft Key to delete. -
Page 25: Speed Dial Contacts
Speed Dial Contacts On the contacts list screen, press the Right Soft Key to access Options, select Settings > Set speed dial contacts, use the Navigation Key to select 2-9, press the Center Soft Key to add a contact then press the Center Soft Key to confirm. - Page 26 • Create Group : Press the Center Soft Key to enter a new group name, press the Right Soft Key to save. From the contacts list, press Group > the Center Soft Key > the Left Soft Key to add contacts to the group. •...
-
Page 27: Messages
Messages......Use the messaging feature to send and receive text (SMS) and multimedia (MMS) messages. Sending a Text Message Press the Messages Key , or from the Home screen, press the Center Soft Key and select Messages to enter Messages. •... - Page 28 • Press Key to switch between the different methods. • Press Key to select symbols. • Press the Left Soft Key to send text messages. • Press and hold the Center Soft Key to speak your text. Inputting Text There are different ways to enter text to create contacts, write emails or send messages.
-
Page 29: Sending A Multimedia Message
• If you want to delete the already typed letters or symbols, press the Back/Delete Key to delete them one by one or long press to delete all at once. Sending a Multimedia Message MMS enables you to send video clips, images, photos, contacts and sounds to other compatible phones and email addresses by pressing the Right Soft Key from an open text messages screen and then... -
Page 30: E-Mail
E-Mail........Setup E-Mail You can access this function by pressing the Center Soft Key from the Home screen and select E-Mail An email wizard will guide you through the steps to set up an email account, press the Right Soft Key to continue. - Page 31 • If you do not want to send the mail right away, you can press the Right Soft Key and select Save as draft to save a copy. • Finally, press the Left Soft Key to send. Note: If you are seeing a “password incorrect” error when setting up your Gmail Account in Email app, please review the following options: Option 1: Generate an App password...
- Page 32 Option 2: Change your settings to allow less secure apps • Go to the “Less secure apps” https://www.google.com/settings/ security/lesssecureapps section in My Account. • Next to “Access for less secure apps,” select Turn on. • You can now setup your email using your username and password.
-
Page 33: Camera
Camera....... Your mobile phone features a Camera and a Video app to take photos and videos. Access the Camera To access this function, press the Center Soft Key from the Home screen and select Camera App Permission Upon first use of Camera, the App Permission screen will display, asking for permission to know your location. - Page 34 • Grid: Adds grid lines to photo screen to help take better photos by using grid lines to align photo image. • Gallery: Select Go to Gallery Application to view photos previously taken. • Modes: Select to switch between Photo and Video mode. To record a video Press Left and Right of the Navigation Key to switch between Photo and Video mode.
-
Page 35: Tools
Tools Using Voice Assistant Your phone offers a way to input commands, contact names and text by using your voice. Launch Voice Assistant 1. There are two ways to open the voice assistant. a. From the Home screen, Press and hold the Center Soft Key on the phone keypad. - Page 36 4. When sending a text, press the Messages Key or select Messages in the menu. Select New to compose a new text message. Place the cursor in the To section of the message, press and hold the Center Soft Key and clearly speak the name of the person to whom you want to send a text.
-
Page 37: Utilities
Utilities ............7.2.1 Calculator From the Home screen, press the Center Soft Key and select Utilities > Calculator. 0-9 key: input numbers +, -, x, ÷ Clear once Clear All 7.2.2 ToDo From the Home screen, press the Center Soft Key and select Utilities >... -
Page 38: Gallery
• Select a task, press the Center Soft Key to CHECK/ UNCHECK the task. 7.2.3 Recorder From the Home screen, press the Center Soft Key and select Utilities > Recorder. • Press the Left Soft Key then press the Center Soft Key to start recording, press the Right Soft Key to Done. -
Page 39: Clock
• Share: Share the photo via Email, Messages and Bluetooth, etc. • Select Multiple: Allows you to select more than one photo in the Gallery. • File Info: Displays file name, size, image type, date taken, resolution, and path. • Set as: Set the photo as Wallpaper or Image for existing contact. -
Page 40: Music
Press the Center Soft Key and then Left or Right of the Navigation key to edit hour, minute and second, when finished, press the Center Soft Key to start the Timer. • When the Timer is ongoing, press the Center Soft Key pause and continue the Timer, press the Right Soft Key add 1 minute. -
Page 41: Video
Video ............Video acts as a media player for you to view videos. From the Home screen, press the Center Soft Key and select Video. • Press the Left Soft Key to enter Camera to take a video. • Use the Navigation Key to select a video, press the Center Soft to play the video. -
Page 42: Fm Radio
FM Radio ............. Your phone is equipped with a radio with RDS functionality. You can use the application as a traditional radio with saved channels or with parallel visual information related to the radio program on the display if you tune to stations that offer Visual Radio service. To access this function, press the Center Soft Key from the Home screen and select FM Radio. -
Page 43: File Manager
• Long press left/right of the Navigation Key to search and go to the nearest lower/higher frequency channel. • Press the Right Soft Key to add the channel to favorites. A red star will be added to the station in the channel list. Press the Right Soft Key to edit favorites channel or switch to speaker. - Page 44 View Calendar You can display the Calendar in Day, Week, Month view. Press the Right Soft Key to change your Calendar view. Day view Week view Month view Create New Event Press the Left Soft Key to add new events from any Calendar view.
- Page 45 Delete and Edit Event After new event is created, under Month view or Day view, use the Navigation Key to move to the event. Press the Center Soft Key to show events list, then press the Left Soft Key to delete or press the Right Soft Key to edit.
-
Page 46: Network & Connectivity
Network & connectivity From the Home screen, press the Center Soft Key and select Settings > Network & Connectivity. Airplane Mode When Airplane mode is on, all wireless connections are disabled simultaneously, including Wi-Fi and Bluetooth. • Press the Center Soft Key to enter Airplane Mode. -
Page 47: Wi-Fi
APN Settings Press the Left Soft Key to add new APN. Enter the required APN information, when finished, press the Right Soft Key to save. Wi-Fi Wi-Fi will allow you to surf the internet without using your mobile network when in range of a wireless network. Press the Center Soft Key to enter Wi-Fi. -
Page 48: Geolocation
• My Phone’s Name: Press the Center Soft Key to enter, edit the name then press the Right Soft Key to save. • Nearby Devices: Press the Center Soft Key to enter nearby devices list, using the Up and Down of the Navigation Key to select a needed device, press the Center Soft Key to confirm, then press the Right Soft Key... -
Page 49: Personalize Your Phone
Personalize Your Phone Language Your device can be operated using English, Spanish, and other languages. To change the language: • From the Home screen, press the Center Soft Key , select Settings > Personalization > Language > Language. • Press the Navigation Key to select the desired languages preference. -
Page 50: Sounds
Sounds To adjust Volume: • Press the Volume Up/Down button that is located on the right side of the device to adjust the Ringtone & Alerts volume. • From the Home screen, press the Center Soft Key , select Settings >... - Page 51 • Press Wallpaper to select from pre-loaded Wallpapers. To adjust Brightness • From the Home screen, press the Center Soft Key , select Settings > Personalization > Display. • Press the Navigation Key to highlight Brightness. • Select desired brightness by pressing the Left or Right of the Navigation Key.
-
Page 52: Security
Security 10.1 Lock/Unlock your screen To protect your phone and privacy, you can lock the phone screen by creating a password. • From the Home screen, press the Center Soft Key , select Settings > Privacy & Security > Screen lock. •... -
Page 53: 10.2 Sim Security
10.2 SIM Security A SIM PIN prevents access to the SIM card cellular data networks. When enabled, any device containing the SIM card will request the PIN upon restart. Note: A SIM PIN is not the same as the lock code used to unlock the device. -
Page 54: Kaios Account
KaiOS account To create a KaiOS account, press the Center Soft Key from the Home screen and select Settings > Account > KaiOS account. Create Account • Select Create Account and press the Center Soft Key confirm. • Read About KaiOS Account and press the Right Soft Key to Accept. -
Page 55: Software Update
Software Update To access Software Updates, follow the steps below: • Connect your device to a Wi-Fi network and make sure it has a strong data connection. • Ensure your battery is fully charged before starting the software update. Your device’s current battery level can be found on your device under Settings >... -
Page 56: Safety And Use
Safety and use We recommend that you read this chapter carefully before using your mobile phone. The manufacturer disclaims any liability for damage, which may result as a consequence of improper use or use contrary to the instructions contained herein. TRAFFIC SAFETY: Given that studies show that using a mobile phone while driving a vehicle constitutes a real risk, even when the hands-free kit is used... - Page 57 • Switch the phone off when you are in health care facilities, except in designated areas. As with many other types of equipment now in regular use, mobile telephones can interfere with other electrical or electronic devices, or equipment using radio frequency.
- Page 58 • Do not dismantle or attempt to repair your mobile phone yourself. • Do not drop, throw or bend your mobile phone. • Do not use the phone if the screen is damaged, cracked or broken to avoid any injury. •...
- Page 59 PRIVACY: Please note that you must respect the laws and regulations in force in your jurisdiction or other jurisdiction(s) where you will use your mobile phone regarding taking photographs and recording sounds with your mobile telephone. Pursuant to such laws and regulations, it may be strictly forbidden to take photographs and/or to record the voices of other people or any of their personal attributes, and duplicate or distribute them, as this may be considered to be an...
- Page 60 This symbol on your phone, the battery, and the accessories means that these products must be taken to collection points at the end of their life: • Municipal waste disposal centers with specific bins for these types of equipment; • Collection bins at points of sale.
- Page 61 CHARGERS: Home A.C./ Travel chargers will operate within the temperature range of: 0°C (32°F) to 40°C (104°F). The chargers designed for your phone meet the standard for safety of information technology equipment and office equipment use. Due to different applicable electrical specifications, a charger you purchased in one jurisdiction may not work in another jurisdiction.
-
Page 62: Radio Waves
Radio Waves THIS MOBILE PHONE MEETS THE GOVERNMENT’S REQUIREMENTS FOR EXPOSURE TO RADIO WAVES. Your mobile phone is a radio transmitter and receiver. It is designed and manufactured not to exceed the emission limits for exposure to radiofrequency (RF) energy. These limits are part of comprehensive guidelines and establish permitted levels of RF energy for the general population. - Page 63 Although the SAR is determined at the highest certified power level, the actual SAR level of the mobile phone while operating can be well below the maximum value. This is because the mobile phone is designed to operate at multiple power levels so as to use only the power required to reach the network.
- Page 64 Note: This equipment has been tested and found to comply with the limits for a Class B digital device pursuant to part 15 of the FCC Rules. These limits are designed to provide reasonable protection against harmful interference in a residential installation. This equipment generates, uses and can radiate radio frequency energy and, if not installed and used in accordance with the instructions, may cause harmful interference to radio communications.
- Page 65 Please note by using the device some of your personal data may be shared with the main device. It is under your own responsibility to protect your own personal data, not to share with it with any unauthorized devices or third-party devices connected to yours. For products with Wi-Fi features, only connect to trusted Wi-Fi networks.
-
Page 66: Licenses
Licenses microSD Logo is a trademark of SD-3C, LLC. The Bluetooth word mark and logos are owned by the Bluetooth SIG, Inc. and any use of such marks by TCL Communication Technology Holdings Limited. and its affiliates is under licence. Other trademarks and trade names are those of their respective owners. - Page 67 Hearing Aid Compatibility Your mobile phone is rated: «For Hearing Aid», to assist hearing device users in finding mobile phones that may be compatible with their hearing devices. This phone has a HAC rating of M4/T4. Reference ANSI C63.19 (2011). FCC ID: 2ACCJN048 This phone has been tested and rated for use with hearing aids for some of the wireless technologies that it uses.
-
Page 68: General Information
General information • Internet address: www.tcl.com/us • Manufacturer: TCL Communication Ltd. • Address: 5/F, Building 22E, 22 Science Park East Avenue, Hong Kong Science Park, Shatin, NT, Hong Kong • Electronic labeling path: Touch Settings > Device > Regulatory & Safety or press *#07# to find more information about labeling , such as FCC ID. - Page 69 Disclaimer There may be certain differences between the user manual description and the phone’s operation, depending on the software release of your phone or specific carrier services. TCL Communication Technology Holding Limited. shall not be held legally responsible for such differences, if any, nor for their potential consequences, which responsibility shall be borne by the carrier exclusively.
-
Page 70: Year Limited Warranty
1 YEAR LIMITED WARRANTY For information on warranty of your device, visit the USA and Canada websites at https://support.tcl.com/us-mobile-product- downloads/614427 WARNING: Cancer and Reproduction Harm - www.P65Warmings.ca.gov. Electronic Information For more information on Electronic Recycling: Visit TCL Electronic Recycling Program website at https://www. tcl.com/us/en/mobile/accessibility-compliance/tcl-mobile- electronic-recycling-program.html/ or 2) Call TCL US Customer Support at 1-855-224-4228. -
Page 71: Troubleshooting
Troubleshooting Before contacting the service center, follow the instructions below: • You are advised to fully charge ( ) the battery for optimal operation. • Avoid storing large amounts of data in your phone as this may affect its performance. •... - Page 72 My phone cannot connect to a network or “No service” is displayed • Try connecting in another location. • Verify the network coverage with your service provider. • Check with your service provider that your SIM card is valid. • Try selecting the available network(s) manually.
- Page 73 Unable to receive incoming calls • Make sure your phone is switched on and connected to a network (check for overloaded or unavailable network). • Check your subscription status with your service provider (credit, SIM card valid, etc.). • Make sure you have not forwarded incoming calls. •...
- Page 74 I am unable to add a contact in my contacts • Make sure that your SIM card contacts are not full; delete some files or save the files in the phone contacts. My callers are unable to leave messages on my voicemail •...
- Page 75 • After a partial charge, the battery level indicator may not be exact. Wait for at least 20 minutes after removing the charger to obtain an exact indication. • Switch off the backlight upon request. • Extend the email auto-check interval for as long as possible. •...
- Page 76 TCL Communication Technology Holdings Limited. reserves the right to alter material or technical specification without prior notice. TCL is a registered trademark of TCL Technology Group Corporation © 2021 TCL Technology Group Corporation.
- Page 77 CHARITYMOBILE.COM 1-877-474-3662...