Advertisement
Quick Links
Advertisement

Subscribe to Our Youtube Channel
Summary of Contents for Brenderup 314425
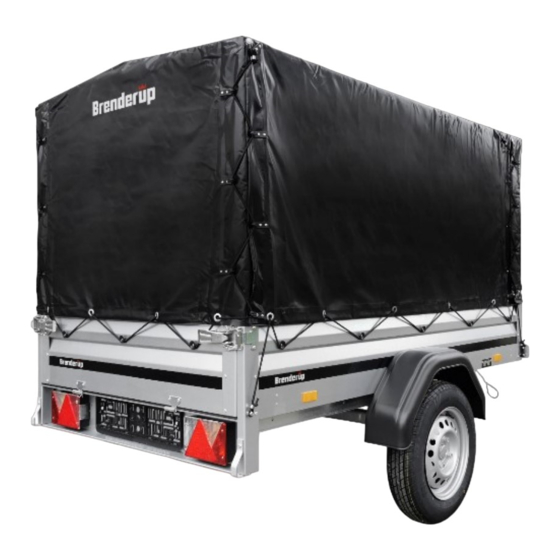
- Page 1 Item no. 314425 MOUNTING ISTRUCTION HIGH COVER 1205...
- Page 2 SE Monteringsanvisning Obs! För att undvika skador på kapellställning och presenningen rekommenderar vi att montering utförs av 2 personer. Obs! Fäst endast alla skruvar och muttrar löst under monteringen, dra åt skruvar och muttrar efter avslutat montering. Montera en skruv med en bricka på insidan av kapellställningen. Förmonterat elastiskt rep på...
- Page 3 DE Montageanleitung Wir empfehlen 2 Personen für die Montage - um Schäden am Produkt während der Montage zu vermeiden. Befestigen Sie die Schrauben und Muttern während der Montage nur lose - ziehen Sie alle Schrauben und Muttern nach Abschluss der Montage fest. Schraube mit Unterlegscheibe an der Innenseite des Gestells befestigen.
- Page 4 PL Instrukcja montazu UPS! Do montażu zalecamy 2 osoby - ma to na celu zapobieganie uszkodzeniom produktu podczas montażu. UPS! Śruby i nakrętki należy dokręcać luźno tylko podczas montażu - wszystkie śruby i nakrętki należy ostetcznie dokręcić po zakończeniu montażu. Sruba z nakretka od srodka.
- Page 5 IT Istruzioni di montaggio ATTENZIONE! Consigliamo 2 persone per il montaggio - questo per evitare danni al prodotto durante l’assemblaggio. ATTENZIONE! Avvitare, senza stringerle, le viti e i dadi durante l’assemblag- gio – successivamente serrare a fondo tutte le viti e i dadi dopo aver completato il montaggio della centina.
- Page 6 Components OBS! We recommend 2 people for the mounting – this to prevent any damage on the product during assembly. L=1,1m L=1,1m L=0,566m L=2,036m...
- Page 7 Remove 4x Remove 8x back front holes holes...
- Page 8 OBS! Only fasten screws and nuts loosely during assembly – retighten all screws and nuts after completed assembly.
- Page 10 A screw with washer from inside...
- Page 17 Pre mounted cover cords on the back of cover. Pre mounted cover cords left and right side – front of cover.
- Page 18 Front Back Mount one cover cord (2,6 M) on each side of the cover. Tie a knot and put the ring on as shown on the picture. Attach the cord to the screw (see picture) on the side of trailer (front and back).
- Page 19 Mount the 2 M long cover cord on front of the cover. Tie a knot on both end, put the ring and attach the cord to the screw (see picture) on the side of trailer (front and back).
- Page 20 Copyright © 2018 Brenderup Group. All rights reserved. We reserve the right to change design details, specifications and equipment levels without prior notice. Reservations for errors in technical specifications, information and images.
Need help?
Do you have a question about the 314425 and is the answer not in the manual?
Questions and answers