Advertisement
Quick Links
BEFORE YOU START:
1. Check the parts against the parts list to
make sure all items are present.
2. Assemble your furniture on a soft, flat
surface to avoid scratching the finish.
3. CAUTION: Do not over tighten screws, nuts
or bolts during assembly.
4. Your furniture may require occasional
tightening.
INSTRUCTIONS:
1. Place mirror on to the dresser.
2. Attach Mirror support to the base. Use Bolt (A), Lock
washer (B), Flat washer (C) and Allen wrench (D) to tighten.
As shown Diagram 1.
Diagram 1
HARDWARE LIST:
No. Description
Bolt
A
B
Lock Washer
C
Flat Washer
Allen Wrench
D
848-131( Remy Dresser)/040( LorraineMirror)
848-020(Sambre Mirror )
2
3
C
B
Sketch
Size
Ø1/4"*1-1/2''
Ø1/4"*12*3
Ø1/4"*19*2
4mm
ASSEMBLY INSTRUCTIONS
Complete
A
D
Quantity
PARTS LIST:
8PCS
No.
8PCS
1
8PCS
2
1PC
3
1
Complete
2
3
C
B
Diagram 1
Description
Sketch
Dresser
Mirror
Mirror Support
A
D
Quantity
1PC
1PC
2PCS
Advertisement

Summary of Contents for American Drew 848-131
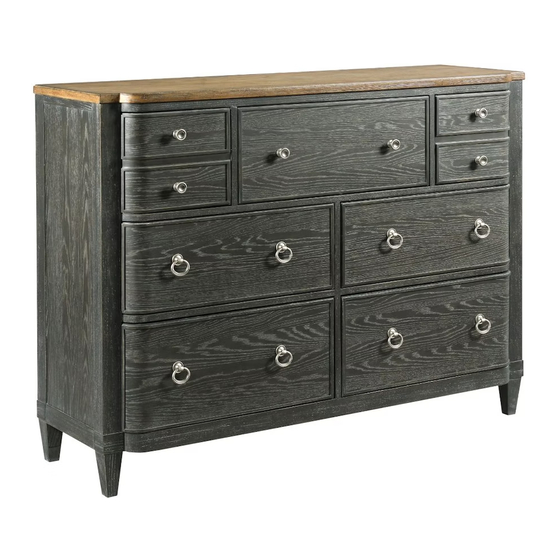
- Page 1 ASSEMBLY INSTRUCTIONS 848-131( Remy Dresser)/040( LorraineMirror) 848-020(Sambre Mirror ) BEFORE YOU START: 1. Check the parts against the parts list to make sure all items are present. 2. Assemble your furniture on a soft, flat surface to avoid scratching the finish.
-
Page 2: Hardware List
ASSEMBLY INSTRUCTIONS 848-130( Ardennes Dresser)/040( LorraineMirror) 848- 020(Sambre Mirror ) BEFORE YOU START: 1. Check the parts against the parts list to make sure all items are present. 2. Assemble your furniture on a soft, flat surface to avoid scratching the finish. 3. -
Page 3: Before You Start
ASSEMBLY INSTRUCTIONS 848-130 Ardennes Dresser BEFORE YOU START: 1. Check the parts against the parts list to make sure all items are present. Adjustable 2. Assemble your furniture on a soft, flat leveler surface to avoid scratching the finish. 3. CAUTION: Do not over tighten screws, nuts or bolts during assembly. - Page 4 ASSEMBLY INSTRUCTIONS 848-131 Remy Dresser BEFORE YOU START: 1. Check the parts against the parts list to make sure all items are present. Adjustable 2. Assemble your furniture on a soft, flat leveler surface to avoid scratching the finish. 3. CAUTION: Do not over tighten screws, nuts or bolts during assembly.
- Page 5 ASSEMBLY INSTRUCTIONS 848-422( Liano Nightstand) / 215( Joliette Chest ) 848-420( Ardennes Nightstand ) BEFORE YOU START: 1. Check the parts against the parts list to make sure all items are present. 2. Assemble your furniture on a soft, flat surface to avoid scratching the finish.
- Page 6 ASSEMBLY INSTRUCTIONS 848-225 ( Corsica Door Dresser) Tools required: Phillips Screw Driver (not supplied) BEFORE YOU START: 1. Check the parts against the parts list to make sure all items are present. 2. Assemble your furniture on a soft, flat surface to avoid scratching the finish.
- Page 7 ASSEMBLY INSTRUCTIONS 848-304/306 Queen / King Sambre Panel Bed Hdbd Diagram 3 BEFORE YOU START: HEADBOARD mirror Front BACK 1. Check the parts against the parts list to make sure view all items are present. 2. Assemble your furniture on a soft, flat surface to back avoid scratching the finish.
- Page 8 ASSEMBLY INSTRUCTIONS 848-304- 5/0 Sambre Panel Bed Hdbd 848- 305- 5/0 Sambre Panel Bed Ftbd 848 -R42- 5/0 Bolt On Bedrails Diagram 1 Screwdriver (not Provided) Tools required: Phillips Screw Driver (not supplied) BEFORE YOU START: 1. Check the parts against the parts list to make sure all items are present.
- Page 9 ASSEMBLY INSTRUCTIONS 848-306- 6/6 Sambre Panel Bed Hdbd 848- 307- 6/6 Sambre Panel Bed Ftbd 848 -R44- 6/0 Bolt On Bedrails Diagram 1 Screwdriver (not Provided) Tools required: Phillips Screw Driver (not supplied) BEFORE YOU START: 1. Check the parts against the parts list to make sure all items are present.
- Page 10 ASSEMBLY INSTRUCTIONS 848-306- 6/6 Sambre Panel Bed Hdbd 848- 307- 6/6 Sambre Panel Bed Ftbd Diagram 1 848 -R42- 6/6 Bolt On Bedrail s Screwdriver (not Provided) Tools required: Phillips Screw Driver (not supplied) BEFORE YOU START: 1. Check the parts against the parts list to make sure Diagram 3 all items are present.
- Page 11 ASSEMBLY INSTRUCTIONS 848-324-5/0 Lorraine Upholstered Bed Headboard 848-326-6/6 Lorraine Upholstered Bed Headboard BEFORE YOU START: 1. Check the parts against the parts list to make sure all items are present. 2. Assemble your furniture on a soft, flat surface to avoid scratching the finish.
- Page 12 ASSEMBLY INSTRUCTIONS 848-636 Roland Side Chair BEFORE YOU START: 1. Check the parts against the parts list to make sure all items are present. 2. Assemble your furniture on a soft, flat surface to avoid scratching the finish. 3. CAUTION: Do not over tighten screws, nuts or bolts during assembly.
- Page 13 ASSEMBLY INSTRUCTIONS 848-637 Roland Arm Chair BEFORE YOU START: 1. Check the parts against the parts list to make sure all items are present. 2. Assemble your furniture on a soft, flat surface to avoid scratching the finish. 3. CAUTION: Do not over tighten screws, nuts or bolts during assembly.
- Page 14 ASSEMBLY INSTRUCTIONS 848-701/B01 Laurent Round Dining Table-Top -Base BEFORE YOU START: 1. Check the parts against the parts list to make sure all items are present. Diagram 2 2. Assemble your furniture on a soft, flat surface to Diagram 1 avoid scratching the finish.
- Page 15 ASSEMBLY INSTRUCTIONS 848-744 Belmar Leg Dining Table Tools required: Diagram 2 Phillips Screw Driver (not supplied) BEFORE YOU START: 1. Check the parts against the parts list to make sure Diagram 1 all items are present. 2. Assemble your furniture on a soft, flat surface to avoid scratching the finish.
- Page 16 ASSEMBLY INSTRUCTIONS 848-830 / 831 Liege China Base / Liege China Deck Tools required: Mending Plate Phillips Screw Driver (not supplied) BEFORE YOU START: 1. Check the parts against the parts list to make sure all items are present. Diagram 2 2.
- Page 17 ASSEMBLY INSTRUCTIONS 848-857 Mariello Sideboard HARDWARE LIST: No. Description Sketch Size Quantity PARTS LIST: Ø5/16"*12 8PCS Description Quantity Sketch Lock Washer Ø5/16"*12*3 8PCS Mariello Sideboard Flat Washer Ø5/16"* 19*2 8PCS 12mm Wrench Legs 4PCS...
- Page 18 ASSEMBLY INSTRUCTIONS 848-910 Sabine Coffee Table Tools required: Diagram 1 Phillips Screw Driver (not supplied) BEFORE YOU START: 1. Check the parts against the parts list to make sure all items are present. 2. Assemble your furniture on a soft, flat surface to avoid scratching the finish.
- Page 19 ASSEMBLY INSTRUCTIONS 848-915 Sabine End Table Diagram 1 Tools required: Phillips Screw Driver (not supplied) BEFORE YOU START: 1. Check the parts against the parts list to make sure all items are present. 2. Assemble your furniture on a soft, flat surface to avoid scratching the finish.
- Page 20 ASSEMBLY INSTRUCTIONS 848-916 Sabine Chairside Table Tools required: Phillips Screw Driver (not supplied) Diagram 1 BEFORE YOU START: 1. Check the parts against the parts list to make sure all items are present. 2. Assemble your furniture on a soft, flat surface to avoid scratching the finish.
- Page 21 ASSEMBLY INSTRUCTIONS 848-925 Sabine Console Table Tools required: Phillips Screw Driver (not supplied) Diagram 1 BEFORE YOU START: 1. Check the parts against the parts list to make sure all items are present. 2. Assemble your furniture on a soft, flat surface to avoid scratching the finish.
Need help?
Do you have a question about the 848-131 and is the answer not in the manual?
Questions and answers