Table of Contents
Advertisement
Quick Links
Advertisement
Table of Contents

Summary of Contents for MAYO 2100 Series
- Page 1 STRAIGHT SCALE CONVEYOR OPERATOR'S MANUAL...
- Page 2 This warranty does not apply to any machine that has been altered outside the factory in any way so as, in the judgement of Mayo, to affect its operation, reliability or safety, or which has been subject to misuse, neglect or accident.
- Page 3 MAYO MANUFACTURING, INC. MODEL 2100 SERIES STRAIGHT SCALE CONVEYOR WARRANTY REGISTRATION FORM & INSPECTION REPORT WARRANTY REGISTRATION This form must be filled out by the dealer and signed by both the dealer and the customer at the time of delivery.
- Page 5 SERIAL NUMBER LOCATION Always give your dealer the serial number of your Mayo Scale Conveyor when ordering parts or requesting service or other information. The serial number plate is located where indicated. Please mark the number in the space provided for easy reference.
-
Page 7: Table Of Contents
TABLE OF CONTENTS SECTION DESCRIPTION PAGE Introduction ............1 Safety ..............3 General Safety ............4 Equipment Safety Guidelines ........ 5 Storage Safety ............5 Safety Training ............6 Safety Signs ............6 Preparation ............7 Installation Safety ..........7 Lock-Out Tag-Out Safety........ -
Page 9: Introduction
INTRODUCTION Congratulations on your choice of a Mayo Model 2100 Series Straight Scale Conveyor and welcome to Mayo's quality line of potato handling equipment. This equipment is designed and manufactured to meet the needs of a discriminating buyer in the agricultural industry for the loading, unloading, processing and storing of harvest yields. -
Page 11: Safety
If you have any questions not answered in this manual or require additional copies or the manual is damaged, please contact your dealer or Mayo, P.O. Box 497, Bus Highway 2, East Grand Forks, Minnesota, 56721. (Telephone) 218-773-1234, (FAX) 218-773-6693 or toll free at 1-800-223-5873. -
Page 12: General Safety
YOU are responsible for the SAFE operation and Operator's Manual and all safe- maintenance of your Mayo Scale Conveyor. YOU ty signs before supplying power must ensure that you and anyone else who is going to, operating, maintaining or ad- to operate, maintain or work around the conveyor be justing the Scale Conveyor. -
Page 13: Equipment Safety Guidelines
EQUIPMENT SAFETY GUIDELINES Safety of the operator and bystanders is one of 9. In addition to the design and configuration of this the main concerns in designing and developing a implement, including Safety Signs and Safety machine. However, every year many accidents oc- Equipment, hazard control and accident preven- cur which could have been avoided by a few sec- tion are dependent upon the awareness, con-... -
Page 14: Safety Training
SAFETY TRAINING SAFETY SIGNS Safety is a primary concern in the design and man- Keep safety signs clean and legible at all times. ufacture of our products. Unfortunately, our efforts to provide safe equipment can be wiped out by a 2. -
Page 15: Preparation
PREPARATION INSTALLATION SAFETY Never operate the Scale Conveyor and auxiliary Disconnect and remove all mechanical locks, an- equipment until you have read and complete- chor chains and any other transport devices that ly understand this manual, the auxiliary equip- would hinder or prohibit the normal functioning of ment Operator's Manual, and each of the Safety the Scale Conveyor upon start up. -
Page 16: Operating Safety
2. Turn machine OFF, shut down and lock out power supply (safety lockout devices are avail- the manuals of other equipment in the system. able through your Mayo dealer parts depart- 2. Turn machine OFF, shut down and lock out ment), relieve hydraulic pressure and wait for... -
Page 17: Hydraulic Safety
Such repairs power supply (safety lockout devices are avail- will fail suddenly and create a hazardous and un- able through your Mayo dealer parts depart- safe condition. ment), relieve hydraulic pressure and wait for all moving parts to stop before servicing, ad- 4. -
Page 18: Tire Safety
2.13 TIRE SAFETY 2.14 TRANSPORT SAFETY Make certain that you are in compliance with local, Inflate tires to proper pressure as specified on the side wall of each tire. Do not overinflate or state/provincial and federal regulations regard- under-inflate. ing transporting agricultural equipment on public roadways. -
Page 19: Employee Sign-Off Form
Mayo Manufacturing, Inc. follows the general Safety Standards specified by the American Society of Agricultural Engineers (ASAE) and the Occupational Safety and Health Administration (OSHA). Anyone who will be oper- ating and/or maintaining a Mayo built machine must read and clearly understand ALL Safety, Operating and Maintenance information presented in this manual. -
Page 21: Safety Sign Locations
SAFETY SIGN LOCATIONS The types of safety signs and locations on the equipment are shown in the illustrations that follow. Good safety requires that you familiarize yourself with the various Safety Signs, the type of warning and the area, or particu- lar function related to that area, that requires your SAFETY AWARENESS. - Page 22 The types of safety signs and locations on the equipment are shown in the illustrations that follow. Good safety requires that you familiarize yourself with the various Safety Signs, the type of warning and the area, or particu- lar function related to that area, that requires your SAFETY AWARENESS. • Think SAFETY! Work SAFELY! REMEMBER - If Safety Signs have been damaged, removed, become illegible or parts replaced without safety signs, new signs must be applied.
- Page 23 The types of safety signs and locations on the equipment are shown in the illustrations that follow. Good safety requires that you familiarize yourself with the various Safety Signs, the type of warning and the area, or particu- lar function related to that area, that requires your SAFETY AWARENESS. • Think SAFETY! Work SAFELY! REMEMBER - If Safety Signs have been damaged, removed, become illegible or parts replaced without safety signs, new signs must be applied.
- Page 24 The types of safety signs and locations on the equipment are shown in the illustrations that follow. Good safety requires that you familiarize yourself with the various Safety Signs, the type of warning and the area, or particu- lar function related to that area, that requires your SAFETY AWARENESS. • Think SAFETY! Work SAFELY! REMEMBER - If Safety Signs have been damaged, removed, become illegible or parts replaced without safety signs, new signs must be applied.
-
Page 25: Operation
TO THE NEW OPERATOR OR OWNER Follow all safety instructions exactly. Safety is The Mayo Manufacturing Scale Conveyor is designed everyone's business. By following recommended to be used as a stand-alone unit or part of a system procedures, a safe working environment is pro- to convey potatoes from one location to another. -
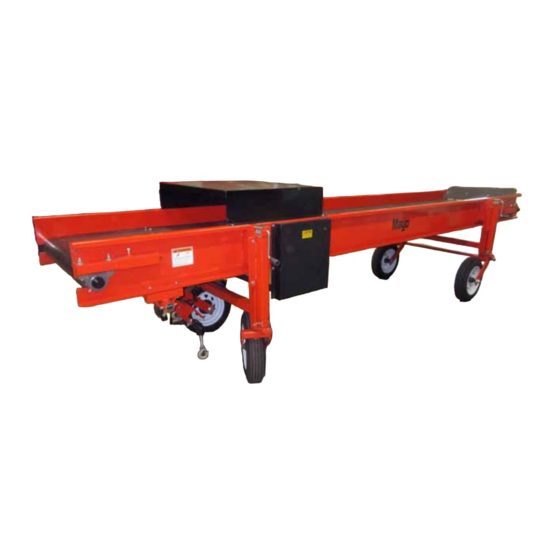
Page 26: Machine Components
MACHINE COMPONENTS The Mayo Manufacturing Scale Conveyors are de- Manual ratchet jacks are used to level the frame or signed with a belted or chain conveyor to move po- set the height of the machine for minimizing drop tatoes. The conveyor is powered by a electric motor height. -
Page 27: General Operation Theory
GENERAL OPERATION THEORY Potatoes are unloaded from transport trucks into the hoppers of the stingers. Here they are carried by chain conveyors up into the hopper of the mainframe con- veyor. The chain conveyors are engineered to gently vibrate and rotate the potatoes to remove excess dirt. The top, belted mainframe conveyor feeds into the bottom, belted mainframe conveyor, which ultimately feeds into the hopper of a bin piler, an additional con-... -
Page 28: Machine Break-In
MACHINE BREAK-IN Although there are no operational restrictions on the Scale Conveyor when used for the first time, it is rec- ommended that the following mechanical items be checked: A. Before Starting: 1. Read conveyor and auxiliary equipment man- uals before starting. 2. -
Page 29: Pre-Operation Checklist
Performing the following pre- operation checklist is important for personal safety as well as for continued mechanical soundness and longevity of your new Mayo conveyor. The checklist should be performed before operating the conveyor and prior to each operation thereafter. -
Page 30: Controls
CONTROLS It is recommended that all operators review this sec- tion of the manual to familiarize themselves with the location and function of all machine controls before starting. Some machines may vary slightly due to custom features but they are similar and all controls are labelled. -
Page 31: Machine Preparation
MACHINE PREPARATION The machine must be properly prepared prior to us- ing. Before starting machine, be sure that the follow- ing items are appropriate for your machine and oper- ating requirements: 4.7 .1 CONVEYOR - MECHANICAL: Power: Have a licensed electrician provide power at the required voltage, phase and amperage for your machine by following ANSI/NFPA 70 Wiring Standard. - Page 32 An optional over-center clamp is Fig. 8 WhEEl cAstors available on one end to attach to another Mayo machine. Adjust the hook bolt to obtain the re- quired position. If connecting to equipment made by other manufacturers, connect securely using a chain, straps or other means.
- Page 33 4.7 .2 CONVEYOR - ELECTRICAL Appropriate electrical power must be provided to the machine for it to function as designed. Always follow these general guidelines when applying electrical power to the machine: Power: Make certain that sufficient amperage, at the prop- er voltage and frequency (60 Hz) is available be- fore connecting power.
- Page 34 4.7.3 SCALE CALIBRATION: The scale system is set and calibrated at the factory but the system must be checked prior to placing into operation. Refer to Scale Operator's manual provided with the machine for more detailed information. Follow this procedure when checking system: Provide 120 volt power to the system.
- Page 35 5. Material Calibration Mode: Use this calibration mode if you want to calibrate the scale with a known amount of material. The material must be pre-weighed or post weighed. Use the following steps to perform a material calibration: a. Press the Material soft key on the integrator display.
- Page 36 4.7.4 PARAMETER SETTINGS FOR 920i (BCI) INDICATOR: ** THESE PARAMETERS ARE SET AT THE FACTORY - THIS IS JUST A REFERENCE PAR # DESCRIPTION SETTING PAR # DESCRIPTION SETTING ADMINISTRATOR PASSCODE STREAM FORMAT 4.47 SCALE CAPACITY IN POUNDS CLEAR TOTALIZER WITH PRINT 4.48 LOAD CELL MV REMOTE TOTALIZER RESET INPUT...
- Page 37 4.7 .5 Complete System Calibration Test Used In Conjunction With Integrator Calibration There are two types of tests that are also used in conjunction with calibrating the complete system. They are: • Material testing. • Maintenance testing. Material testing is used only with the material cali- bration and the simulated load testing is used only with the Auto calibration.
- Page 38 c. The belt is run for a period of time equal to Table 1 that required to deliver the minimum totalized Material Testing Advantages Material Testing Disadvantages load, approximately 10 minutes and the read- ing is again taken. It should not vary more This is the only method that Requires availability of accurate than +/- increment of the scale.
-
Page 39: Attaching/Unhooking
ATTACHING/UNHOOKING Follow this procedure when attaching the scale con- veyor to a pickup or tractor. Clear the area of bystanders, especially small children. 2. Make sure there is enough room and clearance to safely back up to the machine. 3. Release hitch from its stowed position and place it in its extended position. - Page 40 8. Connect the wiring harness to the pickup or tractor if transporting on a public road. Be sure to secure hitch and provide sufficient slack for turning. NOTE Install the optional lighting bar and con- nect wiring harness to towing unit. FIG.
-
Page 41: Operating
• Turn machine OFF, shut down and lock out power supply (safety lockout devices are • Keep all electrical components tight, dry and in available through your Mayo dealer parts good repair. department) and wait for all moving parts to stop before servicing, adjusting, maintaining • Extend leg ratchets to level the frame before or repairing. - Page 42 5. Starting Scale Conveyor: a. Clear the area of bystanders. Know where ev- eryone is before starting. b. Place all controls in the OFF or neutral position. c. Turn the power to the machine and scale ON at the master panel. d.
- Page 43 An optional over center clamp is available on one end to attach to another Mayo machine. Adjust the hook bolt to obtain the re- quired position. If connecting to equipment made by other manufacturers, connect securely using a chain, straps or other means.
- Page 44 8. moving: The Scale Conveyor is manually steered and moved in normal conditions. To assist in the mov- ing process, the front wheels are designed to be used for steering. To move the conveyor, follow this procedure: a. Release the hitch from its stowed position. b.
- Page 45 10. Drop Height: Potatoes are sensitive to bruising during the gath- ering, transporting and handling phases of har- vesting. Bruising is kept to a minimum by maintain- ing a full flow of potatoes through each machine and minimizing all drop heights. Bruising during the conveying phase can be minimized by keeping the drop height between each piece of conveying equipment as small as possible.
-
Page 46: Transport
• Wrap up and bind to the frame all loose electrical when transporting. ends. Mayo Scale Conveyors are designed to be easily and conveniently moved from location to location. The term moving is used to describe the action of mov- ing the machine manually or with the optional wheel drive system and is covered in Section 4.8 Operating. - Page 47 3. Release the hitch from its stowed position under the front of the frame. Stowed 4. Place hitch in its extended position to provide clearance when turning. Extended FIG. 26 MACHINE PREPARATION - HITCH 5. Mount the optional lighting bar. 6.
- Page 48 12. Install an SMV on the rear frame if towing with a tractor. 13. Use pilot vehicles or install optional lighting bar on the machine when transporting. 14. Clean all the reflectors. 15. Be sure all bystanders are clear of the machine. 16.
-
Page 49: Storage
4.11 STORAGE STORAGE SAFETY • Store the Scale Conveyor on a firm level surface. • If required, make sure the unit is firmly blocked 8. Check all rotating parts for entangled material. Remove. • Make certain that all mechanical locks are safe- 9. Touch up all paint nicks and scratches to prevent ly and positively connected before storing. rusting. -
Page 51: Service And Maintenance
• Turn machine OFF, shut down and lock out pow- er supply (safety lockout devices are available through your Mayo dealer parts department), re- lieve hydraulic pressure and wait for all moving parts to stop before servicing, adjusting, main- taining or repairing. •... - Page 52 5.1.3 SERVICING INTERVALS 8 Hours or Daily Check the conveyor tension and alignment. Tension or align as required. FIG. 29 ALIGNMENT (TYPICAL) 2. Inspect electrical system and all components. FIG. 30 ELECTRICAL (TYPICAL) 3. Check speed sensor for entangled material around the shaft.
- Page 53 50 Hours or Weekly Grease Scale Conveyor shaft bearings with one shot of grease (2 locations each shaft). IMPORTANT Only sealed bearings are used on the Scale Conveyor shaft. Sealed bearings should never be greased more often than weekly or every 50 hours. Do not over-grease.
- Page 54 100 Hours or Annually Check the oil level in the speed reducing gearbox in the drive system (1 location). FIG. 33 LEVEL PLUG (TYPICAL)
- Page 55 500 Hours or Annually Change the oil in the gearbox. 2. Clean the gearbox breather plug. a. Fill Plug b. Level Plug c. Drain Plug FIG. 34 GEARBOX (TYPICAL) 3. Repack each wheel bearing. 4. Clean machine. FIG. 35 WHEELS (TYPICAL)
- Page 56 5.1.4 SERVICE RECORD See Lubrication and Maintenance sections for details of service. Copy this page to continue record. ACTION CODE: CHECK CHANGE CLEAN LUBRICATE REPACK INSPECT Maintenance Hours Serviced by 8 Hours or Daily CK Conveyor Tension and Alignment IN Electrical System and Components CK Speed Sensor 50 Hours or Weekly...
-
Page 57: Maintenance
5.2 MAINTENANCE By following a careful service and maintenance pro- gram on your machine, you will enjoy many years of trouble-free use. 5.2.1 ELECTRIC SYSTEM INSPECTION Electricity provides power to all systems on the Scale Conveyor. To maintain the integrity of each system and provide a safe working environment for the op- erator, it is important that a daily inspection be done to make sure that all systems and components are in... - Page 58 5.2.2 SPEED REDUCER GEARBOX OIL The Scale Conveyor is driven by an electric motor that is attached to a high ratio speed reducing gear- box to give the required operating speed. The gear- box is equipped with a drain, level and fill plug. Every 100 hours, the oil level should be checked.
- Page 59 5.2.3 BREATHER CLEANING The gearbox is equipped with a breather in the fill plug that vents the internal pressure to atmosphere. As the gearbox temperature increases and decreas- es during the operating and stopped modes, the pressure in the gearbox will increase or decrease if it is not vented to atmosphere.
- Page 60 5.2.4 CONVEYOR TENSION/ALIGNMENT OR REPLACEMENT Flat belts are used to move potatoes with the Scale Conveyor. The tension and alignment of the conveyor should be checked daily to insure proper function. Replace the conveyor when damaged or badly worn. To maintain conveyor, follow this procedure: Place all controls in their OFF or neutral position.
- Page 61 4. Alignment: a. Conveyor Belt: It is properly aligned when the belt runs in the center of the frame panels and the shafts. Be sure to run the Scale Conveyor a full revolu- tion to check the entire belt. the belt can move from side-to-side while it is turning as long as it doesn't contact the sides.
-
Page 63: Trouble Shooting
6 TROUBLE SHOOTING The Mayo Scale Conveyor uses a straight design to convey potatoes. It is a simple and reliable system that requires minimum maintenance. In the following section, we have listed many of the problems, causes and solutions to the problems that you may encounter. -
Page 65: Specifications
SPECIFICATIONS 7 .1 MECHANICAL Scale Conveyor physical dimensions, power specifications & wheel/tire configurations vary substantially for each machine. Please contact factory at 1-218-773-1234 or 1-800-223-5873 for your machines particular specifications. SPECIFICATIONS SUBJECT TO CHANGE WITHOUT NOTICE... -
Page 66: Bolt Torque
BOLT TORQUE CHECKING BOLT TORQUE The tables shown below give correct torque values for various bolts and capscrews. Tighten all bolts to the torques specified in chart unless otherwise noted. Check tightness of bolts periodically, using bolt torque chart as a guide. Replace hardware with the same strength bolt. ENGLISH TORQUE SPECIFICATIONS Bolt Torque* Bolt... -
Page 67: Electrical Schematic
7 .3 ELECTRICAL SCHEMATIC Line phasing, line voltage, control voltage, and accessory options can vary substantially for each machine. Please contact factory at 1-800-223-5873 for your machine's specific electrical layout. SPECIFICATIONS SUBJECT TO CHANGE WITHOUT NOTICE... -
Page 69: Index
8 INDEX PAGE PAGE Introduction ............1 Safety ............3 Electrical Safety ........9 Employee Sign-Off Form ......11 Equipment Safety Guidelines ....5 General Safety ..........4 Operation ............17 Hydraulic Safety ........9 Attaching/Unhooking .......31 Installation Safety ........7 Controls ...........22 Lock-Out Tag-Out Safety ......7 General Operation Theory ......19 Maintenance Safety ........8 Machine Break-In ........20 Operating Safety ........8... - Page 72 MAYO MANUFACTURING CO. BUS HIGHWAY 2 BOX 497 EAST GRAND FORKS, MN 56721 PHONE (218) 773-1234 TOLL FREE (800) 223-5873 FAX (218) 773-6693 PRINTED IN USA ISSUE DATE: MARCH 2017 PART NUMBER: 200-002...
Need help?
Do you have a question about the 2100 Series and is the answer not in the manual?
Questions and answers