Advertisement
MANUAL SPRING-V3
software version from V1.1 (24/72 channels)
General
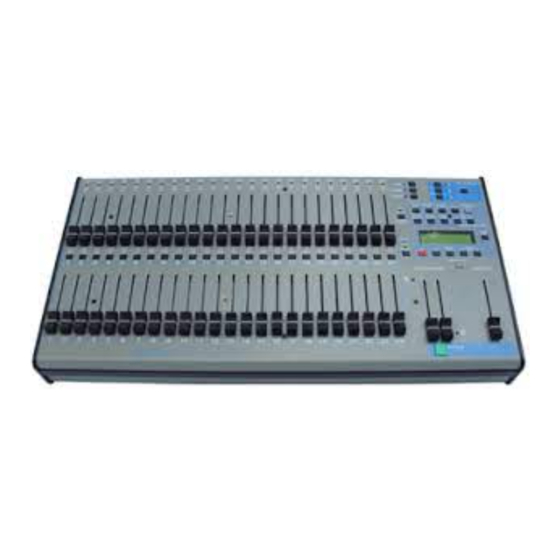
The SPRING is a 24channel memory lighting control desk with a DMX512 out- and input. You can extend the SPRING to
a 72-channel desk with extra software. The SPRING has two fader banks with 24 faders, a split up crossfader and a
MASTER fader. Each channel has a level led and a push button. These buttons are channel pointers for: channel level
flashing, level view/preview, DMX soft patch and to set the control curve. In 72 channel mode they are also Sub-MASTER
pointers for Sub-MASTER flashing and assigning a memory to a Sub-MASTER.
This desk is designed to play back manual made pre-sets as well as pre-sets recorded in memory. You can store 768 pre-
sets in memory. You can fade-in these pre-sets with the crossfader or with a GO-button action in a programmable fade-in,
delay in, fade-out and delay out time.
The SPRING has a LOOP/chase section. You can add 3 pre-programmed loops or user defined loops of memories (NOT
YET realized for software V1.1). These memories follow each other by crossfades in the programmed fade-and delay
times. You get a stepped chase by giving the rhythm with the TEMPO button
The SPRING has several possibilities for remote control: external GO-button, pre-set controller and MIDI.
You can backup all your settings and memories on a USB memory stick. Optional you can connect a VGA display and a
standard keyboard to the SPRING. You can lock the interface with a pin-number.
The SPRING has four users levels: so you can reduce the control possibilities and adjust the user interface to the
experience of the user (NOT YET realized for software V1.0).
Definitions
A
is the visible result of the setting of 24/72 control channels (on stage).
SCENE
A
is a level setting of 24/72 control channels, made with the faders on the bank whose led doesn't burn (manual
PRE-SET
pre-set). The result becomes visible after a crossfade.
A
or
MEMORY
SCENE RECORD
A
is an automatically repeating sequence of memory fade-ins . The fade-in speed is determined by the programmed
LOOP
fade-in, delay-in, fade-out and delay-out times of the memories that are used to build-up the loop.
mode of a loop is the situation in which memories follow up each other step by step (no crossfade)
STEPPED LOOP-
The
are the rectangle black buttons between the fader-banks.
FADER-BUTTONS
H.T.P. stands for highest takes precedence.
The cursor is a blinking hyphen in the display. It points the selected item for changing.
Legend
[.......] points to a button, <......> points to a led and "..." is a displayed text.
For example: [GO/stop] means: the button 'GO/stop', <live> burns, means: the led 'live' burns.
User situations
Manual play
The SPRING has two fader-banks. Each bank has 24 faders and a red indication led in the middle. This led indicates
whether the faders of the corresponding bank controls 'live scene' or not. In the latter case this fader-bank controls 'next'
pre-set or memory. You can make a pre-set or next memory visible on stage with the crossfader or with a GO-button action
in a programmable fade time.
The level-leds indicate:
a)the channel levels of 'live scene' if led <live>, located by button [SELECT live or blind control/view], is ON.
b)the channel levels of 'next pre-set' or 'next memory' if led <live> is OFF. So you get a preview of what is coming.
c)the channel levels of the output if there is a fade going. You have to realize that the output is the H.T.P of all the fade-
engines, Sub-MASTER account (72 channel mode) and going loops.
Each fader has a button. By pressing a button you point the corresponding channel, 1 up till 24 or 1 up till 72 in
combination with the three fader-bank buttons. If channel flash is enabled the corresponding channel output level will
directly set on 100%. If Sub-MASTER flash is enabled (only 72 channel mode) the corresponding Sub-MASTER is
directly set on 100%. If both are disabled you can see the level of the corresponding channel in percent's at the LCD-
display. If led <live> is ON you get levels of life scene or if OFF you get the levels of next memory/pre-set.
is a pre-set stored in memory.
1
Advertisement
Table of Contents

Summary of Contents for Theater Technisch Lab SPRING-V3
- Page 1 MANUAL SPRING-V3 software version from V1.1 (24/72 channels) General The SPRING is a 24channel memory lighting control desk with a DMX512 out- and input. You can extend the SPRING to a 72-channel desk with extra software. The SPRING has two fader banks with 24 faders, a split up crossfader and a MASTER fader.
-
Page 2: Operation In General
Memory play The SPRING can store 768 pre-sets in memory. Each memory gets a name, which exists of a letter (A up till X) and a number (1 up till 32). For example: “A17”. You can select a memory with the buttons [select digit] and/or [<<] and [>>]. You can make a memory visible on stage with the crossfader or a GO-button action, just like you make a manual made pre- set visible. -
Page 3: Basic Operations
BASIC OPERATIONS The SPRING as a manual desk Create a pre-set Select with [MANUAL PLAY] for next “manual” on the display. You get this display. Check if both parts of the crossfader are together in the same end live: D23 position. - Page 4 The SPRING as memory control desk Create a memory You make a scene on the fader-bank, whose led <live> is ON. Push [STORE scene Save as? A13 as]. With the scroll buttons [<<], [>>] and button [select digit] you can chose a memory name.
- Page 5 time. Move the cursor to “t_IN”. Change the displayed time with [<<], [>>] and [select digit]. If it concerns a manual pre- set (“MAN”), this is the time for the first automatic crossfade you make. In the same way you can change the “delay” value.
- Page 6 B06. You select in the main display for NEXT memory B06 and press [GO/stop]. Now B06 will be faded in and on the same time, on a separate fade-engine the loop will be started. You can also start a loop with the buttons [GO/stop] in the LOOP CONTROL section (right upper corner). These loops are pre-defined stepped loops or user defined loops(Not yet realized for software version 1.1) The step tempo can be adjusted by pressing twice the button [TEMPO] in the desired ritme.
- Page 7 The SET-UP menus There are 13 setup menus. A setup menu is meant to control the operation of the SPRINGin general. You can select these menu’s by pressing [next menu] or [previous menu] repeatedly under SETUP. Soft patch menu-1: Patching a CONTROL channel proportional on one or more DMX channels Repeat pressing [next menu] or [previous menu] till you see the adjacent menu..
- Page 8 [select digit] to select the backup number and confirm this choice by pushing [YES]. De file what will be created has the name P24-XXXX.TTL or P72-XXXX.TTL(SPRING-V3-24/72 only), XXXX=1,2,..,1000. You can lock this file on a PC by setting the read only attribute. Do not edit the file because that will damage the backup file.
-
Page 9: Appendix-1: The Spring Versus Midi
RESET ALL!, with pressing [next menu](SETUP). You will see the adjacent menu. Here you can select, if you wish, another channel count:24 or 72(only SPRING-V3 72). By 24 channels? pressing [YES] the display shows “Memory will be overwrite!, Sure?”. By pressing again on [YES] all settings will be set to default and the scene list will be cleared. -
Page 10: Layout Of The Front Panel
1-24 or 1-72 (spring 24/72) sub’s change select << >> ENABLE digit item flash MANUAL PLAY CROSSFADER MASTER live live channel faders or sub-masters GO/stop GO/stop fade in of the above selected Spring-V3 NEXT scene 24/72 digital channel control desk...
Need help?
Do you have a question about the SPRING-V3 and is the answer not in the manual?
Questions and answers