Table of Contents
Advertisement
Advertisement
Table of Contents

Summary of Contents for Smith-Style Retro H1
- Page 1 Retro H1 Portable DAB/FM Radio with Bluetooth Speaker Instruction Menu...
-
Page 2: Table Of Contents
Content Page Important Safety Instructions ........................3 Your Portable DAB / FM Radio with Bluetooth Speaker ................4 Getting Started ............................5 What can you find inside the box ....................... 5 Positioning your Radio ........................5 Avoid the following locations ......................5 Adjusting the Antenna ........................ -
Page 3: Important Safety Instructions
Important Safety Instructions WARNING: TO REDUCE THE RISK OF FIRE OR ELECTRIC SHOCK, DO NOT EXPOSE THIS SPEAKER TO RAIN OR MOISTURE. To reduce the risk of electrical shock, fire, etc.: Do not place unit near any heat source such as radiators, heat registers, stoves, or other apparatus (including amplifiers) that produce heat. -
Page 4: Your Portable Dab / Fm Radio With Bluetooth Speaker
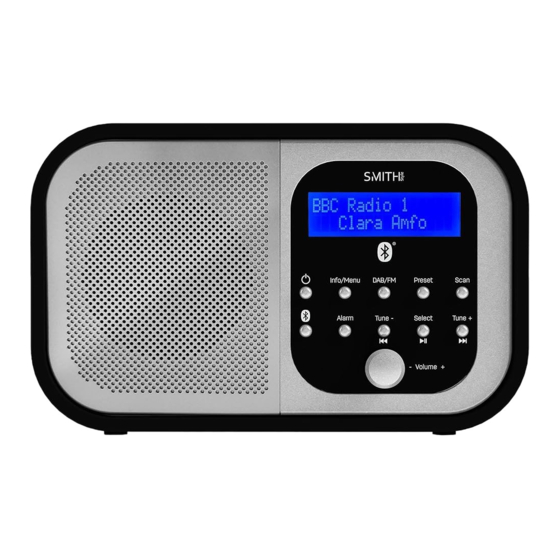
Your Portable DAB / FM Radio with Bluetooth Speaker Handle Info/Menu Tune + Speaker DAB/FM Select Antenna(Back) Preset Tune - Scan Alarm/Snooze LCD Display Battery compartment(Back) Bluetooth ON/OFF Power socket(Back) Volume... -
Page 5: Getting Started
Getting Started Carefully remove your radio from the box. You may wish to store the packaging for future use. What can you find inside the box Main unit Instruction manual Power adapter Positioning your Radio Place your radio on a flat / stable surface that is not subject to vibrations. Avoid the following locations ... -
Page 6: Manual Tune
the memory of your radio. If you have moved your radio to another location, e.g.: if you go on holiday, then it’s also a good idea to carry out a manual scan. In DAB mode, press and hold the ‘Scan’ button to begin a search for stations. The display will change to ‘Scanning...’. -
Page 7: Dynamic Range Control (Drc)
Dynamic range control (DRC) There are 3 levels of compression: DRC Off - no compression. This is the default setting. DRC Low - medium compression. DRC High - maximum compression. 1. Press and hold the ‘Info/Menu’ button until <Full scan> is displayed. 2. -
Page 8: Store Station
Station name or frequency This shows the station name and frequency. Audio mode There are two type of audio mode, they are ‘Stereo’ and ‘Mono’ Note: You may wish to select ‘Stereo’ if you are listening to your radio using headphones. When ‘Stereo’... -
Page 9: Using The Alarm
2. The product will be in pairing mode and a pairing symbol on the first line of the display will flash for up to 3 minutes. 3. On your smart device that you would like to connect to your radio via Bluetooth, turn on Bluetooth connectivity and ensure that it is ‘discoverable’. -
Page 10: Stop The Alarm
Note: If you choose DAB or FM as the sound source, you are prompted to select the station you Last Listened to or one of your preset radio stations. Use the ‘Tune -’ and ‘Tune +’ buttons to scroll through the available options. -
Page 11: Backlight
9. The ‘Year’ will flash. Use the ‘Tune -’ and ‘Tune +’ buttons to display the year. Press the ‘Select’ button. ‘Time Saved’ is displayed and then returns to <Set Time/Date>. 10. You can now use the ‘Tune -’ and ‘Tune +’ buttons to scroll through the other options available. Press the ‘Select’... -
Page 12: Specification
Specification Description: DAB/FM Radio with Bluetooth Speaker Frequency range: Bluetooth: 2.4GHz DAB: Band III, 174 MHz to 240 MHz FM: 87.5 MHz to 108 MHz Power adaptor: Output DC 6V 1A. Input 100-240V 50/60Hz. Batteries: 4 x AA non-rechargeable batteries (Not included) Display: 2 x 16 characters LCD display with backlight... -
Page 13: General Information
This product is guaranteed for 1 year from the date of original purchase against mechanical and electrical defects. You will get extra 2 years warranty period by registered your product within 30 days after purchase. Please fill in required information on the warranty card and email back to cs@smith-style.com within 30 days of purchase.


Need help?
Do you have a question about the Retro H1 and is the answer not in the manual?
Questions and answers