Advertisement
Quick Links
Advertisement

Related Manuals for parks audio Tube st35

Summary of Contents for parks audio Tube st35
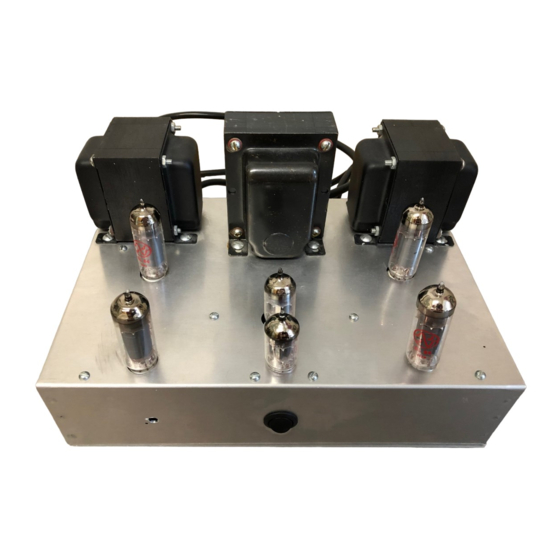
- Page 1 st35 power amplifier manual the diy tube series...
-
Page 2: Warranty Information
Lethal voltages exist in the capacitors even after unit is powered down, so wait at least one hour to after unplugging to allow charge to dissipate. Warranty Information All goods purchased from Parks Audio LLC have a thirty (30) day warranty from the date of purchase against defects. - Page 3 Preparation Before assembly, some preparation needs to done. Parts must be purchased, a work area needs set up and chassis decisions should be made. The axiom haste makes waste has never been more true. Make sure your chosen transformers and the board will fit comfortably using the chassis of your choice.
- Page 4 4. Stuff D1 and D2. Mind the orientation of the cathode, which is represented by a stripe on both the silkscreen and the diode s body. 5. Stuff C5,C6,C7 & C8. Mind the polarity. The board has + symbols to show where the positive terminal from the capacitor should be placed.
-
Page 5: Adjusting Bias
1. >10M 2. >10M 3. 28.3K [1 ohm] 1. >10M 2. >10M 3. 28.3K [1 ohm] 1. >10M 2. >10M 3. GND 1. >10M 2. GND 1. >10M 2. GND Initial Settings: Feedback and Bias WARNING: Do these adjustments with the unit off and unplugged, as well as having had one hour to bleed voltage from the filter caps. - Page 6 measure 400 ohms to ground. 4) Then probe your DMM from V6 pin 3 (the cathode) to ground. Adjust R25 until you measure 400 ohms to ground. WARNING: The following is done while the unit is ON and IDLE. Take care and follow proper high voltage safety rules.
- Page 7 35. Radio Shack has a 100k Alps stereo pot that many people use. Each channel must have its own control, so either a stereo pot or two single pots must be used. The pot connections will be: -pin 1 to RCA audio IN -pin 2 (the wiper) to J6-1 or J7-1 (depending on channel) -pin 3 to J6-2 (GND) or J7-2 (GND) To determine which pin is which, use a DMM and crank the volume pot fully...
- Page 8 diytube Stereo 35 Rev E PCB Parts Revised: 8/12/2013 Tip: Put a dot in the checkbox if you have the part already as a quick reference when ordering parts. out the checkbox when you have installed the part on the PCB. Item Reference Part...
- Page 9 Zener Mod: Omit R17, R20, R23 & R26. Sub the following: R18,R21,R24,R27 10V zener 2% 78-BZX85B10-TAP 0.10 R19,R22,R25,R28 100 ohm Pot 72-T93YB-100 1.58 Notes: - C14 & C15 are input coupling capacitor footprints that are PCB jumpered. These can be cut open and used if DC blocking is needed. - R36 &...
- Page 10 diytube Stereo 35 Rev E Chassis Parts Revised: 8/12/2013 Item Reference Part Mouser Part Cost _______________________________________________________________________ Neon Power Switch 112-R13-66B-G 1.38 IEC Power w/ Fuse 161-R3014-E 2.19 2A Midget Fuse 504-GMA-2 0.48 3-Prong AC cord 545-P004-006 3.99 ...
- Page 11 diytube Stereo 35 Rev E Tubes & Transformers Revised: 8/12/2013 Item Reference Part Mouser Part Cost _______________________________________________________________________ 12AX7/ECC83 12ax7tesla $10.95 12AU7/ECC82 12au7 $11.95 V3,V4,V5,V6 6BQ5/EL84/6p14p el84jjmq $44.99/quad V1-V6 9pin PCB Socket 9pinpccer $2.35 (0.750 diameter) Transformers are from Triode Electronics, Mouser and Edcor respectively. ...
- Page 12 V3 EL84 J2 Output Transformer Hookup R51 100 R47 1K 0.1uF J7 Left Channel Input 475K PF left 470uF 6.3VAC B 6.3VAC A 150K 475K 47.5K 33pF 0.22uF 470uF R3 475K R52 100 0.1uF R48 1K R5 1K NF left 18pF V4 EL84 PF left...
- Page 13 R34 & R35 can be subbed with a two pole connector (571-14376644) and a small choke (1 or 1.5H and around 50 ohms DCR), e.g. a Hammond 546-158SA or Triad C-24X. 320V D1 UF4007 380V B+ 100, 2W D2 UF4007 6.8K, 2W 100, 2W CON10...
- Page 14 Connect directly to chassis. green 120VAC white black black red/yellow black SW1: Connect pin 1 to the fuse, pin 2 to the primary and pin 3 to brown J1-10, as the neon bulb is in parallel to the primary winding. diytube brown/white green...
- Page 15 Connect directly to chassis. green 120VAC white black Edcor XPWR005-120 Power Transformer black red/yellow black SW1: Connect pin 1 to the fuse, pin 2 to the primary and pin 3 to brown J1-10, as the neon bulb is in parallel to the primary winding. diytube brown/white green...
- Page 16 9.250 1.000 1.260 3.480 0.300 4.625...
Need help?
Do you have a question about the Tube st35 and is the answer not in the manual?
Questions and answers