Table of Contents
Advertisement
Quick Links
LANCERTECH
Motorcycle Dash Cam
LT-510 User Manual
Thank you very much for purchasing "Motorcycle-Dedicated Dash Cam LT-510".
Please read this user manual carefully before using product.
Also, please keep this manual in a safe place to ensure your continued patronage. If
you have a question, please contact the support center.
Warranty Explanation
Support Center
Thank you very much for purchasing our product.
This warranty provides the warranty service for the above products under the
following conditions. The warranty card that is not described in the entry will be void,
so please check with the entry and if there are any leaks, please contact the support
center immediately.
Email:
service@lancertech.cn
Product Warranty
Warranty period:
12 months from the date of purchase (for main unit)
6 months from the date of purchase (for accessories)
1
Advertisement
Table of Contents

Subscribe to Our Youtube Channel
Summary of Contents for LANCERTECH LT-510
- Page 1 Motorcycle Dash Cam LT-510 User Manual Thank you very much for purchasing "Motorcycle-Dedicated Dash Cam LT-510". Please read this user manual carefully before using product. Also, please keep this manual in a safe place to ensure your continued patronage. If you have a question, please contact the support center.
-
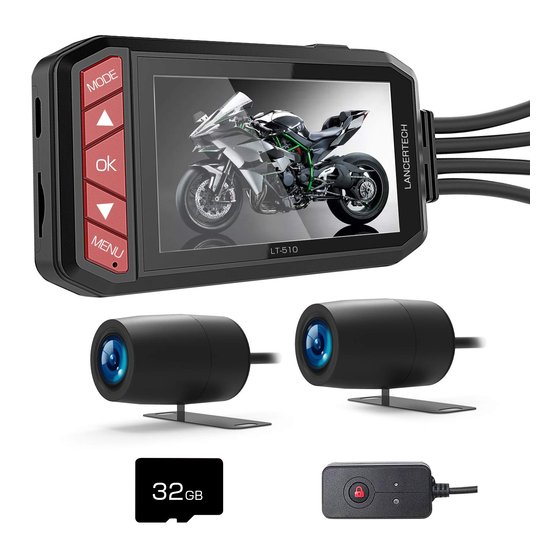
Page 2: Package Contents
Package Contents Ensure the included items is completed before using this machine. 1.Main Unit ×1 2.Remote controller ×1 3.Power Cable ×1 4.Test Power Cable(Micro USB Cable) ×1 5.Front Camera ×1 6.Rear Camera ×1 ※The front and rear cameras can be switched for general purpose use. 7.Micro SD Card ×1 Component Name 1/10.LED Indicator... -
Page 3: Interface Description
Interface Description It can be charged using a commercially available Micro USB Port Micro USB cable and AC adapter (Certified 5V 2.0A). ※ Don’t suggest connect to PC. 8 128GB micro SD card supported. Micro SD Card Slot ※ Class10 recommended About Micro SD Card Don’t use any other micro SD card than specified. -
Page 4: Description Of Button Function
Description of Button Function 1.Power ON/OFF Press and hold for about 3 seconds to turn on / off the power. Power Button 2.Screen Saver Short press while in the power on mode to turn on / off the display. Switching Mode Button Mode Button Short press to switch to playback mode while recording is stopped. -
Page 5: Setting Menu
Setting Menu Recording Resolution 1920×1080(★);1280×720 Static Image Resolution 1M/2M/5M(★)/8M 1 min (★) / 3 mins / 5 mins / 10 mins ※ 1 min Loop Recording recommended High (★) / Medium / Low / Off Microphone Volume Speaker Volume High (★) / Medium / Low / Off Simplified Chinese, Traditional Chinese, English (★), Language Japanese, Indonesian, Vietnamese, Spanish... -
Page 6: Connection Method
Connection Method 接続方法 Camera① Camera② Remote Controller Power Cable Camera① Camera② Red(ACC) Remote controller Black(GND) How to connect by cable Red(ACC) ● Connect to accessory power supply (+) or generates 12V voltage when the ignition key is ON Earth ● Black(GND)... -
Page 7: Camera Angle Adjustment
Camera Angle Adjustment It is necessary to adjust the shooting angle of the camera lens depend on actual situation. 1. Turn the camera lens protection cap Rotate Lens Protection Cap counter clockwise and loosen the camera lens protection cap. 2. Please make the camera supporter movable, and rotate the lens to an appropriate angle while comparing the display on the LCD monitor. -
Page 8: Specification
Specification Model LT-510 Viewing Angle 130°Wide Angle 2 Million Pixel Color CMOS Recording resolution 1920×1080/1280×720 Monitor 2.7 inch LCD, 960 * 240 Recording Method Normal Recording / Emergency Recording / Shooting Recording file 1 min / 3 mins / 5 mins / 10 mins... -
Page 9: Troubleshooting
Trouble Shooting Please try the following items when you meet troubles in using, if it is still couldn't be improved.Please contact the service center. At such time? Please check here Power on problem ●Make sure that the power is connected properly and there is no interruption.
Need help?
Do you have a question about the LT-510 and is the answer not in the manual?
Questions and answers