Table of Contents
Advertisement
Quick Links
Installation Instructions
Please read these instructions and warnings thoroughly before beginning installation and retain for future reference.
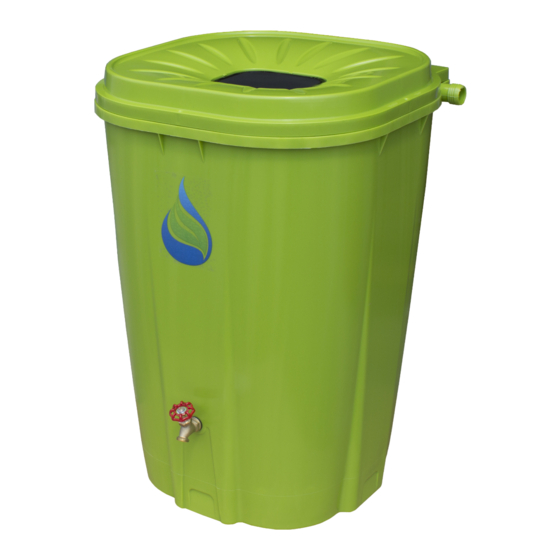
INCLUDED
•
Rain barrel body
(A)
•
Rain barrel lid
(B)
•
Mesh filter (preinstalled in lid) (C)
•
1 overflow hose and 1 hose clamp
•
1 spout, 1 rubber gasket, 1 nut
•
4 screws
Step 1
Locate
Choose a location below a downspout for your rain barrel. The location must have level, firm
ground. A 3'x3' paving stone can be used to provide stability. Avoid locations near ground-level
basement windows or window wells.
Step 2
Assemble
Put the rubber gasket on the spout and place it through the hole at the front of the barrel.
Thread the nut onto the back of the spout from inside the barrel.
Hold the nut in place with a wrench and hand tighten only. It only
needs to be tight enough to prevent water leakage. Use caution as
over-tightening can crack the barrel.
Step 3
Cut Downspout
Place the barrel beside the downspout to measure and mark your re-
quired cut. Make sure to allow enough room for the barrel, lid and elbow
spout. Wearing safety glasses and gloves,
cut the downspout using a hacksaw.
Attach your existing elbow spout (F) to the new
downspout end.
Step 4
Overflow
Choose which side overflow spout you will use. Both spouts
are blocked by a plastic disc by default. Remove the disc by
inserting a slot screwdriver or chisel into the overflow tube from
the outside, and gently tap with a hammer around the edges
of the disc until it pops free. Attach the overflow hose using the
hose clamp and a slot screwdriver. Direct the other end of the
hose to wherever your downspout originally drained, which
should be either a splash pad or sewer drain.
Step 5
Attach Lid & Place
Place the lid on the barrel and affix using the four provided
screws (#6 x 1.5") and a crosshead screwdriver. Hand-tighten
only. Over-tightening may crack the plastic. Place assembled bin
under downspout and ensure it is level and stable.
(D)
(E)
FreeGarden
NEEDED
•
Slothead and Phillips (crosshead) screwdrivers
•
Wrench
•
Tape measure and marker
•
Safety glasses, safety gloves
•
Hacksaw
•
Hammer or chisel
®
RAIN
Advertisement
Table of Contents

Summary of Contents for FreeGarden RAIN
- Page 1 ® FreeGarden RAIN Installation Instructions Please read these instructions and warnings thoroughly before beginning installation and retain for future reference. INCLUDED NEEDED • Rain barrel body • Slothead and Phillips (crosshead) screwdrivers • Rain barrel lid • Wrench • Mesh filter (preinstalled in lid) (C) • Tape measure and marker • 1 overflow hose and 1 hose clamp •...
- Page 2 Use only for watering plants and cleaning of items that may allow a child to climb above, on, or of the installation are critical; the platform outdoor items not related to eating or drinking. in the rain barrel. must be level and provide robust support for a filled rain barrel. Warning and Limitations Installation Hazards Electrical Hazard Improper installation and maintenance Rain barrels are for water collection and out- If the downspout contains heating cables, there may result in property damage, bodily door use only. No other uses are recommend- is a potential electrocution or fire hazard during injury and/or death. Enviro World ed. Downspout edges may be sharp. Wear installation. Ensure power is disconnected at Corporation is not responsible for protective gloves when cutting and handling the electrical panel before manipulating heated any damages or injuries caused by or downspouts. Always wear safety glasses when downspouts. Consult a qualified electrician for...
Need help?
Do you have a question about the RAIN and is the answer not in the manual?
Questions and answers