Table of Contents
Advertisement
Quick Links
Advertisement
Table of Contents

Summary of Contents for Tecmar Technologies 5525ES
- Page 1 Page i Friday, April 25, 1997 3:41 PM QIC Tape Drive Installation and User’s Guide Models 5525ES, E5525ES, 51000HT, E51000HT, 52000HT, and E52000HT PN SQICUGM-EN2 Tecmar Technologies, Incorporated 1900 Pike Road, Bldg. E, Longmont, Colorado 80501 (303) 682-3700 Fax: (303) 776-7706...
- Page 2 qiccover.fm Page ii Friday, April 25, 1997 3:41 PM INSTALLATION NOTE ***NO SOFTWARE UPGRADES REQUIRED*** When installing 52000 or E52000 QIC drives, the drives respond to system inquiries as model 51000. When selecting drivers for the 52000, use the 51000 driver provided with the software.
- Page 3 COPYRIGHT NOTICE Copyright 1996 by Tecmar Technologies, Inc. All rights reserved. This item and the information contained herein are the property of Tecmar Technologies Corporation. No part of this document may be reproduced, transmitted, transcribed, stored in a retrieval system, or translated into any language or computer language in any form or...
- Page 4 qiccopy.fm Page iv Friday, April 25, 1997 3:33 PM REGULATORY APPROVALS UNDERWRITERS LABORATORIES INC. This device complies to UL Bi-national Standard 1950 3rd edition for Safety of Information Technology Equipment including Electrical Business Equipment. CANADIAN STANDARDS ASSOCIATION This device complies to UL Bi-national Standard 1950 3rd edition for Safety of Information Technology Equipment including Electrical Business Equipment.
- Page 5 qiccopy.fm Page v Friday, April 25, 1997 3:33 PM radioelectrique etabli par le ministere des Communications du Canada. L’exploitation faite en milieu residentiel peut entrainer le brouillage des reception radio et television, ce qui obligerait le proprietaire ou l’operateur a prendre les dispositions necessaires pour en eliminer les causes.
- Page 6 Phone (303)682-3741 Fax (303)776-9788 Company Rep. Keith A. Goshia Declare under sole responsibility that the Model #s 5525ES, E5525ES, 51000HT, E51000HT, 52000HT and E52000HT to which this declaration relate, meet the essential health and safety requirements and are in conformity with the relevant EC directives listed below using the relevant...
-
Page 7: Table Of Contents
qicman~3.fm Page vii Friday, April 25, 1997 4:03 PM Contents Chapter 1 Introduction to the QIC Drive ........1 Product Description............2 QIC Model Numbers............3 Chapter 2 Installation Procedures ........... 5 Unpacking and Handling ..........6 Installing an Internal Drive ..........7 Preparing the Computer .......... - Page 8 qicman~3.fm Page viii Friday, April 25, 1997 4:03 PM Installing/Removing Resistor Packs ......26 Setting SCSI ID and Termination Power ......28 Setting the SCSI ID............. 28 Setting SCSI Bus Termination and SCSI Bus Termination Power ..........29 Removing the Cover from an External Drive....31 Removing and Installing the Bezel .........
- Page 9 qicman~1.fm Page ix Friday, April 25, 1997 3:44 PM Figures Internal and External QIC Drives ........2 LED Indicators..............16 Write Protect Setting............18 Docking and Cleaning the Heads........21 SCSI Bus Termination ............ 25 Installing Jumpers on a Pin Block........26 Removing Resistor Packs..........
- Page 10 Page x Friday, April 25, 1997 4:01 PM Tables SCSI ID and SCSI Bus Termination Default Settings ..9 LED Indicators..............16 Recommended Data Cartridges ........17 Setting the SCSI ID for the 5525ES, 51000HT and 52000HT ..............29 SQICUGM-EN2 Rev. A...
- Page 11 qicpref.fm Page xi Friday, April 25, 1997 4:17 PM Preface Purpose of this Manual This manual provides step-by-step installation instructions, and information required for ongoing use and maintenance of the QIC drive. This manual is written for the installer and user of this equipment. Organization The following information is contained in this manual.
- Page 12 qicpref.fm Page xii Friday, April 25, 1997 4:17 PM Where to Get Help Technical support is available from the following sources: Technical Support: 1 (800) 992-9916 Sales: 1 (800) 422-2587 Fax Back Service: 1 (303) 776-1085 Internet: www.Tecmar.com FaxBack is a service that allows you to select documents from a catalog, and receive those documents by fax.
-
Page 13: Introduction To The Qic Drive
qicc1.fm Page 1 Friday, April 25, 1997 12:36 PM Chapter 1 INTRODUCTION TO THE QIC DRIVE This chapter provides a brief description of the QIC tape drive, its intended applications and the model numbers covered by this manual. SQICUGM-EN2 Rev. A... -
Page 14: Product Description
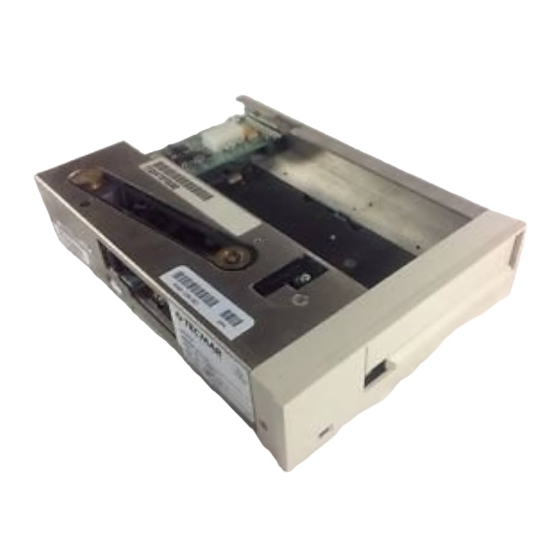
qicc1.fm Page 2 Friday, April 25, 1997 12:36 PM Product Description The Tecmar Quarter-Inch Cartridge (QIC) tape drive is a high-capacity, high- performance, reliable tape device that provides up to 2.5 gigabytes of removable data storage on a tape cartridge. The quarter-inch cartridge provides economical data storage for PCs and servers. -
Page 15: Qic Model Numbers
Page 3 Friday, April 25, 1997 12:36 PM QIC Model Numbers Several QIC tape drive models are available. This manual applies to the following QIC drive models: • 5525ES • E5525ES • 51000HT • E51000HT • 52000HT • E52000HT... - Page 16 qicc1.fm Page 4 Friday, April 25, 1997 12:36 PM SQICUGM-EN2 Rev. A...
-
Page 17: Installation Procedures
qicc2.fm Page 5 Friday, April 25, 1997 12:40 PM Chapter 2 INSTALLATION PROCEDURES This chapter provides step-by-step instructions for 1) unpacking the tape drive, 2) installing an internal tape drive and 3) installing an external tape drive. SQICUGM-EN2 Rev. A... -
Page 18: Unpacking And Handling
qicc2.fm Page 6 Friday, April 25, 1997 12:40 PM Unpacking and Handling CAUTION: Electro-static discharge can damage or destroy the electronic components in the tape drive. Make sure you have contacted a grounded surface such as the computer chassis immediately prior to handling the tape drive. -
Page 19: Installing An Internal Drive
qicc2.fm Page 7 Friday, April 25, 1997 12:40 PM Installing an Internal Drive Complete all steps in this section to install a QIC drive in your PC or server. Refer to your computer user’s guide and host adapter documentation as required. If you have an external model, go to “Installing an External Drive”... -
Page 20: Preparing The Qic Drive
qicc2.fm Page 8 Friday, April 25, 1997 12:40 PM Preparing the QIC Drive Touch the power supply to discharge any static electricity on your body. Caution: Handle the drive with care; do not expose the unit to excessive shock. Remove the drive from its anti-static bag. The QIC drive is shipped with a 5-1/4-inch bezel (plastic front plate and drive door). -
Page 21: Installing The Drive, Cabling And Host Adapter Board
qicc2.fm Page 9 Friday, April 25, 1997 12:40 PM Table 1. SCSI ID and SCSI Bus Termination Default Settings Variable Setting Notes SCSI ID Can be set to 0-6. 0 and 1 are usually used for hard disks. 4 is recommended. Internal SCSI bus termination Enabled If this is not the last device on the SCSI bus, termination must be disabled. - Page 22 qicc2.fm Page 10 Friday, April 25, 1997 12:40 PM Install the power connector from the power supply to the LINE ART TO BE nylon 4-pin connector on the COMPLETED FOR FINAL back of the drive. The connectors are shaped so as to insure proper orientation.
-
Page 23: Completing The Installation
qicc2.fm Page 11 Friday, April 25, 1997 12:40 PM Push the tape drive into the computer housing and install fasteners to secure the tape drive in its bay. Connect the free end of the SCSI cable to the SCSI connector on the host adapter. NOTE: Make sure pin 1 of the cable is connected to pin 1 of the SCSI connector. -
Page 24: Installing An External Drive
qicc2.fm Page 12 Friday, April 25, 1997 12:40 PM Installing an External Drive Complete all steps in this section to attach an external QIC drive to your PC or server. Refer to your computer user’s guide and host adapter documentation as required. -
Page 25: Installing The Cabling And Terminator
qicc2.fm Page 13 Friday, April 25, 1997 12:40 PM Position the drive in either the horizontal or vertical position. Make sure the rubber feet are down. CAUTION: All units are equipped with a fan exhaust vent. Make sure the drive is positioned to provide unobstructed ventilation;... -
Page 26: Setting The Scsi Id
qicc2.fm Page 14 Friday, April 25, 1997 12:40 PM Setting the SCSI ID NOTE: Any SCSI setting 0 through 6 can be selected, provided it is not being used for another SCSI device. 0, 1 and 6 are usually reserved for hard disk drives. 4 is the recommended setting. -
Page 27: Using The Qic Drive
qicc3.fm Page 15 Friday, April 25, 1997 2:24 PM Chapter 3 USING THE QIC DRIVE This chapter provides information needed in daily use of the QIC drive, including interpretation of the LED indicators, use and care of the cartridges, and required cleaning instructions. -
Page 28: Led Indicators
qicc3.fm Page 16 Friday, April 25, 1997 2:24 PM LED Indicators The front panel of the internal QIC drive contains one LED (light-emitting diode) indicator. The front panel of the external QIC drive contains three LED indicators. The LEDs display drive activity and drive power status. Figure 2 shows the locations of the LEDs. -
Page 29: Data Cartridges
Storage capacity is shown at the intersection of each drive model number and media model number. Table 3. Recommended Data Cartridges Tecmar Media by Model Number Drive Model DC6250 DC6525 DC9120 DC9250 5525ES 250MB 525MB — — E5525ES 250MB 525MB —... -
Page 30: Write Protect
qicc3.fm Page 18 Friday, April 25, 1997 2:24 PM • Store the cartridge at moderate temperatures (between 40 and 115 degrees F). • If the cartridge has been stored at an extreme temperature, allow it to return to room temperature before using. •... -
Page 31: Removing A Cartridge
qicc3.fm Page 19 Friday, April 25, 1997 2:24 PM with the metal plate to the right, and the tape door and write protect switch down. Then push the cartridge into the drive and continue pushing until you hear and feel a distinct click. Quickly release the cartridge and it will slide out partially to the head docking position. -
Page 32: Cleaning The Heads
qicc3.fm Page 20 Friday, April 25, 1997 2:24 PM Cleaning the Heads The tape read/write heads can be cleaned using either of two methods: using a cleaning cartridge kit, or using Freon TF and a swab. Each of these methods are described here. -
Page 33: Docking And Cleaning The Heads
qicc3.fm Page 21 Friday, April 25, 1997 2:24 PM Figure 4. Docking and Cleaning the Heads SQICUGM-EN2 Rev. A... - Page 34 qicc3.fm Page 22 Friday, April 25, 1997 2:24 PM SQICUGM-EN2 Rev. A...
- Page 35 qicaa.fm Page 23 Wednesday, April 23, 1997 6:07 PM Appendix A SETTING THE SCSI ID, TERMINATION AND TERMINATOR POWER This appendix contains information that will allow you to set the SCSI ID, and properly configure SCSI termination and terminator power for the SCSI bus on which the QIC drive is installed.
-
Page 36: About Scsi Bus Termination
qicaa.fm Page 24 Wednesday, April 23, 1997 6:07 PM About SCSI Bus Termination This section provides a brief tutorial about how to configure a system to provide proper termination on a SCSI bus. A single SCSI host adapter can support up to six other SCSI devices. The devices can be linked directly to the host adapter or, more commonly, linked to each other in a daisy chain. -
Page 37: Scsi Bus Termination
qicaa.fm Page 25 Wednesday, April 23, 1997 6:07 PM Figure 5. SCSI Bus Termination SQICUGM-EN2 Rev. A... -
Page 38: About Jumpers And Resistor Packs
qicaa.fm Page 26 Wednesday, April 23, 1997 6:07 PM About Jumpers and Resistor Packs SCSI bus ID and terminator power are set or configured using one or both of the following methods: • Installing or removing jumpers on pin blocks •... -
Page 39: Removing Resistor Packs
qicaa.fm Page 27 Wednesday, April 23, 1997 6:07 PM Before removing any components, refer to “About SCSI Bus Termination” in this appendix for termination information specific to your model number. If removal is required, use a narrow, flat tool such as a flat-blade screwdriver (refer to Figure 7) to gently pry each resistor pack up and out of its socket. -
Page 40: Setting Scsi Id And Termination Power
qicaa.fm Page 28 Wednesday, April 23, 1997 6:07 PM Setting SCSI ID and Termination Power The internal QIC drives allow you to set the SCSI ID by installing jumpers on a pin block located at the back of the drive, and termination power by installing jumpers on a pin block located on the underside of the drive. -
Page 41: Setting Scsi Bus Termination And Scsi Bus Termination Power
Page 29 Wednesday, April 23, 1997 6:07 PM Table 4. Setting the SCSI ID for the 5525ES, 51000HT and 52000HT Jumpers ON/OFF To set SCSI Set Jumpers Pins 1 & 2 Pins 3 & 4 Pins 5 & 6... -
Page 42: Qic Drive Termination And Terminator Power Components
qicaa.fm Page 30 Wednesday, April 23, 1997 6:07 PM termination power is supplied by the interface via pin 25 of the host. The QIC drive is shipped in its default configuration with termination power supplied by the drive rather than by the host. Figure 9. -
Page 43: Removing The Cover From An External Drive
qicaa.fm Page 31 Wednesday, April 23, 1997 6:07 PM Removing the Cover from an External Drive To gain access to the tape drive circuit board, remove the cover from the drive as follows. Place the drive horizontally and upside down on a flat surface. Facing the front of the drive, remove the rubber foot closest to you on the left side. -
Page 44: Removing The Cover From An External Drive
qicaa.fm Page 32 Wednesday, April 23, 1997 6:07 PM Figure 10. Removing the Cover from an External Drive SQICUGM-EN2 Rev. A... - Page 45 qicab.fm Page 33 Friday, April 25, 1997 12:33 PM Appendix B REPLACING THE BEZEL This appendix describes how to remove a bezel and replace it with another bezel (of another color). SQICUGM-EN2 Rev. A...
-
Page 46: Removing And Installing The Bezel
qicab.fm Page 34 Friday, April 25, 1997 12:33 PM Removing and Installing the Bezel Remove five fasteners from the bezel: three from along the bottom front edge, and one from either side edge. Lift the bezel off the drive. To install a bezel, reverse this procedure. CAUTION: Do not over-tighten the screws when installing the bezel.
Need help?
Do you have a question about the 5525ES and is the answer not in the manual?
Questions and answers