Table of Contents
Advertisement
Advertisement
Table of Contents

Subscribe to Our Youtube Channel
Summary of Contents for Hysnox HY-01
-
Page 2: Table Of Contents
HY-01 bluetooth headset intercom Table of Contents 1.Introduction..........................1 1.1 Product Descriptions......................1 1.2 Main Functions........................2 2.Package Contents........................3 3.Installation Procedure......................4 3.1 Installation method with plastic clamp................4 3.3Use a screw plug for the headphone cable....................5 3.2 Installation method with velcro clamp................5 4.Quickly remove Bluetooth headset........................6 5.Functions and operation of buttons........................6... -
Page 3: Introduction
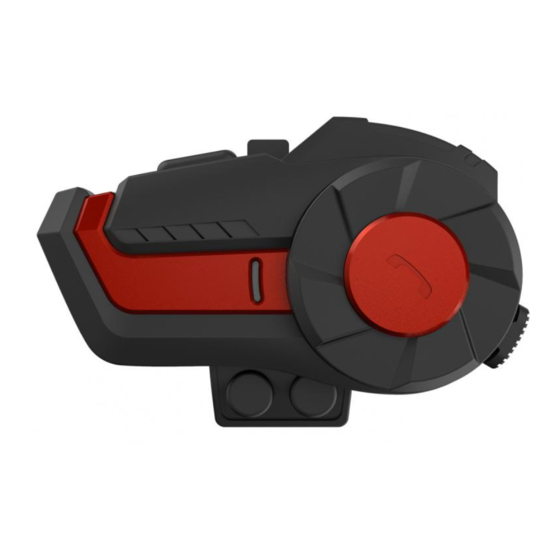
1. Introduction HY-01 is a full-duplex intercom Bluetooth headset for 1.1 Product introduction motorcycle riders with the design that enables clear and safe wireless communication during riding. Compatible with all Bluetooth mobile phones and any type of helmet, our products... -
Page 4: Main Functions
(1) After paired with a mobile phone, our products can answer 1.2 Main Functions incoming calls, reject calls or hang up calls within a visible range of 10 meters; (2) Our products can maintain the full-duplex intercom between the helmet Bluetooth headsets at a distance of up to 1000 meters. -
Page 5: Package Contents
2. Package Contents 1. Bluetooth Device 6.Headphone Velcro 2. Microphone&Ear Speakers 7.USB Cable 3. Velcro Clamp 8. Screw Driver 4. Hook and loop fasteners 9.Manual 5. Clamp... -
Page 6: Installation Procedure
3. Installation Procedure 3.1 Installation method with plastic clamp ①Loosen the screws on the back of clamp with the provided screw driver. ②Open the lining of helmet,insert the clamp in the proper position on the left of helmet and fasten the screw(overly fastened screw can damage the clamp) ③Slide the receiver down into the slots on the headset clamp mount.Make sure that it is locked in securely. -
Page 7: Use A Screw Plug For The Headphone Cable
3.2 Installation method with velcro clamp You can directly use the Velcro to mount the bluetooth device on the edge of helmet. See the following pictures. ①Tear off the white paper on velcro and stick the velcro onto clamp&helmet ②Stick the clamp with velcro onto helmet ③Slide the receiver down into the slots on the headset clamp mount.Make sure that it is locked in securely. -
Page 8: Quickly Remove Bluetooth Headset
①Remove the headphone 4. Quickly remove Bluetooth headset ②Remove the device from clamp(along the arrow direction in fingure) ③Remove the clamp from helmet(along the arrow direction in fingure) 5.Functions and operation of buttons 5.1 Turning on / off the unit On:Press the On/Off Button for 3 seconds until you hear a “Di”.The blue light will flash 3 times swiftly and then turn into regular intervals. -
Page 9: Phone Controls
5.2 Phone Controls ①To answer a call – Briefly press the Multi-function button once. ②Auto receive call – Dependant on the phone the unit will automatically answer the call after 15 seconds of ringing. ③To reject a call – Press the Multi-function button and hold until you hear a “Du”... - Page 11 Warranty Service Warranty Service: 2 years This card is a product warranty Certificate 合 格 证 card, please keep it properly; Model: Please attach a receipt to the Inspector warranty card to prove the date Date of manufacture: of purchase. Date of purchase:...
-
Page 12: Music Controls
5.3 Music Controls ①Play / Pause – Briefly press the Multi-function button once. ②Next Track – Turn the knob counterclockwise to select the next music. ③Previous Track – Turn the knob clockwise to go back to the previous music. ①After turn the unit on, double press the Multi-function button 5.4 To Start FM radio to start FM radio.When there is no call or intercom. -
Page 13: To Adjust The Volume
5.6 To Adjust the Volume Rotate the knob counterclockwise and hold it down to increase the volume, rotate the knob clockwise and hold it down to decrease the volume, let go when the volume is adjusted to the right level, and you can hear a "thump" sound when you adjust the volume. -
Page 14: Pairing Method
③Open the Bluetooth function on your mobile phone. ④Bluetooth on your phone will search the device until you see on your phone,when you see the blue light Hysnox flashes regularly,it means pairing is successful.(Already paired ⑤Click Hysnox... -
Page 15: Pairing Between Three Headsets
Note: When 2 bluetooth devices need to pair for intercom, also need to connect mobile phone, you should following the instruction: a: Firstly, two bluetooth devices need to pair for intercom successfully,(see the above instruction), then turn off the two bluetooth devices. -
Page 16: Function Priority
Level 1: Phone 7.Function priority Level 2: Bluetooth intercom Level 3: Music/FM radio 8.Technical parameters of product Working distance:1000 meters Frequency:2.4GHz Supports: A2DP and AVRCP Supported Bluetooth Profiles : Bluetooth headset and hands free profiles with automatic detection Operating Range: Up to 10m for cellphones Battery Type:... -
Page 17: Battery And Charging Instructions
9.Battery and charging instructions Before using this device, Please charge the headset with charger. Please ensure that the battery is fully recharged when you first time use it.We have provided you with the ability to charge the system via the USB port of your computer or if you are away on a trip, you can use Multi-voltage USB power adapter. - Page 18 10.Note ①If you don't use the headset for one month or more, in order to protect the headset lithium battery, please charge the headset once every two months (the damage caused by incorrect charging will not be guaranteed); ②The suitable storage temperature of this product is -20℃ to 50 ℃...
Need help?
Do you have a question about the HY-01 and is the answer not in the manual?
Questions and answers
Muchas gracias , tengo una consulta , cuando estoy escuchando musica a los 3 minutos se apaga la musica y escucho tono y para volver a la musica me toca a pagarlos y volver a conectarlo ?por que pasa?