
Summary of Contents for Zenno SS40E
- Page 1 Brushless DC Tubular Motor Operation Manual Tubular Motor Type: SS40E Remote Control Type: ZEN16SA、ZEN16DA...
-
Page 2: Table Of Contents
Table of Content Before Using Safety recautions Name of Each Part Installation Settings Switch Setting Mode / User Mode Switch blind system Set Connection Between Motor and Remote Control Cancel the Connection Switch Between Forward and Reverse Rotations Set Upper and Lower limits Set Group Control Duplicate Remote Control Cancel『... -
Page 3: Before Using
Safety Precautions Before using this product , please read the manual carefully. After reading , please keep this manual properly for future reference. In this manual, the precautions indicated as Warnings and Cautions. Please observe the following precautions to ensure safety. !... -
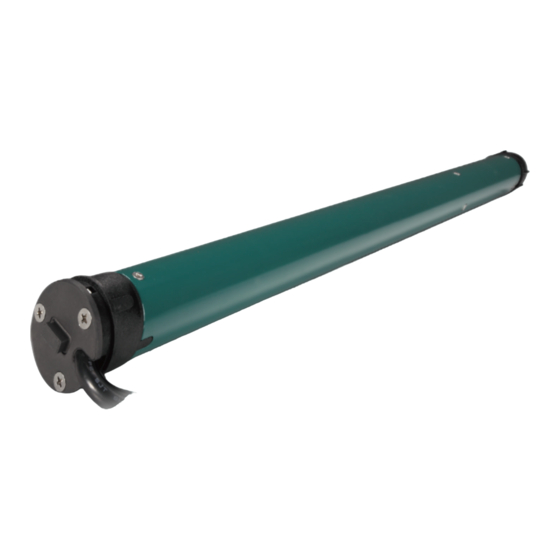
Page 4: Name Of Each Part
Name of Each Part SS40E series Tubular Motor 1. Driving Wheel: It connects the tubular motor to the aluminum tube so that the motor may drive the aluminum tube to rotate. 2. Code Button: It is for setting the communication code between the remote control unit and the tubular motor. - Page 5 ZEN16SA remote control Front side details LCD Screen detail 1. LCD Screen: A. Group channel : 4 group control channels available from G1 to G4. B. Window channel: 16 window channels available from 1 to 16. C. All: to control all channels at the same time. D.
- Page 6 Reverse side details : Duplicate button To duplicate or cancel the remote control : Mode switch To switch between USER MODE and SETTING MODE。 Battery cover ※ Notice: About the remote control: Please do not install the socket at a location that may be exposed to direct sunlight. ...
-
Page 7: Installation
Installation Installation of motorized blinds: 1. Select a suitable aluminum tube Slot size 5 ㎜ 13 ㎜ Cylindrical Molded Molded Aluminum Tube Aluminum Tube Aluminum Tube ATD46 ATD50 Inside diameterφ40 A "plastic ring for ATD50" is required Molded Molded Aluminum Tube Aluminum Tube ATO43... - Page 8 3. Position the Crown pin into the slot. Molded Cylindrical Aluminum Tube Aluminum Tube Position for inserting the Positioning Pin of the Crown 4. Fasten the tube at the motor end with screws (not a necessity, may skip this step) Positions for mounting the screws...
- Page 9 6. Fasten the tube at the idler wheel end with screws (not a necessity, may skip this step). Positions for mounting the screws 7. Install the brackets: Measure a suitable distance for installing the brackets to the target position (in the curtain box or on the wall). 8.
- Page 10 Battery installation 1. Open the battery cover 2. Insert the battery (notice the polarity ○ /○ + - 3. Close the battery cover 4. Battery specification: DC 6V (CR2032) ※ Notice: About the battery The battery provided with the product is prepared for your initial use.
-
Page 11: Switch Setting Mode / User Mode
Switch Setting Mode / User Mode 1. Please switch the remote control to【Setting Mode】when the motor needs settings, and switch to 【 User Mode】 when the motor is ready to be operated. 2. To switch between【Setting Mode】and【User Mode】should be achieved on the remote control. - Page 12 4. Mode Switch: Open the battery cover on the remote control. Toggle the【Mode Selection Switch】located above the battery. Note: It is necessary to use a thin rod to toggle the switch. After finish toggling【Mode Selection Switch】, close the battery cover immediately.
-
Page 13: Switch Blind System
Switch blinds system 1. The tubular motor could operate either【Roller system】or【Venetian system】. 【Roller system】: It could not adjust by degrees on User Mode, but only could on Setting Mode. 【Venetian system】: It could adjust by degrees both on User Mode and Setting Mode. 2. -
Page 14: Set Connection Between Motor And Remote Control
Set Connection Between Motor and Remote Control 1. Switch the remote control to【Setting Mode】。 2. Channel Selection: Press any button of「」 、 「」 、 「<」 、 「>」to select the channel needs to be connected. Press any button of【】 、 【】 、 【<】... -
Page 15: Cancel The Connection
Press【Up】and【Down】simultaneously ; when the motor responds with a “beeping” sound, the code identification process is complete and the remote control is ready to control this motor. Beep Press the【Up】 and【Down】 simultaneously ※ Notice: Unless it is necessary to establish connection again, please do not press the【Code】 for more than seconds. -
Page 16: Switch Between Forward And Reverse Rotations
Switch Between Forward and Backward 1. Switch the remote control to【Setting Mode】。 2. Switch Between Forward and Backward Rotations: Press【Stop】for seconds; when the motor responds with a “beeping” sound, the process for switching between forward and backward rotation is complete. Beep ... -
Page 17: Set Upper And Lower Limits
Set Upper/Lower Limit 1. Switch the remote control to【Setting Mode】。 2. Enter the Upper Limit Setting Mode: Press【Up】and 【Stop】simultaneously; when the motor responds with a “beeping” sound, it enters the Upper Limit Setting Mode. Beep Press【Up】and【Stop】 simultaneously. 3. Set the Upper Limit: ... - Page 18 4. Enter the Lower Limit Setting: Press 【Stop】and【Down】simultaneously; when the motor responds with a “beeping” sound, it enters the Lower Limit Setting Mode. Beep Press【Stop】and【Down】 simultaneously 5. Set the Lower Limit: Use remote control to lift blinds at the target position for setting the lower limit. ...
-
Page 19: Set Group Control
Set Group Control Switch the remote control to【User Mode】。 Press any button of 「」 、 「」 、 「<」 、 「>」to move cursor [ ] to 2. Select Group the target group channels G1 ~ G4 which needs to be executed. The ZEN16SA remote control provides up to 4 groups to perform. - Page 20 Press any button of 「」 、 「」 、 「<」 、 「>」to move cursor [ ] to Select window the target window. Join window Press【Enter】 to join window in this group and the cursor [ ] will stay on the window once it is joined, another flash cursor [ ] will be stand by after the previous window is joined.
-
Page 21: Duplicate Remote Control
Duplicate Remote Control This function allows to duplicate codes from a remote control to another without pressing the "Code" button on motor . 1. Switch the original remote control (RM-A) and the duplicate one (RM-B) to 。 【Setting Mode】 2. Select the channel needs to be copied on RM-A. 3. -
Page 22: Cancel『 Other 』Remote Control
Cancel Other Remote Controls This function works if there are many remote controls connect to one motor, to preserve only one remote control and to cancel the connections between motor and the other remote controls. 。 1. Switch the preserved remote control to【Setting Mode】 2. -
Page 23: Set \ Cancel Preferred Position
Set / Cancel the Preferred Positions 1. Switch the remote control to【User Mode】 。 2. Each motor could set preferred positions exclude the upper and lower limit. 3. Set preferred position: Use remote control to lift blinds to target positions. ... -
Page 24: Operate Preferred Position
Move to Preferred Position 1. After settings, press【Stop】for seconds to move to preferred positions. 2. Movement is different depends on quantity of preferred position: One preferred position: press【Stop】for seconds the blinds will move to this preferred position. Two preferred positions: press【Stop】for seconds the blinds will move to nearest preferred position, press【Stop】for seconds again the blinds will move to another... -
Page 25: Quick Command Guide
Command Quick Reference Mode Switch Page Command Operations Setting Mode Toggle【Mode Selection Switch】to the right P11~12 User Mode Toggle【Mode Selection Switch】to the left Setting Mode Page Command Operations 1. Roller System: Press【Up】and【Enter】for sec. System Switch 2. Venetian System: Press【Down】and【Enter】 for sec. - Page 26 User Mode Page Command Operations 1. Press【Enter】for 3 sec. to enter group control setting mode 2. Select windows and press【Enter】to join Set Group Control P19~20 in the group 3. Move to【OK】then press【Enter】to confirm group setting Press【Stop】and【Enter】 Set Preferred Position Cancel Preferred Press【Stop】and【Enter】...
-
Page 27: Troubleshooting
Troubleshooting Conditions Causes Solutions No Power Check the power supply Not connected with remote control Perform the connection again No reaction Remote control is running out of energy Replace the battery Remote control is damaged Contact the distributor for service. Motor is damaged Contact the distributor for service. -
Page 28: Illustration Of Wiring
Illustration of Wiring The color of wires: ○ :Yellow ○ :Green RJ-14 connector ○ :Red ○ :Black (6P4C) Note: 1.Wire○ is the internal power source of the motor , do not use it for external power supply. ※If any external connection to 27V power source will cause the damage of the motor. 2.After wire○... -
Page 29: Appendix
Appendix Product Specifications: SS40E series Brushless DC Tubular Motor: Power Supply (input):AC 100~230V;50~60Hz. Operating Voltage:DC 27V. Power Consumption:Rating 29W. Net Weight:1.4 ㎏. Dimensions:660 ㎜(L)× 38 ㎜(Dia.). Rotation Speed:N6R22- 22 rpm、N5R27- 27 rpm、N4R34- 34 rpm.
Need help?
Do you have a question about the SS40E and is the answer not in the manual?
Questions and answers