
Related Manuals for Junction Powertrail

Summary of Contents for Junction Powertrail
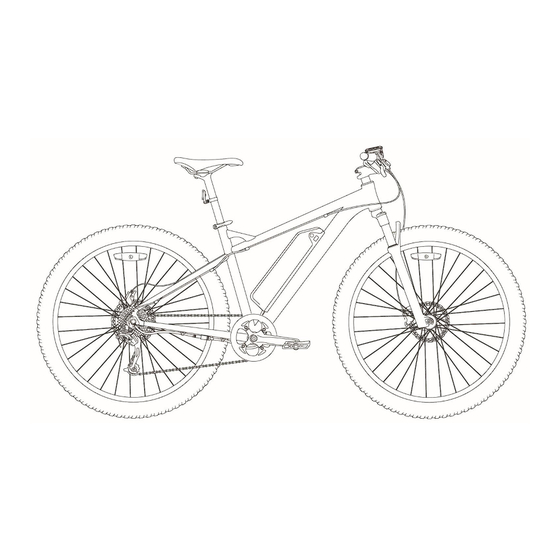
- Page 1 Powertrail Power Assisted Bicycle – User Instruction Manual For assistance or questions regarding this product, please call our customer service at 1-800-268-6407...
-
Page 2: Table Of Contents
Power assist level and modes ..........13 Contents Charging the battery ............. 15 Battery capacity level indicator ..........15 Welcome word ................2 Using the LCD controller............16 Safety Information ............... 2 Positioning the LCD controller ..........16 Quick Start Instructions ............... 4 LCD controller buttons description ........ -
Page 3: Welcome Word
The following symbols will be used Welcome word Safety Information throughout the manual. They represent Congratulations on buying a power Although modern power assisted bicycles important Warnings and Cautions about assisted bicycle! Whether it is to make look a lot like their regular counterparts, the proper handling and operation of your your daily commute to work easier, there is quite a lot of technology behind it... - Page 4 Always use your power assisted Power assisted bicycles Laws and regulations regarding bicycle according to the local laws heavier than most other bicycles. the limitations and use of a power and regulations. Always keep in mind that the assisted bicycle varies among required distance needed for braking may countries and even sometimes among states Don’t...
-
Page 5: Quick Start Instructions
Quick Start Instructions STEP 2: Turn the system on STEP 1: Charge the battery 1. Slide and lock the battery onto its support on the frame. - Mount the bicycle and stand still over it or sit on the saddle with a foot 1. - Page 6 STEP 3: Select your assistance level STEP 4: Start off 1. Press the button on the LCD Controller to switch to a higher 1. Make sure the path in front of you is clear. power assistance mode. 2. Hold on to the handlebar with both hands and push on the pedals. 2.
-
Page 7: System Component Presentation
System component presentation Battery unit 1. Battery casing 6. Key lock 2. Power button switch 7. Key 3. Charge level LED indicators 8. Battery support base Charger unit 4. Charging socket 9. Power cord Charger block 5. USB auxiliary port 10. - Page 8 LCD Controller unit Up Button Motor unit Power Button Rear hub motor shell Down Button Power cord junction cap LCD Screen Power cord coupler Handlebar bracket Battery casing...
-
Page 9: Component Features
Component features LCD controller unit Components technical specs Battery ▪ Built-In LCD screen Charger unit ▪ On / Off control for the system ▪ Voltage: 36V ▪ Power assistance mode control ▪ Converts input electrical current from ▪ Capacity: 10.4 Ah ▪... -
Page 10: Operating Range
Here are some tips to help you reach It is recommended that you plan your Operating Range ride to make sure you can make it back maximum range of a battery charge: The distance you will be able to ride with home on a single charge or have a ▪... -
Page 11: Using Your Power Assisted Bicycle
If you are using a bicycle rack to perform repair or maintenance on any parts of the Using your power assisted bicycle transport your power assisted bicycle power assist system. General handling instructions on your vehicle, make sure it can Only use genuine parts provided by the support the bicycle’s weight. -
Page 12: Turning The System On
If a leakage from the battery occurs, In the event that an error logo shows To turn the power assist system On: avoid touching it as it is corrosive. If up when the LCD screen lights up do 1. First turn the battery power On the liquid gets in contact with your not ride your bicycle. -
Page 13: Removing Or Inserting The Battery
Removing or inserting the battery To Insert the battery: To remove the battery: ▪ Turn the key for half a turn, clockwise (to the right) to lock the battery in ▪ Insert the key into the key lock of the position. -
Page 14: Specific Riding Maneuvers
much smoother acceleration, helping you Specific riding maneuvers Power assist level and modes to keep control over your speed as well as Your power assist system can be used at many levels and on different modes. Get There are some maneuvers that should be to save the battery’s capacity. - Page 15 Level 3 – Intermediate assistance Walk Mode Level 0 – No assistance At this level, there will be no power Maintains a steady speed on variable Use Walk Mode when walking beside your incline surfaces with medium wind bicycle and you’re in need of power assistance coming from the motor.
-
Page 16: Charging The Battery
The operating range (battery To charge the battery: Battery capacity level indicator autonomy) of your bicycle is significantly influenced by the ▪ Capacity 70% or more power assistance level you choose and how you manage it during your ride. For more details on how to extend your ride time, refer to the section Operating Range. -
Page 17: Using The Lcd Controller
Using the LCD controller LCD screen icons description LCD controller commands Turning the system ON or OFF: Positioning the LCD controller Press and hold the Power button for 2 Position the LCD controller on the left- seconds to turn the system On or Off hand side of your handlebar, facing up, (The battery power must have been slightly at angle so it’s easy to look at, and... - Page 18 LCD screen Mode 2 displays: Reset the latest trip data: Switch to a different LCD screen mode: ▪ Battery charge level (Wait at least 5 seconds after the LCD Press the Power button briefly to switch ▪ Current power assist level controller has been turned On) between different LCD screen modes (1 >...
-
Page 19: Adjusting The System Parameters
2. Wheel diameter Adjusting the system parameters The wheel diameter value has been set To access Parameters Adjustment Menu: at the factory according to your bike’s (Within 5 seconds after turning the LCD specific configuration. Do not modify controller On) the default value of this parameter. -
Page 20: Maintenance & Storage
Servicing, maintenance or repairs must Maintenance & storage Washing your power assisted bicycle The bicycle user manual that was be carried out only by a qualified Besides your bicycle’s regular mechanical provided to you separately contains a technician. maintenance, for which the requirements more detailed bicycle... -
Page 21: Storing Your Power Assisted Bike
Storing your power assisted bike Troubleshooting For other mechanical issues System malfunction sign and error codes not related to the power Battery care: The LCD controller unit can communicate assist system, such Before storing your bike for the off a problem related to the power assist derailleurs brakes system to the user through an error code. -
Page 22: Troubleshooting Guide
Troubleshooting guide Problem Possible causes Solution ▪ ▪ Pedaling feels stiff Improper tire pressure (may be too low) Add air ▪ ▪ Either the controller or battery or both are turned Make sure the display is lit up on the controller and the lights are on on the battery ▪... - Page 23 Problem Possible causes Solution ▪ There is an odor, smoke or fluid Stop using the battery and contact the coming from the battery place of purchase Controller won’t turn on after pressing ▪ ▪ Is the power on the battery turned on? Make sure the battery is charged and power button turned on...
Need help?
Do you have a question about the Powertrail and is the answer not in the manual?
Questions and answers
I bought the function trailer Montaigne bike couple years ago. Now I lost charger and key. Could u please help me please? Thank u very much!