
Summary of Contents for AOLIER BM1349DB-GS
- Page 1 INSTRUCTION MANUAL MODEL: BM1349DB-GS Read this booklet thoroughly before using and save it for future reference...
-
Page 2: Table Of Contents
CONTENTS IMPORTANT SAFEGUARDS KNOW YOUR BREAD MAKER INTRODUCTION OF CONTROL PANEL KEEP WARM MEMORY ENVIRONMENT WARNING DISPLAY FOR THE FIRST USE HOW TO MAKE BREAD SPECIAL INTRODUCTION CLEANING AND MAINTENANCE INTRODUCTION OF BREAD INGREDIENTS INGREDIENTS MEASUREMENT TROUBLE SHOOTING ENVIRONMENT FRIENDLY DISPOSAL Page 1 of 14... -
Page 3: Important Safeguards
IMPORTANT SAFEGUARDS Before using the electrical appliance, the following basic precautions should always be followed: READ ALL INSTRUCTIONS. 2. Before using check that the voltage of wall outlet corresponds to that shown on the rating plate. 3. Do not operate any appliance with a damaged cord or plug or after the appliance malfunctions, or it is dropped or damaged in any manner. - Page 4 be able to escape freely. A fire can be caused if it is covered by, or comes into contact with combustible material. 17. Do not operate the appliance for other than its intended use. 18. Always use the appliance on a secure, dry level surface. 19.
-
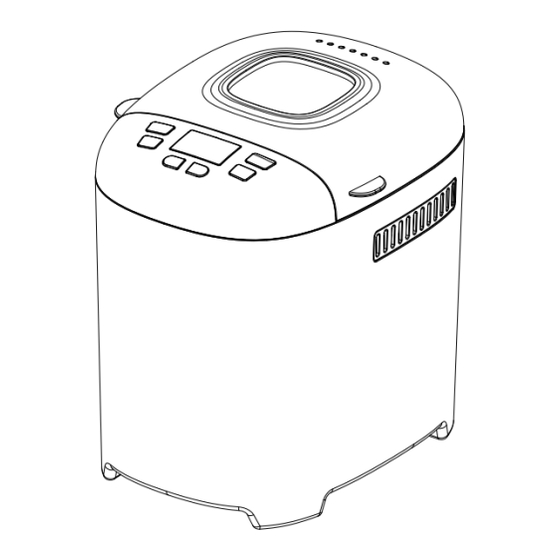
Page 5: Know Your Bread Maker
KNOW YOUR BREAD MAKER INTRODUCTION OF CONTROL PANEL The silkscreen is subject to change without prior notice. Page 4 of 14... - Page 6 AFTER POWER-UP As soon as the bread maker is plugged into the power supply, a beep will be heard and “3:00” appears in the display after a short time. But the two dots between the “3” and “00” don’t flash constantly. The arrow points to 900g and MEDIUM. It is the default setting.
- Page 7 2.0LB) The speciality setting is used for bread types that are required in a shorter time. The bread baked in this setting is smaller with a dense texture. 11. Jam: boiling jams and marmalades. Fruit or vegetables must be chopped before putting them into the bread pan.
-
Page 8: Keep Warm
。 fresh milk, fruits, onions, etc. KEEP WARM Bread can be automatically kept warm for 60 minutes after baking. If you would like to take the bread out, switch the program off with the START/STOP button. MEMORY If the power supply has been broken off during the course of bread making, the process of bread making will be continued automatically within 10 minutes, even without pressing Start/stop button. - Page 9 It is recommended to fill holes with heat-resisting margarine prior to placing the kneaders, this avoids the dough to stick below the kneaders and the kneaders could be removed from bread easily. 2. Place ingredients into the bread pan. Please keep to the order mentioned in the recipe. Usually the water or liquid substance should be put firstly, then add sugar, salt and flour, always add yeast or baking powder as the last ingredient.
-
Page 10: Special Introduction
falls out onto rack. 15. Remove the bread carefully from the pan and cool for about 20 minutes before slicing. 16. If you are out of the room or have not pressed START/STOP button at the end of operation, the bread will be kept warm automatically for 1 hour, if you would like to take the bread out, switch the program off with the START/STOP button. - Page 11 3. Whole-wheat flour Whole-wheat flour is ground from grain. It contains wheat skin and gluten. Whole-wheat flour is heavier and more nutrient than common flour. The bread made by whole-wheat flour is usually small in size. So many recipes usually combine the whole -wheat flour or bread flour to achieve the best result.
-
Page 12: Ingredients Measurement
(2) Put 1 tsp. white sugar into the cup and stir, then sprinkle 2 tsp. yeast over the water. (3) Place the measuring cup in a warm place for about 10min. Do not stir the water. (4) The froth should be up to 1 cup. Otherwise the yeast is dead or inactive. 9. - Page 13 ingredients. 2. Dry measurements Dry measuring must be done by gently spooning ingredients into the measuring cup and then once filled, leveling off with a knife. Scooping or tapping a measuring cup with more than is required. This extra amount could affect the balance of the recipe. When measuring small amounts of dry ingredients, the measuring spoon must be used.
- Page 14 2 table spoons 2 .5 table spoons 6.Brown Sugar 2 table spoons 3 table spoons 7.Milk Powder 1 tea spoons 1 tea spoons 8.Yeast 四、QUICK BREAD SIZE MATERIAL 900g 320ml 320g 1.Water (40~50℃) 2 table spoons 2.Oil 1.5 table spoons 3.Salt 2 table spoons 4.Sugar...
- Page 15 Water 270 ml 270g 340 ml 340g Butter 1.5 table spoons 2 table spoons Salt 1.5 tea spoons 2 tea spoons Sugar 1.5 table spoons 2 tablespoon Milk Powder 1.5 table spoons 2 tablespoon Bread Flour 3 cups 420g 3 1/2 cups 490g Yeast 1 tea spoons...
- Page 16 minutes, then the kneading maker blade can be easily removed and cleaned. The ingredients are Incorrect program setting Check the selected menu and not mixed or the the other settings. bread is not baked The START/STOP button was Do not use the ingredients correctly touched while the machine was and start over again...
-
Page 17: Environment Friendly Disposal
The bread is not too much or not enough liquid a/b/g baked in the center too much humidity recipes with moist ingredients, e.g. yogurt Open coarse too much water structure no salt many holes gread humidity, water too hot too much liquid Mushhroom-like, bread volume too big for the pan unbaked surface...
Need help?
Do you have a question about the BM1349DB-GS and is the answer not in the manual?
Questions and answers