Table of Contents
Advertisement
Quick Links
Advertisement
Table of Contents

Related Manuals for Dictopro X100

Summary of Contents for Dictopro X100
- Page 1 IC Recorder User Manual...
-
Page 2: Table Of Contents
Contents APPEARANCE............FEATURES............... PARTS LIST.............. CHARGING..........8 POWER ON OR OFF........9 RECORDING..........10 Pausing..........10 SAVING RECORDED FILES.......11 RECORDING SETTINGS......12 Recording mode........13 Recording format........13 Recording quality (set bitrate)....13 Recording source........14 Recording from a phone.....14 Recording monitoring......15 VOR/Line-in recording......15 MIC Sensitivity........16 Denoise level........16 Page 2... - Page 3 Automatic Gain Control level....16 AUTO RECORDING........17 Setting the Start Time......17 Setting the End Time......18 Timed Recording.........19 MUSIC PLAYING........20 Upload music........20 RECORDED FILE PLAYING......21 Volume Adjustment......22 Music Skip Forward, Fast Forward/ Backward..........22 A-B Repeating Adjustment....22 FILE DELETION.........23 Deleting Music........23 Deleting All Recorded Files....23 Deleting a Single File......24 SYSTEM SETTINGS........24 Play settings........24...
- Page 4 Display settings........26 Brightness...........26 Backlight time........27 Date and time........26 Time setting........26 Date setting........26 Language..........27 Information.........27 Formatting setting......27 Backup/download your files....28 Factory settings........28 WARNINGS..........29 WARRANTY/CONTACT US......29 Page 4...
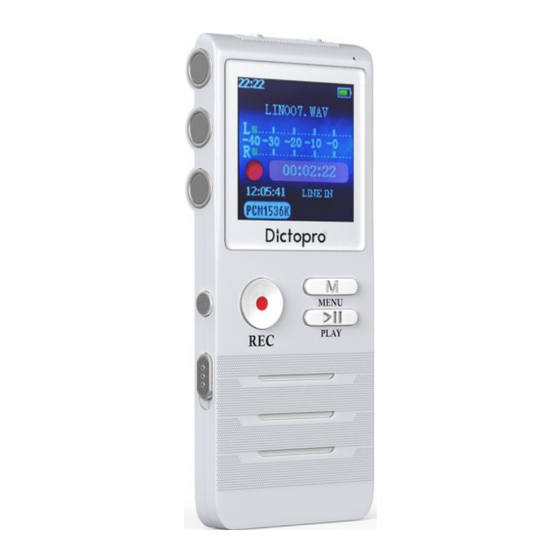
- Page 5 APPEARANCE Deco overlay VOL/volume button Power switch Recording button Speaker/Deco overlay Earphone jack (green) LINE-IN port (red) Recording indicator Menu button Play Lock Previous Next Page 5...
- Page 6 Page 6...
- Page 7 FEATURES Zinc alloy die cast casing – for durability Recording time settings – for repeating events Recording indicator on/off - to indicate when the device is recording Recording low-voltage automatic saving – auto save when the battery is low ...
-
Page 8: Parts List
LINE-IN recording – record telephone conversations PARTS LIST Item IC Recorder Telephone jack wire (1 foot/30 cm) 3.5mm audio line-in wire with 2 male ends (18 inches/45cm) Telephone adapter (2 telephone jacks and 3.5mm audio line jack) USB 2.0 to mini USB cable (4.33 feet/1.3 meters) Page 8... - Page 9 Earphones Page 9...
-
Page 10: Charging
CHARGING When you receive your device, you will need to charge it. This will take 3-4 hours 1. Plug the USB end of your charging cord into a USB port. 2. Plug the micro USB connector end into the base of the IC recorder. A battery shaped picture will appear indicating its charging progress. - Page 11 switch to the Off position. CAUTION: To avoid file damage when recording or playing music, do not turn off the device using the ON/OFF switch. Page 11...
-
Page 12: Recording
RECORDING In power-on status, press the Recording button and the device will start to record. Pausing While recording, press the Recording button to pause recording. The recording indicator will flash a red light. Note: When the device is playing music or a recorded file, press Pause before starting to record. -
Page 13: Saving Recorded Files
SAVING RECORDED FILES While recording, press the M menu button to save the recorded file. The recorder will stop recording. After saving the recorded file, you can play the current recording by pressing ►❚❚. Page 13... -
Page 14: Recording Settings
RECORDING SETTINGS To enter the recording interface, 1. Press ►❚❚. Music, Recordings, Auto Record, or Set appears. 2. Use the Up or Down to find Recordings. 3. Press ►❚❚. Recording Library appears. 4. Use the Down to select Recording settings. 5. -
Page 15: Recording Mode
Recording Recording mode format Options: Normal To change the recording or Dual- recording file format: core denoise 1. Press Up or Down to recording to select the recording reduce echo and format settings. provide surround 2. Press ►❚❚ to enter. sound. -
Page 16: Recording Source
3. Plug the provided 3.5mm audio line into the telephone adapter and plug the other end into the Line-in on the Dictopro. 4. Change the recording Page 16... -
Page 17: Recording Monitoring
source to Line-in (see previous procedure). 5. When you want to record a phone call, press Record. Recording VOR/Line-in monitoring recording To change the The VOR function, also called voice operated recording recording, saves monitoring: memory. There are two options: 1. -
Page 18: Mic Sensitivity
mode, the VOR voice control function is available for MIC recording and the automatic separation function is available for Line-in recording. MIC Sensitivity Automatic This means line-in Gain Control sensitivity. Adjust the level gain on the Automatic Gain microphone to Control amplifies or reduce distortion. - Page 19 level: confirmation. 1. Press Up or Down to select Denoise level. 2. Press ►❚❚ to enter. 3. Press Up or Down to select the setting needed (1- 4. Press ►❚❚ for confirmation. Page 19...
-
Page 20: Auto Recording
AUTO RECORDING To set a time to begin a recording: 1. Press ►►❚. Music, Recordings, Auto Record, or Set appears. 2. Use the Up or Down to find Auto record. 3. Select Auto record and press ►❚❚ to enter. 4. Use the Down to select Auto Record. - Page 21 menu. Page 21...
-
Page 22: Setting The End Time
Setting the End Time To set the end recording time: 1. Select End time. 2. Press ►❚❚ to enter and press Up or Down to set the clock. 3. Press M menu button and the minute icon will be highlighted. 4. -
Page 23: Timed Recording
Timed Recording Options include: Once, Every day, Work days Once setting: 1. Select Once and press ►❚❚ to enter. At this time, the date shown on the top of the screen is red. 2. Press Up or Down to select the date. 3. -
Page 24: Music Playing
Dictopro. A window will appear on your computer with a Record folder. 2. Copy any MP3s from your computer to the root of the Dictopro i.e. copy them beside the Record folder. Page 24... -
Page 25: Recorded File Playing
RECORDED FILE PLAYING To play your recordings: 1.Turn on the device. 2.Press Up or Down to select Recording. 3.Press ►❚❚ for confirmation. 4.After entering the menu, select Recording library. 5.Press ►❚❚ for confirmation. 6.Press Up or Down to select the recorded files you want to play. -
Page 26: Volume Adjustment
Volume Adjustment To decrease or increase the volume: 1.Press VOL button. 2.Press Up or Down to increase or decrease the volume. Music Skip Forward, Fast Forward/ Backward To fast forward or backwards: Press and hold Up or Down. To skip forward or backwards: ... - Page 27 the file. 4. While the recording is repeating, press Recording button to exit repeating mode. Page 27...
-
Page 28: File Deletion
FILE DELETION Note: Please backup important files before deletion. Deleting Music To delete music files: 1. Play the song. 2. Press ►❚❚ to pause. 3. Press and hold VOL button to enter the file options. 4. Press Up or Down to select Delete. -
Page 29: Deleting A Single File
7. Press ►❚❚ for confirmation. Deleting a Single File To delete a single recorded file: 1. Select the file you want to delete in the recording file library. 2. Press and hold VOL button to enter the file list. Delete appears. 3. -
Page 30: Sound Settings
and set repeating mode and shuffle playing. Sound Volume limit settings To change the volume limits for a recording: Equalizer 1. In Sound settings, To adjust the sound select Volume limit. equalizer for 2. Press ►❚❚ to enter various kinds of for adjustment. -
Page 31: Timed Power-Off
Timed power- Date and time 1. Press Up or Down to select Date and 1. In Set menu, time. press Up or 2. Press ►❚❚ button Down to select to enter. Sleep timer. Time setting 2. Press ►❚❚ to enter. 1. -
Page 32: Language
to select the Language setting required. 1. Press Up or Down 4. After setting, to select Language. press ►❚❚ for 2. Press ►❚❚ to enter. confirmation. 3. Press Up or Down Backlight time to select the 1. Press Up or language required. -
Page 33: Backup/Download Your Files
Dictopro: factory. 1. Plug the USB/mini USB cable into your computer and the Dictopro. A window will appear on your computer with Record Folder. 2. Copy the folder or select files to your computer. - Page 34 Page 34...
-
Page 35: Warnings
Thunderstorms can cause the device to malfunction and increase the risk of electric shock. WARRANTY/CONTACT US We really appreciate you choosing DICTOPRO as your trusted brand of digital voice recorders and we sincerely hope you enjoy your purchase. We love making our customers happy by providing true value with our products. - Page 36 Warranty 1 year parts and labor warranty. To register your warranty, please visit www.dictopro.com Page 36...
Need help?
Do you have a question about the X100 and is the answer not in the manual?
Questions and answers