Advertisement
Advertisement

Summary of Contents for Hestom NDAP-01
- Page 1 User Manual NDAP-01...
-
Page 2: Table Of Contents
Contents 1. Important safety information ………… …………………………01 2. Product Structure … …… ………………………………………… …02 3. Before first use … ……… ……………………………………… ……03 4. Using the appliance ……… …………………………………………05 5. Cleaning …… … …… ……… ………………………… ………… ……08 Troubleshooting …… ……… ……………………………… …………... -
Page 3: Important Safety Information
1. Important safety information Read this user manual carefully before you use the appliance and save it for future reference. Danger Do not let water or any other liquid or flammable detergent enter the appliance to avoid electric shock ● and/or a fire hazard. -
Page 4: Product Structure
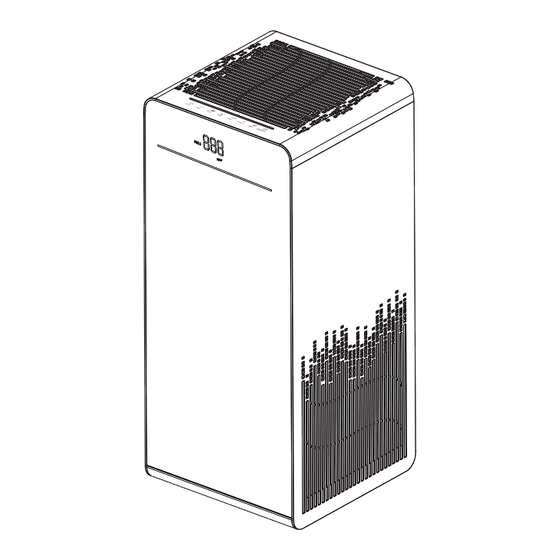
2. Product Structure Welcome using our company air purifier,before using,please read this manual carefully to operatate the product correctly. 1. Touch Panel 5. Dust Sensor 2. Digital Display 6. Composite filter 3. Air Quality Indicator 7. Filter's Cover 4. Air Outlet Description for the function of display panel A1: PM2.5 Icon A2: PM2.5 data... -
Page 5: Before First Use
3. Before first use Placing the filters The appliance comes with all filters fitted inside, but you have to remove the packaging of the filters before you can use the appliance. Remove all filters, unpack them and place them back into the appliance as described below. Tip: Place the appliance against a wall for more stability when you remove or insert filters. - Page 6 4.Put the filter back in the purifier. 5. To reattach the back cover , insert the bottom hooks into the bottom of the appliance first . Then push the back cover against the body of the appliance.
-
Page 7: Using The Appliance
4. Using the appliance 4.1 Control panel function description Timer On/Off Auto Mode Fan Speed Sleep Mode Timer Key Lock Filter Replacement Indicator 4.2 Plug into the power supply The LED on the control panel will be on for 1 second, and you will hear a click, then the indicator will go out again and go to standby. - Page 8 Reminder: In standby mode, the dust sensor is off. To turn off the machine, unplug the product from the power cord in standby mode. Note: When the machine is turned on, the default mode is working, the fan speed is in the automatic mode, the negative ion mode is on, and the air quality indicator lights up.
- Page 9 4.7 Sleep mode In the working state, touch the “ ” button, and the sleep indicator lights up, the machine enters the sleep mode; the “ ” and the “ ” indicator light are half-bright, the negative ion function is turned off, the other indicator lights are all off.
-
Page 10: Cleaning
5. Cleaning 5.1 Clean air purifier Clean the inside and outside of the purifier body regularly to prevent dust from accumulating. 1)Wipe the dust off the purifier body with a soft, dry cloth. 2)Clean the air inlet and outlet with a soft, dry cloth. 5.2 Clean air quality sensor Clean the air quality sensor every 2 months to ensure that the purifier operates at peak performance. - Page 11 5.3 Filter replacement Reminder When the product's “ ” indicator lights up and flashes, the user is suggested to replace the filter. When the replacement filter indicator lights up, the customer is suggested to replace the filter. Reminder: Remove the plastic packaging of each filter before placing it in the machine. Make sure the label on the side of the filter is facing up.
- Page 12 3) Press the “ ” button on the filter cover with both hands, spread the filter cover, and pull the filter cover up slightly. 4) Remove the purifier insider filter. 5) Remove all packaging materials from the new filter. 6) Load a new filter.
- Page 13 7) Reinstall the filter cover, align and insert the fixed groove, and then press the & button on the filter cover to apply pressure to secure the filter cover. 8) After replacing the new filter, plug in the power plug and press the “ ”...
-
Page 14: Troubleshooting
6. Troubleshooting This chapter summaries the most common problems you could encounter with the appliance. If you are unable to solve the problem with the information below, please contact our service center or distributor. At the Auto mode ,the machine will automatically adjust the fan speed in the order to achieve energy saving .
Need help?
Do you have a question about the NDAP-01 and is the answer not in the manual?
Questions and answers