Advertisement
Available languages
Available languages
Quick Links
Advertisement

Related Manuals for KCream Gaming Chair


Summary of Contents for KCream Gaming Chair
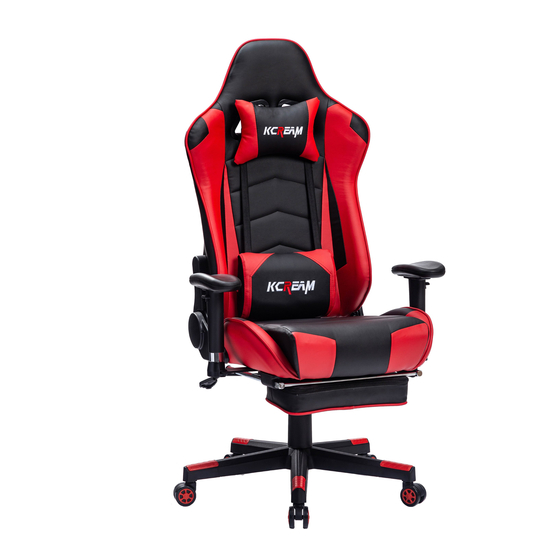
- Page 1 INSTRUCTION MANUAL...
-
Page 2: Assembly Guide
ASSEMBLY GUIDE Congratulations, you are now the owner of a brand new chair! Before enjoy the comfort chair, you have to put it together.This Assembly Guide will take you through the basic assembly process. To make sure your assembly goes smoothly, please follow the assembly instructions, and especially the important safety information. -
Page 3: Package List
PACKAGE LIST Gas Lift Lift Cover Casters Star Base Quantity: 1 Quantity: 1 Quantity: 5 Quantity: 1 Right Left Left Plastic Cover Set Angle Adjusters Right Plastic Cover Set Quantity: 1 Quantity: 1 Quantity: 2 Seat Plate Back Cushion Seat Cushion Armrests Quantity: 1 Quantity: 1... - Page 4 ASSEMBLY INSTRUCTIONS If possible, using drill bit with your electric drill to install our chair will make assembly more convenient. STEP 2 : Turn the Star Base upright and insert the Lift into the center hole of the Star Base, the Lift Cover should be placed over the Lift.
- Page 5 ASSEMBLY INSTRUCTIONS STEP 3 : Remove All M8x25mm Bolts from the seat and back. M8*25mm STEP 4 : Attach the arms to the seat cushion with four M8X25mm bolts, using the Wrench. front...
- Page 6 ASSEMBLY INSTRUCTIONS STEP 5 : Align the seat plate to the bottom of the seat cushion, make sure that the front of the seat plate is facing the front of the seat cushion. Attach the seat plate to the seat cushion using four M8X25mm bolts, tighten all the bolts with the wrench.
- Page 7 ASSEMBLY INSTRUCTIONS STEP 7: Turn the seat cushion upright and align the center hole of the seat plate over the lift, then push the seat cushion down onto the lift STEP 8: Using Adjusters to attach Seat Cushion and Back Cushion, align the adjusters over the pre-drilled holes underneath the seat cushion and back cushion with M8x25mm Bolts, tighten all the bolts with the wrench.
- Page 8 ASSEMBLY INSTRUCTIONS STEP 9 : Attach Seat Cushion and Back Cushion, align the adjusters over the pre-drilled holes underneat h the back cushion wi t h M8 x 25m m Bolts, tighten all the bolts with the wrench. Note: Do not tighten the bolts fully at this step. STEP 10: Adjust the balance, then fully tighten all the bolts on each side of adjusters.
- Page 9 ASSEMBLY INSTRUCTIONS Congratulations!You’ve assembled your chair. CAUTION! Do not pull the cable during using.
- Page 10 INSTRUCTIONS FOR USE Seat Height: Paddle-shaped lever on right side To raise: While taking your weight off chair, lift lever up. To lower: While seated, lift lever up. At the proper height, your feet should rest flat on the floor. Tilt Tension: Long stem under the seat cushion with knob To increase tension: While seated, turn knob...
- Page 11 INSTRUCTIONS FOR USE Operating the tilt lockout To let your chair tilt back, pull the control handle out. To stop your chair from tilting, sit forward, then push the control handle in. Backrest Recline Pull the lever FULLY and lean back slowly until desired angle is achieved, then slowly return the lever to its starting position,...
- Page 12 INSTRUCTIONS FOR USE 2D-Function Armrest Up and Down Left and Right Relax with footrest Pull out the pole of the footrest, and turn the footrest to the front.
-
Page 13: Safety And Maintenance
SAFETY AND MAINTENANCE Do not stand on the chair, Do Not use the chair as stepladder. Use this product for seating one person at a time. Do not use the chair unless all bolts and screws are firmly secured. Avoid contact with sharp objects to prevent puncturing the fabric. Every 6 months, check all bolts and screws to ensure they are tight. - Page 14 MONTAGEANLEITUNG Herzlichen Glückwunsch!Sie sind jetzt Inhaber eines Markenstuhls ! Bevor Sie den Komfortstuhl genießen, müssen Sie ihn zusammenbauen. D i e s e M o n t a g e a n l e i t u n g f ü h r t S i e d u r c h d e n g r u n d l e g e n d e n Montageprozess.
- Page 15 VERPACKUNGSLISTE Rollen Sternbasis Abdeckung anheben Gaslift Quantität: 5 Quantität: 1 Quantität: 1 Quantität: 1 Right Left Rechte Plastikabdeckung Linke Kunststoffabdeckung Winkelversteller eingestellt Quantität: 1 Quantität: 1 Quantität: 2 Armlehnen Sitzplatte Rückenkissen Sitzkissen Quantität: 1 Quantität: 1 Quantität: 2 Quantität: 1 Fußstütze Gummiringe Quantität: 1...
- Page 16 MONTAGEANLEITUNGEN Schritt 1 : Drehen Sie die Star Base um und drücken Sie die Rollen in die Löcher am Ende jedes Basisbeines. Wenn möglich, erleichtert die Verwendung eines Bohrers mit Ihrer elektrischen Bohrmaschine die Montage. Schritt 2 : Drehen Sie die Star Base aufrecht und setzen Sie den Lift in das mittlere Loch der Star Base ein.
- Page 17 MONTAGEANLEITUNGEN Schritt 3 : Entfernen Sie alle M8x25mm Bolzen vom Sitz und von der Rückseite. M8*25mm Schritt 4 : Befestigen Sie die Arme mit vier M8X25mm mit dem Schraubenschlüssel am Sitzkissen. front...
- Page 18 MONTAGEANLEITUNGEN Richten Sie die Sitzplatte an der Unterseite des Sitzkissens aus Schritt 5 : und stellen Sie sicher, dass die Vorderseite der Sitzplatte zur Vorderseite des Sitzkissens zeigt. Befestigen Sie die Sitzplatte mit vier M8X25mm Schrauben am Sitzkissen und ziehen Sie alle Schrauben mit dem Schlüssel fest. front Schritt 6 : Setzen Sie die Fußstütze in die vorgebohrten Löcher unter dem Sitzkissen ein, und setzen Sie die Gummiringe am Ende der Stange ein.
- Page 19 MONTAGEANLEITUNGEN Drehen Sie das Sitzkissen aufrecht und richten Sie das Schritt 7 : Mittelloch der Sitzplatte über dem Lifter aus. Drücken Sie dann das Sitzkissen fest auf den Lifter bis die Verbindung sicher ist Befestigen Sie das Sitzkissen und das Rückenkissen mit den Schritt 8 : Justierelementen, richten Sie die Justierelemente mit den M8x25mm- Schrauben über den vorgebohrten Löchern unter dem Sitz- und Rückenkissen...
- Page 20 MONTAGEANLEITUNGEN Schritt 9 : Befestigen Sie das Sitzkissen und das Rückenkissen, richten Sie die Versteller mit den M8x25mm Schrauben über den vorgebohrten Löchern unter dem Rückenkissen aus und ziehen Sie alle Schrauben mit dem Schraubenschlüssel fest. Hinweis: Ziehen Sie die Schrauben in diesem Schritt nicht fest an. Schritt 10: Stellen Sie die Waage ein und ziehen Sie alle Schrauben auf jeder Seite der Einstellschrauben fest an.
- Page 21 MONTAGEANLEITUNGEN Herzlichen Glückwunsch! Sie haben Ihren Stuhl zusammengestellt. VORSICHT! Ziehen Sie während der Verwendung nicht am Kabel.
- Page 22 ANLEITUNG FÜR UNS Sitzhöhe: Paddelförmiger Hebel auf der rechten Seite Zu erhöhen: Heben Sie den Hebel nach oben, während Sie Ihr Gewicht vom Stuhl nehmen. Zu senken: Heben Sie den Hebel im Sitzen In der richtigen Höhe sollten Ihre Füße flach auf dem Boden ruhen. Kippspannung: Langer Vorbau unter dem Sitzkissen mit Knopf Um die Spannung zu erhöhen:...
- Page 23 ANLEITUNG FÜR UNS Kippsperre betätigen Ziehen Sie den Steuerhebel heraus, um den Stuhl nach hinten kippen zu lassen. Um zu verhindern, dass Ihr Stuhl kippt, setzen Sie sich nach vorne und drücken Sie den Steuerhebel hinein. Rückenlehne zurücklehnen Ziehen Sie den Hebel VOLLSTÄNDIG und lehnen Sie sich langsam zurück, bis der gewünschte Winkel...
- Page 24 ANLEITUNG FÜR UNS 2D-Funktionsarmlehne Auf und Ab Links und Rechts Entspannen Sie sich mit Fußstütze Ziehen Sie die Stange der Fußstütze heraus und drehen Sie die Fußstütze nach vorne.
-
Page 25: Sicherheit Und Wartung
SICHERHEIT UND WARTUNG Stehen Sie sich nicht auf den Stuhl und verwenden Sie den Stuhl nicht als Trittleiter. Auf dem Stuhl darf jeweils nur eine Person setzen. Man darf auf dem Stuhl setzen, nur wenn alle Bolzen und Schrauben fest geschrauben sind. Vermeiden Sie bitte den Kontakt mit scharfen Gegenstände, damit der Stoff nicht durchstochen wird.
Need help?
Do you have a question about the Gaming Chair and is the answer not in the manual?
Questions and answers