Advertisement
Quick Links
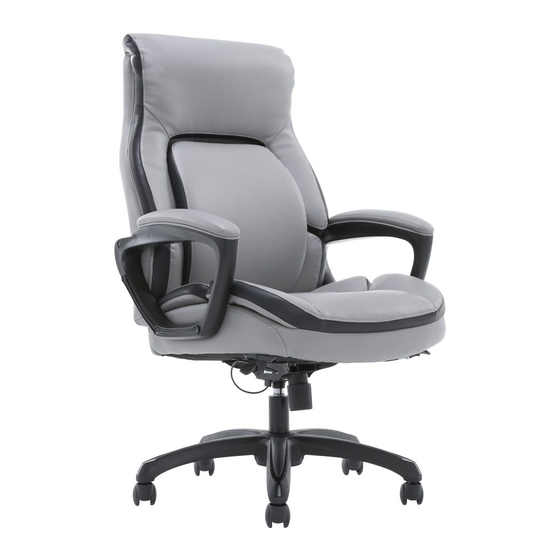
GRAY
ITEM 8085683
Amphion
ASSEMBLY
INSTRUCTIONS
INSTRUCTIONS
DE MONTAGE
MONTAJE
INSTRUCCIONES
IF YOU HAVE ANY QUESTIONS,
1-800-379-9773
PLEASE CALL
PATENTS PENDING
AND CURRENT PATENTS AVAILABLE AT:
Office Depot is a registered trademark of
www.trueinnovations.com/patent-list
The Office Club, Inc. © 2021 Office Depot, LLC. All Rights Reserved.
Made in Vietnam
version 0321
Advertisement

Related Manuals for Office Depot SHAQUILLE O'NEAL Amphion


Summary of Contents for Office Depot SHAQUILLE O'NEAL Amphion
- Page 1 GRAY ITEM 8085683 Amphion ASSEMBLY INSTRUCTIONS INSTRUCTIONS DE MONTAGE MONTAJE INSTRUCCIONES IF YOU HAVE ANY QUESTIONS, 1-800-379-9773 PLEASE CALL PATENTS PENDING AND CURRENT PATENTS AVAILABLE AT: Office Depot is a registered trademark of www.trueinnovations.com/patent-list The Office Club, Inc. © 2021 Office Depot, LLC. All Rights Reserved. Made in Vietnam version 0321...
- Page 2 Thank you for purchasing this product. We trust that you will be completely satisfied with your product for years to come. This product is backed by a 10 year limited warranty and has been crafted with today’s lifestyles in mind. Call Us First! DO NOT RETURN TO STORE.
- Page 3 Nous vous remercions d’avoir acheté ce produit et espérons que vous en serez entièrement satisfait pendant de longues années. Ce produit est couvert par une garantie limitée de 10 ans et a été conçu pour répondre aux besoins d’aujourd’hui. N’hésitez pas à nous appeler! NE RENVOYEZ PAS LE PRODUIT AU MAGASIN.
- Page 4 Le damos las gracias por adquirir este producto. Confiamos en que quede completamente satisfecho con sus prestaciones. Este producto tiene una garantía limitada de 10 años y ha sido creado atendiendo al estilo de vida de hoy día. ANTES DE DEVOLVERLO, ¡LLÁMENOS! Si desea más información sobre el montaje, llámenos sin coste adicional alguno al siguiente teléfono de 6 de la mañana a 5 de la tarde de lunes a viernes (Horario Oficial del Pacífico...
-
Page 5: Parts List
LISTE DE PIÈCES PARTS LIST LISTA DE PIEZAS Spare Qty. / Qté. Épargner Part / Pièce / Pieza Name / Nom / Nombre Cantidad. Sobrante Casters Roulettes Rodillo Star Base Base en étoile Base con forma de estrella Gas Lift Cylindre à... - Page 6 SIZE COMPARISON CHART TABLEAU DE COMPARAISON DE TAILLES TABLA DE COMPARACIÓN DE TAMAÑOS 1 1/4” Bolts Boulons de 32mm Pernos de 32mm 1” Bolts Boulons de 25mm Pernos de 25mm 1 1/2” Bolts Boulons de 38mm Pernos de 38mm...
- Page 7 Select a smooth surface to avoid scratching the parts. Turn the Star Base (B) upside down. Press the Casters (A) into holes at the end of each leg. Turn the Star Base (B) upright and insert Gas Lift (C) into the central hole of Star Base (B).
- Page 8 Align Seat Plate (D) over pre-drilled holes on the underside of Seat Cushion (F) with black tension knob facing the front of the seat. Attach Seat Plate (D) to Seat Cushion (F) using 2 Bolts (H1) for the front holes and 2 Bolts (H2) for the rear holes of Seat Plate (D) as shown.
- Page 9 Insert Levers (D1 & D2) of Seat Plate (D) into the pre-attached cable lever receivers on the underside of Seat Cushion (F). Push down the key on the receivers to pull out the levers. *Note: Place the cable for the seat plate into the plastic clips attached to the bottom of the seat cushion.
- Page 10 Turn the assembled seat upright and locate the central hole on the Seat Plate (D). Push down firmly over the Gas Lift (C) until it is securely connected. Placer l'assemblage en position verticale et localiser le trou central du plateau du siège (D). Presser fermement sur le vérin pneumatique (C) jusqu'à...
- Page 11 Attach the Armrests (E) to the sides of Seat Cushion (F) with four Bolts (H3). Do not tighten Bolts fully until you have completed assembly. Fixez les accoudoirs (E) au siège coussiné (F) à l’aide de quatre boulons (H3). Ne serrez pas ces boulons à fond avant d’avoir terminé...
- Page 12 Attach Back Cushion (G) to Armrests (E) by securing 2 Bolts (H3) to the lower holes of Back Cushion (G) as shown. Do not tighten Bolts fully until you have completed assembly. Fixez le coussin dorsal (G) aux accoudoirs (E) en positionnant deux boulons (H3) dans les trous inférieurs du coussin dorsal (G) tel qu'illustré.
- Page 13 Gently pivot the Back Cushion (G) to upright position. Secure the remaining Bolts (H3) to the Armrests (E) and tighten all the Bolts fully with Allen Key (J). Faites légèrement pivoter le coussin dorsal (G) pour le ramener à la verticale. Placez les autres boulons (H3) aux accoudoirs (E) et serrez tous les boulons à...
- Page 14 Press the Plastic Caps (I) into Armrest holes to cover bolts and sit down on Seat Cushion. Sitting on the Seat Cushion applies even pressure on the Gas Lift and Base and secures them in place. Fixez les embouts en plastique (I) dans les orifices des accoudoirs pour couvrir les boulons.
- Page 15 Before using your chair, ensure that all bolts are fully tightened for safety. You can now enjoy the comfort of your new Chair! NOTE: Please keep the allen key and check all bolts periodically to ensure they are always securely tightened. Avant d'utiliser votre fauteuil de bureau, assurez-vous que tous les boulons sont entièrement serrés par précaution.
- Page 16 REMOVING SEAT PLATE FROM GAS LIFT Raise the chair to the highest level, then step on the Base (B), buckle the handle and Seat Cushion (F) with two hands. Shake the Seat (F) to separate the Gas Lift (C). RETRAIT DE LA PLAQUE DE SIÈGE DU GAS LIFT Soulevez d'abord le fauteuil au niveau le plus élevé, puis base (B), bouclez la poignée et le coussin du siège (F) avec deux mains.
-
Page 17: Function Instruction
FUNCTION INSTRUCTION REMOVING GAS LIFT FROM STAR BASE Grasp the chair Base (B), and hit the bottom of the Gas Lift (C) with the soft hammer to divide the Gas Lift (C) from the Base (B). RETRAIT DU LEVAGE À GAZ DE LA BASE STAR Saisissez la base du fauteuil (B) et frappez le basde l'ascenseur à... - Page 18 FUNCTION INSTRUCTION MODE D’EMPLOI INSTRUCCIONES DE LAS FUNCIONES TO ADJUST SEAT HEIGHT While seated, lean forward and reach under the right side of the chair to find the lever. Lift the lever and raise your body up slightly to allow the chair to rise to the desired height.
-
Page 19: Réglage De L'inclinaison
TO OPERATE TILT LOCKOUT While seated, reach under the left side of the chair to find the lever. Pull up the lever and lean back to allow the chair to tilt backwards. To lock the chair in the upright or vertical position, sit upright and push the lever to the down position. - Page 20 TO ADJUST TILT TENSION Reach under the front center of chair seat and grasp the round black knob. To loosen the tilt mechanism, turn the knob clockwise. This lessens the effort required to rock back and forth. Rotate the knob until desired resistance is reached.
- Page 21 ABOUT THE BREATHABILITY OF THE AIR LUMBAR CUSHION While seated, the open-air contours of the cushion which is designed to breathe and flex, can dynamically provide continuous support by connecting with your body's natural movement. The air cushion conforms to the curve of your spinal cord and is intended to relieve your back from stress.
- Page 22 ABOUT THE NEUTRAL POSTURE OF THE AIR LUMBAR CUSHION The Air chair has been shown to help the user achieve Neutral Posture. Neutral Posture has been shown to reduce back strain and increase long term seated comfort. *Provides constant support as you lean back and twist *Flexible lumbar pivots and conforms following your movement *Continuous proper lumbar support helps keep the body in an optimal working position for maximum comfort...
- Page 23 Limited 10 Years Product Warranty three TRUE INNOVATIONS SEATING PRODUCTS TRUE INNOVATIONS SEATING PRODUCTS TRUE INNOVATIONS SEATING PRODUCTS, TRUE INNOVATIONS SEATING PRODUCTS...
- Page 24 Garantie limitée de 10 ans trois ans...
- Page 25 Garantía limitada de 10 años para el producto diez tres TRUE INNOVATIONS SEATING PRODUCTS TRUE INNOVATIONS SEATING PRODUCTS TRUE INNOVATIONS SEATING PRODUCTS, TRUE INNOVATIONS SEATING PRODUCTS...
- Page 28 SHAQUILLE O’NEAL™, and the Shaquille O’Neal signature are trademarks of ABG-Shaq, LLC. Rights of Publicity and Persona Rights are used with permission of ABG-Shaq, LLC. Shaquille O’Neal™ is used under license by Living Style (Singapore) PTE. LTD.
Need help?
Do you have a question about the SHAQUILLE O'NEAL Amphion and is the answer not in the manual?
Questions and answers