Advertisement
Quick Links
Advertisement

Related Manuals for Eyelights EyeRide

Summary of Contents for Eyelights EyeRide
- Page 1 EyeRide by Eyelights User guide...
-
Page 2: Table Of Contents
Table of content Table of content Pack content Requirements Connect EyeRide to Captain Rider Setup your EyeRide Prism adjustment Launch a navigation Bluetooth Remote version 1 - (optional) Smart Controller... -
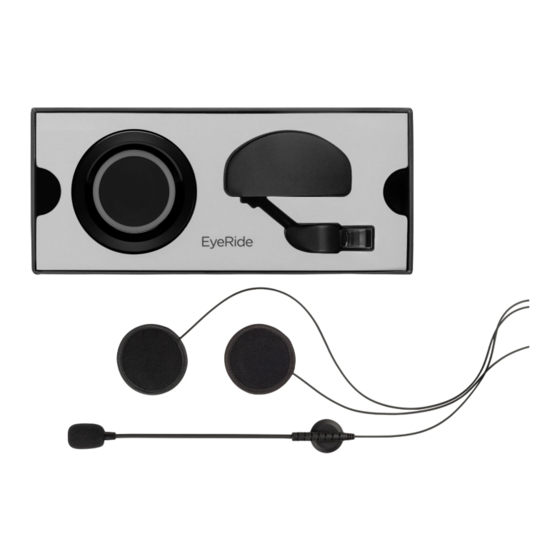
Page 3: Pack Content
Pack content... -
Page 4: Requirements
45W), it may cause irreversible damage to your product! This type of damage is not covered by the warranty. A charger with less power than 2A will take longer to charge EyeRide or may cause battery life and charging problems. - Page 5 - Turn on your EyeRide by pressing the central button on the external box. The LEDs will light up in a circular sequence and the Eyelights logo will appear in the prism: your EyeRide is turned on and in pairing mode.
- Page 6 On your next trip, we recommend that you turn on your EyeRide before getting equipped. This will give it time to pair with your smartphone before you hit the road. Please note: there is no need to select a Wi-Fi network, as pairing is done automatically via Bluetooth.
-
Page 7: Connect Eyeride To Captain Rider
Note: Group members must be in your contacts and have downloaded the application. Connect the EyeRide: click on the Settings tab at the top left of the main menu and then on the Bluetooth tab Connect the Bluetooth Remote / Smart Controller: Same procedure as above. -
Page 8: Setup Your Eyeride
Please refer to the instructions below for the best possible installation. Please note: the prism is a sensitive optical element and should be cleaned with a soft cloth only. A dirty prism will drastically alter the virtual reality experience offered by the EyeRide. - Page 9 The installation is in three parts, the optical module, the external module and the audio kit. To guide you as well as possible, here is the link to the installation video : https://eye- lights.com/pages/support Step one : Installing the optical module Start by removing the cheek protection foams from your helmet and detach only the lower part of the cap.
-
Page 10: Prism Adjustment
Prism adjustment If it is not already done, turn on the product and connect it to display the Apple CarPlay or Android Auto menu into the prism. You can find the position of your prism by using the two main settings as below to view the menu in the way that suits you best. -
Page 12: Launch A Navigation
Launch a navigation There are multiple ways to start navigation on your EyeRide, ● Before connecting to your EyeRide, set up your route on your phone using your favorite GPS application (Google Maps, Waze, Map... ) ● Turn on and pair your EyeRide ●... -
Page 13: Bluetooth Remote Version 1 - (Optional)
Bluetooth Remote version 1 - (optional) If you have a Bluetooth remote control for your EyeRide, read these few lines to know its features ! To connect it to the Captain Rider application, it's very simple. Open the application and log in. - Page 14 EyeRide Battery Life and Charging For maximum battery life, we recommend using a standard smartphone charger (5V/2A output, or about 10W) with a USB-C cable. Leave your EyeRide on charge for 3-4 hours or overnight( before use. Depending on your usage, the battery life of EyeRide may be significantly different from one...
- Page 15 Particularly energy-intensive actions are powering up, booting up, making calls, and repeated use of the system such as voice commands. You can extend the EyeRide's runtime by connecting a battery to it via a USB-C cable. Support You can find our video tutorials and our help center at https://eye-lights.com/pages/support...
Need help?
Do you have a question about the EyeRide and is the answer not in the manual?
Questions and answers