Table of Contents
Advertisement
Quick Links
Advertisement
Table of Contents

Summary of Contents for Ninety One Meraki E Series
-
Page 2: Table Of Contents
Table of Contents Page No. I - Preface II - Parts Identification III - Before Riding • Correct Frame Sizing • Riding Position IV - Cycle Assembly V - Operating Procedures • Monitor Display • How to Charge the Battery VI - Maintenance/Repair •... -
Page 3: I - Preface
DO NOT DISASSEMBLE, MODIFY OR REPLACE ELECTRICAL PARTS. If you need to change any part, please consult a professional authorized “NINETY ONE” mechanic or contact customer service at “cares@outdoors91.com”. “cares@outdoors91.com”. - Page 4 Remember, bicycles, in most areas, are subject to the same laws, rules, and regulations as motor vehicles. 2 © Alpha Vector India Private Limited | Ninety One...
- Page 5 It is the responsibility of the owner or in the case of a younger rider, the parents of the rider to be certain all assembly instructions have been followed, even if the bike has been assembled by the seller or a professional assembly company. 3 © Alpha Vector India Private Limited | Ninety One...
- Page 6 1/3 when the temperature is below 0ºC. Thus, this e-bike’s riding distance per charge will become shorter in winter or cold areas. It returns to normal / optimal when the temperature is higher than 20ºC. 4 © Alpha Vector India Private Limited | Ninety One...
- Page 7 A properly fitting, ISI approved, bicycle helmet should be worn at all times when riding your Forehead Covered Forehead Exposed bicycle. The correct helmet should: - have good ventilation - cover the forehead and fit correctly - be securely fastened on the rider 5 © Alpha Vector India Private Limited | Ninety One...
-
Page 8: Parts Identification
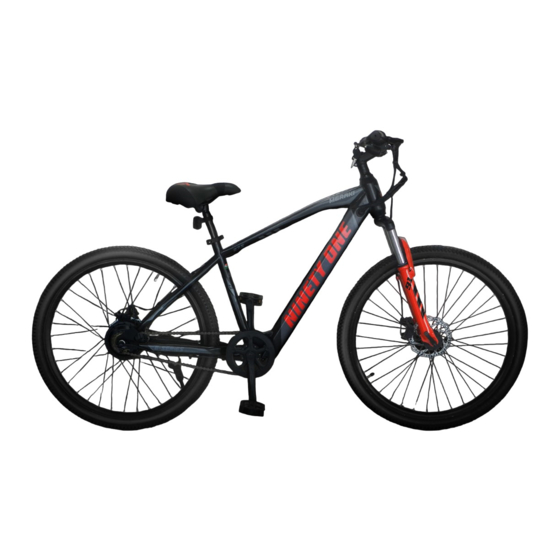
PARTS IDENTIFICATION Circuit Diagram Monitor Display 1 - Monitor Display 6 © Alpha Vector India Private Limited | Ninety One... - Page 9 2 - Handle bar 3 - Jandlebar Stem and Headset 7 © Alpha Vector India Private Limited | Ninety One...
- Page 10 4 - Fork 5 - Front Brake 8 © Alpha Vector India Private Limited | Ninety One...
- Page 11 6 - Pedal, Pedal Crank Arm & Chain 7 - Motor, Wheel & Tire 9 © Alpha Vector India Private Limited | Ninety One...
- Page 12 8 - Rear Brake 9 - Saddle 10 © Alpha Vector India Private Limited | Ninety One...
- Page 13 10 - Frame 11 - Charging Port (Opposite Side) 11 © Alpha Vector India Private Limited | Ninety One...
- Page 14 12 - KEY lock switch 12 © Alpha Vector India Private Limited | Ninety One...
-
Page 15: Before Riding
If possible, avoid riding in wet weather as vision and control are impaired, thus creating a greater risk of accidents and injury. 13 © Alpha Vector India Private Limited | Ninety One... - Page 16 Signal 100 ft. before turning unless your hand is needed to control the bike. 13. Never hitch rides. Never hold onto moving vehicles while riding. Never stunt ride or jump on your bike. 14 © Alpha Vector India Private Limited | Ninety One...
- Page 17 Now, put on your BICYCLE SAFETY HELMET and enjoy your ride. Your safety is well worth just a minute. Also, be sure to read and follow the warnings and instructions in this manual 15 © Alpha Vector India Private Limited | Ninety One...
-
Page 18: Correct Frame Sizing
CHECK TO MAKE SURE THE SEAT POST ADJUSTING MECHANISM IS TIGHTENED CHECK TO MAKE SURE THE SEAT POST ADJUSTING MECHANISM IS SECURELY BEFORE RIDING. SECURELY BEFORE RIDING. SECURELY BEFORE RIDING. 16 © Alpha Vector India Private Limited | Ninety One... -
Page 19: Riding Position
There should be a slight bend in the rider’s elbows. Refer to the section regarding seat and seat posts to learn how to adjust the seat post height. Arms not over extended Handle bar stem height about the same as seat height Pedal bottom position 17 © Alpha Vector India Private Limited | Ninety One... -
Page 20: Cycle Assembly
For more details on inspection, lubrication, maintenance and adjustment of any area please refer to the relevant sections in this manual. We highly recommend that you take “91 CARES” for installation or take help of NINETY ONE authorized mechanic and Frog/NINETY ONE dealership near you. - Page 21 14. Connect the front reflector (white) on the fork. 15. Rotate the front and rear wheel to check if they are rotating freely. Apply brakes to check if the brakes are working properly. 19 © Alpha Vector India Private Limited | Ninety One...
- Page 22 STEP 1-4: Remove the bicycle in the semi-assembled state from the box STEP 5-6: Remove the cable ties, foam and detach the front wheel and handle bar from the frame 20 © Alpha Vector India Private Limited | Ninety One...
- Page 23 STEP 7: Fix the handle bar STEP 8-9: Fix the Front Wheel and Quick Release mechanism 21 © Alpha Vector India Private Limited | Ninety One...
- Page 24 STEP 10: Fix the Pedals STEP 11: Fix Reflectors and Seat 22 © Alpha Vector India Private Limited | Ninety One...
- Page 25 STEP 12: Fix the Connectors STEP 13: Wrap the spiral harness around the cable 23 © Alpha Vector India Private Limited | Ninety One...
-
Page 26: Operating Procedures
You can also use the throttle to take assistance as and when you need from the motor. Minimize using throttle as it adversely impacts the range of cycle and also drastically reduces human effort. 24 © Alpha Vector India Private Limited | Ninety One... - Page 27 The motor would start suddenly which may lead to an accident FOR YOUR SAFETY, PLEASE MAINTAIN AND CLEAN YOUR E-BIKE REGULARLY Add purely manual ride option in description 25 © Alpha Vector India Private Limited | Ninety One...
-
Page 28: Monitor Display
When not riding the bike, you can turn off the meter by holding down the POWER BUTTON for five seconds. FUNCTIONS OF THE MONITOR DISPLAY: Battery charge indicator Choosing motor assistance level from LOW to HIGH On/Off Button 26 © Alpha Vector India Private Limited | Ninety One... -
Page 29: How To Charge The Battery
When the light on charger turns red, the battery is charging. When the charging light turns green, the charging is finished and the battery is fully charged. 27 © Alpha Vector India Private Limited | Ninety One... - Page 30 Do not cover the charger when it is charging. the charger from impact. Never let it drop or drop objects onto it. Do not cover the charger when it is charging. 28 © Alpha Vector India Private Limited | Ninety One...
- Page 31 Unplug the charger outlet from the wall socket when not in use. During charging, if the charger emits any smell or it becomes excessively hot, please stop charging and contact customer service at 7778001408 29 © Alpha Vector India Private Limited | Ninety One...
-
Page 32: Maintenance/Repair
Pedals lithium based grease Disassemble Derailleur cables lithium based grease Disassemble Wheel bearings lithium based grease Bicycle Mechanic Headset lithium based grease Bicycle Mechanic Seat pillar lithium based grease disassemble 30 © Alpha Vector India Private Limited | Ninety One... -
Page 33: Service Shecklist
Lubrication as per schedule 1 Check all points as per monthly service Check and replace brake pads, if required Check chain for excess play or wear Yearly Lubrication as per schedule 1 31 © Alpha Vector India Private Limited | Ninety One... -
Page 34: Tools Required For Maintenance
Caution: Do not clean them with oily or greasy materials. When cleaning, use a clean rag or wash with soapy water, rinse and air dry. Don’t ride while they’re wet. When lubricating your bicycle, don’t get oil on the braking surfaces of the disc brakes. 32 © Alpha Vector India Private Limited | Ninety One... - Page 35 For this reason, it is critically important to maintain the proper tire inflation on your bike. 33 © Alpha Vector India Private Limited | Ninety One...
- Page 36 4. Press one side of the tire bead up over the edge of the rim. Note: Use tire levers, not a screwdriver, otherwise you may damage the rim. 34 © Alpha Vector India Private Limited | Ninety One...
- Page 37 When properly seated, fully inflate the tire to the pressure marked on the sidewall. Replace the wheel into the frame checking that all gears, brakes and quick release levers are properly adjusted 35 © Alpha Vector India Private Limited | Ninety One...
- Page 38 If removing a pedal, remember that the right pedal axle must be turned counter clockwise, i.e. the reverse of when fitting. 36 © Alpha Vector India Private Limited | Ninety One...
- Page 39 Take care to clean the chain of debris before lubrication. After lubrication, wipe off excess oil. NOTE: Do not get oil on the tires or rim braking surfaces. 37 © Alpha Vector India Private Limited | Ninety One...
- Page 40 We recommend that you consult a professional bicycle mechanic (91Cares) to replace or change the length of your chain. They will have the special tools required to perform the repairs correctly. Front Chainwheel Rear Sprocket Pull up 10 mm Straightedge 38 © Alpha Vector India Private Limited | Ninety One...
- Page 41 State/ Federal laws as applicable in the region. DO not discard battery / charger into fire, water or ordinary wet and dry household waste. Take it to an authorized waste facility for lithium and electronic waste in your area. 39 © Alpha Vector India Private Limited | Ninety One...
- Page 42 Use of an unsuitable charger to charge a lithium ion battery could result in over-heating, fire or even explosion. 40 © Alpha Vector India Private Limited | Ninety One...
- Page 43 It is also recommended to apply chain lube to the drive-train of your e-bike when you clean it or wipe it down to keep it in good running condition. 41 © Alpha Vector India Private Limited | Ninety One...
- Page 44 Do not rinse the electrical parts of your e-bike, use a moist cloth only. Please use natural detergents and use a rag to clean its surface gently, finally clean the bike with a dry cloth. 42 © Alpha Vector India Private Limited | Ninety One...
-
Page 45: Troubleshooting
CARES) 2. Bottom bracket 2. Adjust bearings (91 bearings too tight CARES) Freewheel does not 1. Freewheel internal 1. Lubricate. If problem rotate pawl pins are jammed persists, replace freewheel. 43 © Alpha Vector India Private Limited | Ninety One... - Page 46 1. Align wheels correctly frame 2. Adjust /tighten headset 2. Headset loose or 3. Take bicycle to a binding bicycle shop for 3. Front forks or frame possible frame bent realignment 44 © Alpha Vector India Private Limited | Ninety One...
- Page 47 1. Check throttle and/or battery gauge does not 1. Loose connectors battery gauge light up 2. Damaged wires connectors 3. Faulty battery gauge 2. Inspect all wires 3. Replace battery gauge 45 © Alpha Vector India Private Limited | Ninety One...
- Page 48 Battery not getting 1. Charger port faulty. 1. Replace charging port charged even after 3-4 2. Charger faulty. 2. Replace charger hrs of charging 3. Battery faulty. 3. Replace batteries 46 © Alpha Vector India Private Limited | Ninety One...
- Page 49 www.outdoors91.com...