Table of Contents
Advertisement
Advertisement
Table of Contents

Summary of Contents for ziggo Technicolor TC7210
- Page 1 Geavanceerde gebruikers- handleiding internet Technicolor TC7210...
- Page 3 Wi-Fi modem. Let op! Het aanpassen van de geavanceerde instellingen is op eigen risico. Ziggo heeft uw Wi-Fi modem standaard zo ingesteld dat het Wi-Fi modem goed werkt bij normaal gebruik. Mocht het Wi-Fi modem niet goed werken nadat u de geavanceerde instellingen gewijzigd heeft, dan adviseren wij u de standaardinstellingen te herstellen.
- Page 4 Inhoudsopgave 1. Internet van Ziggo 1.1 Symbolen 4.8 Gateway – USB Web Page Group 2. Inloggen op de 4.9 VoIP – Basic Web Page gebruikers- Group omgeving 5. Networking 2.1 Geavanceerde instellingen 5.1 Communications 3. Connections and 5.2 Type of communication setup 9 5.3 Cable Modem (CM) Section...
- Page 5 1. Internet van Ziggo Deze handleiding leidt u stap voor stap door de geavanceerde instellingen van Internet van Ziggo. Wij adviseren u om deze handleiding op uw computer op te slaan in verband met het eventueel wegvallen van de internetverbinding.
-
Page 6: Geavanceerde Instellingen
Voer uw gebruikersnaam en wachtwoord in en klik op Inloggen. Standaard is de gebruikersnaam ziggo en het wachtwoord draadloos. Geavanceerde instellingen Na het inloggen verschijnt de startpagina van de gebruikersomgeving. Op deze startpagina staat basisinformatie van uw Wi-Fi modem weergegeven. - Page 7 Handleiding Internet van Ziggo...
- Page 8 Handleiding Internet van Ziggo...
-
Page 9: Connections And Setup
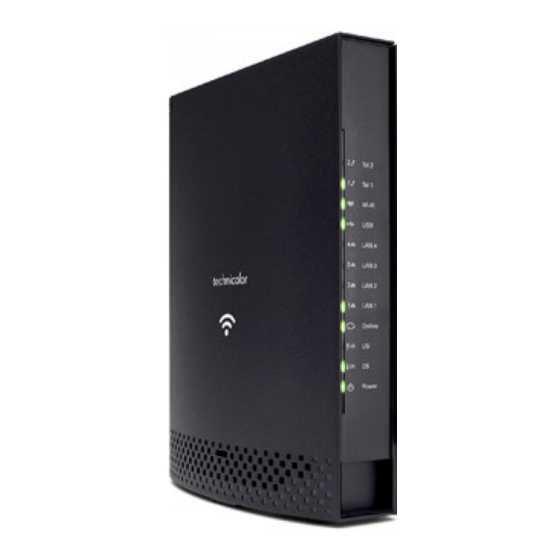
3. Connections and setup Wireless Voice Gateway Overview 3.1.1 Front panel The following illustration shows the front panel: figure 1: Front panel Handleiding Internet van Ziggo... - Page 10 Phone 2. The lights on the front panel LEDs are described in the table below (from left to right): ON = the LED is light, OFF = the LED is gray, FLASH = the LED is blinking. Handleiding Internet van Ziggo...
- Page 11 <CM Normal Operation> Both Lines On-Hook Operation FLASH Tel1 Off-hook, Tel2 On- hook FLASH Tel1 On-hook, Tel2 Off- hook FLASH FLASH Both Lines Off-Hook FLASH FLASH ON A software download and Download while updating the FLASH Operation memory Handleiding Internet van Ziggo...
-
Page 12: Rear Panel
Red LED will turn ON-OFF with 250 msec duration for 2 seconds followed by turning OFF for 500 msec. This cycle will repeat for a total duration of 120 seconds. table 1: LED behaviour 3.1.2 Rear panel figure 2: Rear panel Handleiding Internet van Ziggo... -
Page 13: Wps Button
WPS protocol. A long press (press 2 more seconds) on the button allows you to enable the association of the modem with a PC or other equipment. After link establish. A short press on the button, switch on/off Wi-Fi. Handleiding Internet van Ziggo... -
Page 14: What The Modem Does
Service Provider (TSP). The ISP is your gateway to the Internet and provides you with a pipeline to access Internet content on the World Wide Web (WWW). The TSP provides you with telephony access to other modems or other telephony services over the Public Switched Telephone Network (PSTN). Handleiding Internet van Ziggo... - Page 15 Your cable company should always be consulted before installing a new cable outlet. Do not attempt any rewiring without contacting your cable company first. Please verify the following on the Wireless Voice Gateway The Power LED should be lighted when plug-in the power supply. Handleiding Internet van Ziggo...
-
Page 16: Connecting The Wireless Voice Gateway To A Single Computer
Let op! For optimum performance, be sure to connect your Wireless Voice Gateway to the first point the cable enters your home. The splitter must be rated for at least 1GHz. figure 5: Basic home wiring Handleiding Internet van Ziggo... -
Page 17: Installation Procedure For Connecting To The Ethernet Interface
The modem is ready for data transfer after the green LED "ONLINE" is lit continuously. Let op! the button "reset" at the back of the modem is used primarily for maintenance. figure 6: Connect to the modem Handleiding Internet van Ziggo... -
Page 18: Telephone Or Fax Connection
If you have a multi-line telephone, connect a standard phone line cord (not an RJ-14 type line cord) from the phone to the LINE jacks on the Wireless Voice Gateway. (Other phones can be added to each line by using standard phone line splitters.) Handleiding Internet van Ziggo... -
Page 19: Accessing The Web Configuration
Gateway on the URL field: 192.168.0.1 After connecting to the device, you will be prompted to enter username and password. By default, the username is ziggo and the password is draadloos. figure 7: Login dialogue If you login successfully, the main page will appear. -
Page 20: Outline Of Web Manager
Your cable company may not support the reporting of some items of information listed on your gateway’s internal web pages. In such cases, the information field appears blank. This is normal. Handleiding Internet van Ziggo... -
Page 21: Warning Message To Change The Password
Please refer to the chapter password page 25 for more information. figure 9: Gateway\Status\Password To change the password: type the password, and re-enter it again. Handleiding Internet van Ziggo... - Page 22 The status section of this page shows how long your gateway has operated since last time being powered up, and some key information the Cable Modem received during the initialization process with your cable company. If Network Access shows Allowed, then your cable company has configured your gateway Handleiding Internet van Ziggo...
- Page 23 Internet connectivity. If not, you may not have Internet access, and should contact your cable company to resolve this. figure 11: Gateway\Status\Software Handleiding Internet van Ziggo...
- Page 24 This page reports current connection status containing startup procedures, downstream and upstream status, CM online information, and so on. The information can be useful to your cable company’s support technician if you’re having problems. figure 12: Gateway\Status\Connection Handleiding Internet van Ziggo...
- Page 25 4.2.3 Password By default, the username is ziggo and the password is draadloos. This is set by different actions (non exhaustive list): • at the manufactory level, • following a reset factory on the modem, • following a reset from the operator, •...
- Page 26 Gateway Web pages. figure 13: Gateway\Status\Password To change the password: type the password, and re-enter it again. If the password is accepted, you are required to re log on the web pages: figure 14: Password request dialog Handleiding Internet van Ziggo...
- Page 27 Keep this in mind when ping a device that may be behind a firewall. Ping is most useful to verify connectivity with PCs which do not have firewalls, such as the PCs on your LAN side. figure 15: Gateway\Status\Diagnostics Handleiding Internet van Ziggo...
-
Page 28: Event Log
4.2.5 Event Log This page displays the contents of the SNMP event log. Press Clear Log button to clear the logs. figure 16: Gateway\Status\Event Log Handleiding Internet van Ziggo... -
Page 29: Initial Scan
ID information here. Then click Apply and Reboot button to start scanning the cable network beginning with the values supplied here. The value is provided in Hertz. So, for 549 MHz, you must type: 549000000 figure 17: Gateway\Status\Initial Scan Handleiding Internet van Ziggo... - Page 30 To change the IP address that your gateway will use on the LAN side, enter it into the IP Address box and then click Apply. IP Address and Subnet Mask: A private IP address and Subnet Mask for LAN sub netting. For example 192.168.0.1./ 255.255.255.0. Handleiding Internet van Ziggo...
- Page 31 Configure the IP address numbers for the DHCP server with Lease pool start and Lease pool end. Configure the IP address lease time with Lease time for DHCP server. • Default value is 604800 seconds. figure 19: Gateway\Network\LAN Handleiding Internet van Ziggo...
- Page 32 MAC address when communicating instead of the usual WAN MAC address, e.g., if the MAC address is 00:10:18:de:ad:03, this spoofed MAC address could be 00:11:e3:df:ad:05 or any desired MAC address. figure 20: Gateway\Network\WAN Handleiding Internet van Ziggo...
- Page 33 IP address lease by selecting it in the DHCP Client Lease Info list and then clicking the Force Available button. If you do so, you may have to perform a DHCP Renew on that PC, so that it can obtain a new lease. figure 21: Gateway\Network\Computers Handleiding Internet van Ziggo...
- Page 34 The password that you registered with your DDNS provider. Host Name The domain name or host name that is registered with your DDNS provider. Status It shows the DDNS service status whether it is enabled or disabled. Click Apply to save the changes. Handleiding Internet van Ziggo...
- Page 35 4.3.5 Time This page allows configuration and display of the system time obtained from network servers via Simple Network Time Protocol. The system has to be reset for any changes to take effect. figure 23: Gateway\Network\Time Handleiding Internet van Ziggo...
- Page 36 Choose known FTP server and Filename with correct username and password then choose direction to Download or Upload. Press the Start button to start. figure 24: Gateway\Network\FTP Diagnostics You will see the result on the page, when transmit done. figure 25: Gateway\Network\FTP Diagnostics\test result Handleiding Internet van Ziggo...
-
Page 37: Port-Base Passthrough
Ethernet port is routed. If you enable the Passthrough, the Ethernet Port will have a direct connection to the Network. Note that access to this web access can be denied by your Cable operator. figure 26: Gateway\Network\Port-base Passthrough Handleiding Internet van Ziggo... - Page 38 “hiding” your gateway. PPTP PassThrough Enables PPTP type packets to pass between WAN and LAN. PPTP (Point to Point Tunneling Protocol) is another mechanism sometimes used in VPNs. Handleiding Internet van Ziggo...
- Page 39 (firewall pinhole) dynamically as required. Legitimate application data can thus be passed through the security checks of the firewall or NAT that would have otherwise restricted the traffic for not meeting its limited filter criteria. Handleiding Internet van Ziggo...
- Page 40 WAN. These PCs can still communicate with each other on your LAN, but packets they send to WAN addresses are blocked by the gateway. figure 28: Gateway\Advanced\IP Filtering Handleiding Internet van Ziggo...
-
Page 41: Mac Filtering
WAN. As with IP filtering, these PCs can still communicate with each other through the gateway, but packets they send to WAN addresses are blocked. figure 29: Gateway\Advanced\MAC Filtering Handleiding Internet van Ziggo... -
Page 42: Port Filtering
25 and POP-3 port 110). To enable port filtering, set Start Port and End Port for each range, and click Apply. To block only one port, set both Start and End ports with the same value. figure 30: Gateway\Advanced\Port Filtering Handleiding Internet van Ziggo... - Page 43 For example: To block HTTP (port 80) browse and restrict mail send from POP- 3(port 110), setting as following: figure 31: Gateway\Advanced\Port Filtering Setting port value, block protocol (Both for TCP & UDP), check Enable then Apply. Handleiding Internet van Ziggo...
- Page 44 However, sometimes you may wish for anyone outside to be able to originate a connection to a particular PC on your LAN if the destination port (application) matches one you specify. figure 32: Gateway\Advanced\Forwarding Handleiding Internet van Ziggo...
- Page 45 Press Create IPv6 button you will see follow options shows on the page. To specify rules, choose Service Name or Port number range to set up. IP Address 0.0.0.0 means allow all IP address. figure 34: Gateway\Advanced\Forwarding setting Handleiding Internet van Ziggo...
-
Page 46: Port Triggers
(to restore full protection to your LAN PC) to facilitate this. Port triggering is an elegant mechanism that does this work for you, each time you play the game. figure 35: Gateway\Advanced\Port Triggers Handleiding Internet van Ziggo... - Page 47 113 to 113. An outbound packet arrives at the gateway with your game- playing PC source IP address 192.168.0.10, destination port 666 over TCP/IP. This destination port is within the Trigger destined for port 113 to your game- playing PC at 192.168.0.10. Handleiding Internet van Ziggo...
- Page 48 HTTP server by using your gateway IP address as the destination. A setting of “0” indicates NO DMZ PC. Host is another Internet term for a PC connected to the Internet. figure 37: Gateway\Advanced\DMZ Host Handleiding Internet van Ziggo...
-
Page 49: Rip (Routing Information Protocol) Setup
You can activate settings by checking them and clicking Apply. The web-related filtering features you can activate from the Web Content Filter page include Filter Proxy, Filter Cookies, Filter Java Applets, Filter ActiveX, Filter Popup Windows, and Firewall Protection. Handleiding Internet van Ziggo... - Page 50 If you want the gateway to exclude your selected filters to certain computers on your LAN, enter their MAC addresses in the Trusted Computers area of this page. figure 39: Gateway\Firewall\Web Filter Handleiding Internet van Ziggo...
-
Page 51: Tod Filtering
Internet, but only at specific days and times. Specify a PC by its hardware MAC address, and then use the tools to specify blocking time. Finally, click the Apply button to save your settings. figure 40: Gateway\Firewall\TOD Filtering Handleiding Internet van Ziggo... -
Page 52: Local Log
The log of these events is also visible on the screen. For each blocking event type that has taken place since the table was last cleared, the table shows Description, Count, Last Occurrence, Target, and Source. figure 41: Gateway\Firewall\Local Log Handleiding Internet van Ziggo... -
Page 53: Remote Log
Activate Keyword Blocking and specify some keywords in the Keyword List to cause blocking of web pages on the WAN side with the specified keyword in the content. Activate Domain Blocking and specify some Domain Names (e.g. • www.ABC.com) in the Domain List. Handleiding Internet van Ziggo... - Page 54 Performance Because your wireless communication travels through the air, the factory default wireless channel setting may not provide optimum performance in your home if you or your neighbors have other interfering 2.4GHz or 5 GHz devices Handleiding Internet van Ziggo...
- Page 55 Security secures or scrambles messages traveling through the air between your wireless PCs and the gateway, so they can’t be observed by others. The following minimum security setting changes to factory defaults are recommended. See the 802.11b/g/n Security Web Page discussion below for details. Handleiding Internet van Ziggo...
- Page 56 You may use it to economize on electricity by selecting lower percentage of power output. Control the range of the AP by adjusting the radio output power. 802.11 Band It Support 2.4 GHz and 5 GHz band. This default band was 2.4 GHz. Handleiding Internet van Ziggo...
- Page 57 Default was “Auto”. Restore Wireless defaulfs To recover to the default settings, press this button to retrieve the settings then click Apply. Handleiding Internet van Ziggo...
- Page 58 Select Open to reveal the network to active scans. New Channel Select a particular channel on 1-13 1 or 6 or 11 which to operate. Interface Enable or disable the wireless Enabled, Disabled Enabled interface. table 3: Basic Settings Definitions Handleiding Internet van Ziggo...
-
Page 59: Primary Network
Primary Network This page allows you to configure the Network Authentication. It provides several different modes of wireless security. You will have to enter proper information according to the mode you select. figure 45: Gateway\Wireless\Primary Network Handleiding Internet van Ziggo... - Page 60 A RADIUS Key is like a password, which is used between IAS and the specific RADIUS client to verify identity. Both IAS and the RADIUS client must be use the same RADIUS Key for successful communication to occur. Enter the RADIUS Key. Handleiding Internet van Ziggo...
- Page 61 When a wireless client has associated with the Interval Wireless Voice Gateway for a period of time longer than the setting here, it would be disconnected and the authentication will be executed again. The default value is 3600, you may modify it. Handleiding Internet van Ziggo...
- Page 62 WPA Pre-Shared Key Please type the key to be between 8 and 63 characters, or 64 hexadecimal digits. Only the devices with a matching key that you set here can join this network. figure 47: WPA-PSK / WPA2-PSK Handleiding Internet van Ziggo...
- Page 63 63 characters in this field. If you want to key in 64 characters, only hexadecimal characters can be used. Generate WEP Keys Click this button to generate the Passphrase. Apply After proper configuration, click Apply to invoke the settings. Handleiding Internet van Ziggo...
- Page 64 Here you do not need to change anything, just skip this step. WPS Add Client There are two methods type”Client PIN” and “Authorized Client MAC”. Type in the client information you want. Then press button “add”. Handleiding Internet van Ziggo...
- Page 65 If you type in Client PIN, then the WPS Add Client option will appear as shown below. figure 50: WPS/Push-Button And then if you click “Add” button then WPS Add Client page will appear as shown in Fig. 38. figure 51: WPS Setup AP/PUSH Handleiding Internet van Ziggo...
-
Page 66: Access Control
Control is made by Mac Address. figure 53: Gateway\Wireless\Access Control Administration Web Page This field let you decide if a PC connected over Wi- Access Fi to the Gateway can have access to the Gateway Web Pages. Handleiding Internet van Ziggo... - Page 67 00 90 4B F0 FF 50. It is usually printed on the Wireless card of the device (e.g. the PCMCIA card in a laptop). Apply After proper configuration, click Apply to invoke the settings. Connected Clients: The information of currently connected clients will be displayed here. Handleiding Internet van Ziggo...
- Page 68 “speaking” at the same time. Default is “Auto”. Short Guard Interval To reduce complexity, manufacturers typically only implement a shot guard interval as a final rate adaptation step when the device is running at it’s highest data rate. Default is “Auto”. Handleiding Internet van Ziggo...
- Page 69 And, a lenth less than or equal to the value that you set will not be proceeded by RTS (Value range: 0~2347). Handleiding Internet van Ziggo...
- Page 70 Enabled to turn on the function of WDS. Remote Bridges Enter the MAC addresses of the remote Bridges to realy the signals for each other. Apply After proper configuration, click Apply to invoke the settings. Handleiding Internet van Ziggo...
- Page 71 This field allows you to enable WMM to improve multimedia transmission. Enable WWM No- This field allows you to enable WMM No- Acknowledgment Acknowledgement. Power Save Support This field allows you to enable WMM Power-Save- Support. Handleiding Internet van Ziggo...
- Page 72 TXOP to the AP for the 4 Access Categories: Best effort (AC_BE), Background (AC_BK) Video (AC_VI) and voice(AC_VO). Transmit parameters include Short Retry Limit, Short Fallbk Limit, Long Retry Limit, Long Fallbk Limit, and Max Rate in 500kbps. Handleiding Internet van Ziggo...
- Page 73 Choose Scan all Files will scan your approved USB devices for sharing files. Scan Files by Type for specific file type or all of types for sharing. Choose file types form Available File Types to Selected File Types. figure 57: Gateway/USB/Media Server Handleiding Internet van Ziggo...
- Page 74 Enable the Media Yes or No to activate or the not the DLNA Server (DLNA: Server (DLNA) Digital Living Network Alliance). To configure the DLNA server, click on the button Media Server Configuration. figure 58: Gateway/USB/USB Basic Handleiding Internet van Ziggo...
- Page 75 This page allows the configuration of the USB storage device(s) shared over the network. Add Available USB Devices as Approved USB Devices then apply changes. If you want to remove USB devices, propose you press Safely Remove Device button first. figure 59: Gateway/USB/Approved Devices Handleiding Internet van Ziggo...
- Page 76 This page shows the status of the USB folders shared over the network. Basic option defines shared files in all approved devices and specified folders or only specified folders. You can edit Shared Network Folders and observe the detail of folders. figure 60: Gateway/USB/Storage Basic Handleiding Internet van Ziggo...
- Page 77 4.8.5 Storage Advanced This page shows the status of the folders shared over the network. Advanced option provides FTP option to share files as a FTP server. figure 61: Gateway/USB/Storage Advanced Handleiding Internet van Ziggo...
- Page 78 This page displays the basic LAN status of this device, including the downstream and upstream status, device information, and interface parameters. You can select specific interface from the Interface Name drop-down menu. figure 62: VoIP\Basic\Basic LAN Handleiding Internet van Ziggo...
-
Page 79: Hardware Info
4.9.2 Hardware Info The hardware Info is displayed on this page. figure 63: VoIP\Basic\Hardware Info Handleiding Internet van Ziggo... - Page 80 4.9.3 Event Log The Docsis and PacketCable event logs are displayed on this web page. figure 64: VoIP\Basic\Event log\DOCSIS Handleiding Internet van Ziggo...
- Page 81 65: VoIP\Basic\Event log\PacketCable 4.9.4 CM State This page shows the current state of the cable modem. figure 66: VoIP\Basic\Cm state Handleiding Internet van Ziggo...
-
Page 82: Type Of Communication
Communication between your cable company and the cable modem side. Example: When your cable modem starts up, it must initialize with the cable company, which requires the cable company to communicate directly with the cable modem itself. Handleiding Internet van Ziggo... -
Page 83: Cable Modem (Cm) Section
TCP/IP stacks, as illustrated by Fig.3-2. On a PC, you often use software that came with the PC or its network interface (if you purchased a network interface card separately) to perform this configuration. To communicate with Handleiding Internet van Ziggo... -
Page 84: Three Networking Modes
All units ship from the factory set for the RG mode, but a configuration file which the cable company sends the cable modem section during its initialization can change it. Handleiding Internet van Ziggo... -
Page 85: Cable Modem (Cm) Mode
PC you connect from their pool of available addresses. Your cable company may have you or your installer manually enter these assigned addresses into your PC, or use a DHCP Server to communicate Handleiding Internet van Ziggo... -
Page 86: Residential Gateway (Rg) Mode
IP Stack 3 - for use by you to remotely (i.e. from somewhere on the WAN side, such as at your remote workplace) communicate with the Cable Modem and Networking sections, to remotely access the internal web page Handleiding Internet van Ziggo... - Page 87 Networking section, from their pool of available addresses. With RG Mode, each PC you connect gets an IP address from a DHCP Server that is part of the Networking section of the gateway. Handleiding Internet van Ziggo...
-
Page 88: Frequently Asked Questions
802.11a/b/g networks. When Xpress is turned on, aggregate throughput (the sum of the individual throughput speeds of each client on the network) can improve by up to 27% in Handleiding Internet van Ziggo... - Page 89 802.11g-only networks, and up to 75% in mixed networks comprised of 802.11g and 802.11b standard equipment. The technology achieves higher throughput by re-packaging data, reducing the number of overhead control packets, so that more useful data can be sent during a given amount of time. Handleiding Internet van Ziggo...
-
Page 90: Troubleshooting
If your cable outlet is “dead”, call your Cable Company. • Verify that the Cable Modem service is Euro-DOCSIS compliant and PacketCable compliant by calling your cable provider. Handleiding Internet van Ziggo... - Page 91 The other service can normally be disconnected at the Network Interface Device located on the outside of the house. • If using the second line on a two-line telephone, use a 2-line to 1-line adapter cable. Handleiding Internet van Ziggo...
- Page 92 HTTP (HyperText Transfer Protocol) Invisible to the user, HTTP is used by servers and clients to communicate and display information on a client browser. A device used to connect multiple computers to the Wireless Voice Gateway. Handleiding Internet van Ziggo...
- Page 93 The process of enabling the Media Terminal Adapter (MTA) to register and provide services over the network. TCP/IP (Transmission Control Protocol/Internet Protocol) A networking protocol that provides communication across interconnected networks, between computers with diverse hardware architectures and various operating systems. Handleiding Internet van Ziggo...
- Page 94 Wireless Voice Gateway. Xpress Technology One of the popular performance-enhancing WiFi technologies, designed to improve wireless network efficiency and boost throughput. It is more efficient in mixed environments, and it can work with 802.11a/b/g networks. Handleiding Internet van Ziggo...
- Page 95 Ondanks alle aan deze handleiding Alle rechten voorbehouden. Niets uit bestede zorg kan Ziggo geen deze uitgave mag worden aansprakelijkheid aanvaarden voor verveelvoudigd, opgeslagen in een schade die het gevolg is van enige geautomatiseerd gegevensbestand, onvolkomenheid of fout in deze en/of openbaar gemaakt in enige uitgave.
- Page 97 GEA.INT.TECHNI.1410 | Versie 1.0 | Oktober 2014...
Need help?
Do you have a question about the Technicolor TC7210 and is the answer not in the manual?
Questions and answers
i can not finde username and password for technicolor TC7210
The default username for the Ziggo Technicolor TC7210 is ziggo, and the default password is draadloos.
This answer is automatically generated
where can i finde BRIDGE MODE on modem technicolor TC7210
To find and configure bridge mode on the Technicolor TC7210 modem:
1. Access the modem's web interface.
2. Navigate to the Gateway > Wireless > Bridging section.
3. Choose the desired Wireless Bridging mode:
- Disabled to turn off bridging.
- Enabled to activate WDS (Wireless Distribution System).
4. Enter the MAC addresses of remote bridges if needed.
5. Click Apply to save the settings.
This allows the modem to communicate with other extender access points or local PCs.
This answer is automatically generated
My PC not recognized modem TECHNICOLOR TC 7210
Your PC may not be recognizing the Technicolor TC7210 modem due to several reasons:
1. Incorrect Configuration: If the modem was reset from bridge mode to normal mode, your PC might need to refresh its network settings.
2. IP Assignment Issue: The modem uses DOCSIS/EURO-DOCSIS to assign an IP address automatically. If the PC does not receive an IP, try releasing and renewing the IP through network settings.
3. DHCP Problems: Ensure the modem’s DHCP server is enabled so the PC can obtain an IP address.
4. Connection Issues: If the PC works when directly connected, but not through a router, the router may need to be reset or reconfigured.
5. MAC Address Binding: Some ISPs lock the connection to a specific MAC address. Restarting the modem and PC may resolve this.
6. Firmware or Driver Issues: Ensure the network adapter drivers on the PC are updated.
Try power cycling the modem and PC, checking network settings, and ensuring DHCP is enabled. If the issue persists, a factory reset of the modem may help.
This answer is automatically generated
My PC not recognized modem TECHNICOLOR TC 7210
Your PC may not be recognizing the Technicolor TC7210 modem due to several possible reasons:
1. Modem Initialization: The Technicolor TC7210 uses DOCSIS or EURO-DOCSIS technology, which performs an automated initialization process. If this process fails, the modem may not obtain a CM IP address, preventing connectivity.
2. Configuration Issues: If the modem was recently reset from bridged mode to normal mode, the PC might need to renew its IP address. Try disconnecting and reconnecting the network cable or restarting the PC.
3. DHCP Assignment: The modem provides IP addresses using DHCP. If the PC is set to a static IP or does not receive an IP from the modem, it may not connect properly. Ensure the PC is set to obtain an IP address automatically.
4. Hardware Connection: If the modem works when directly connected to another device (e.g., another router), check the network cable and port being used on the PC.
5. Firmware or Reset Issues: If the modem was reset or had a power loss, it may need a factory reset to restore proper operation.
Try restarting both the modem and PC, ensuring the network settings are correct, and checking for DHCP issues. If problems persist, a factory reset of the modem may help.
This answer is automatically generated
Wie kann man auf Werkeinstellung zurück setzen?
To reset the Technicolor TC7210.Z router to factory settings, follow these steps:
1. Understand the Impact: A reset will erase all custom settings, including the router's login credentials, WiFi name and password, ISP settings, firewall settings, parental controls, and port forwards.
2. Perform the Reset:
- Locate the reset button on the router.
- Press and hold the reset button for about 10-30 seconds using a paperclip or similar tool.
- Release the button and wait for the router to restart.
3. Post-Reset Actions:
- The router will return to factory default settings.
- You may need to reconfigure your ISP settings or contact your ISP.
- Set up WiFi credentials and other custom settings again.
A factory reset should only be done as a last resort, especially if recovering a forgotten password.
This answer is automatically generated