Table of Contents
Advertisement
Advertisement
Table of Contents

Related Manuals for PLANMED SOPHIE

Summary of Contents for PLANMED SOPHIE
- Page 1 PLANMED SOPHIE MAMMOGRAPHY X-RAY UNIT TECHNICAL MANUAL 788405/11...
-
Page 3: Table Of Contents
3.2 Remote control attachment (optional for the mobile unit) ..... . B-8 3.3 Mobile Sophie special accessories attachment......B-8 3.4 Exposure warning light (option). - Page 4 1.2 Other setups before using the unit ........F-1 TOC-2 Sophie Mammography X-ray unit Technical Manual...
- Page 5 3.9 Special system parameters setup ........F-17 FINE TUNING SOPHIE AEC FOR NONSTANDARD FILM/SCREEN COMBINATIONS .
- Page 6 5.3 How to contact Planmed head office ........
-
Page 7: Chapter A General & Technical Data
CAUTION GENERAL SAFETY RULES The unit must be serviced only by qualified personnel, trained by PLANMED Repairs and parts replaced by unqualified personnel carry no warranty. Periodical maintenance as described in this manual must be performed on a regular basis, to ensure the safety and image quality of the unit. -
Page 8: Manual Versions
Planmed reserves the right to make changes to speci- fications without prior notice. This manual is valid for all versions of the Sophie Mammogra- phy X-ray units with SID 650mm. In case you have the unit with SID 600mm, you need a technical manual revision 9. -
Page 9: Software Revisions & Compatibility
Since this unit is fully microprocessor controlled, its operation is controlled by the currently installed software. PLANMED reserves the right to improve functionality or to add new features to the product by modifying the software and/or hardware. Manuals are updated accordingly and technical bulletins published in order to inform about these changes or additions. -
Page 10: How To Find Information In This Manual
“KEYBOARD FUNCTIONS & MODES” on page C-1 This chapter contains a complete short-form presentation of all available special keyboard func- tions. For explanation of normal user operation. Please refer to the “SOPHIE USER’S MANUAL”. The special display modes are also described here. -
Page 11: Technical Specifications (Toshiba E7272 X-Ray Tube
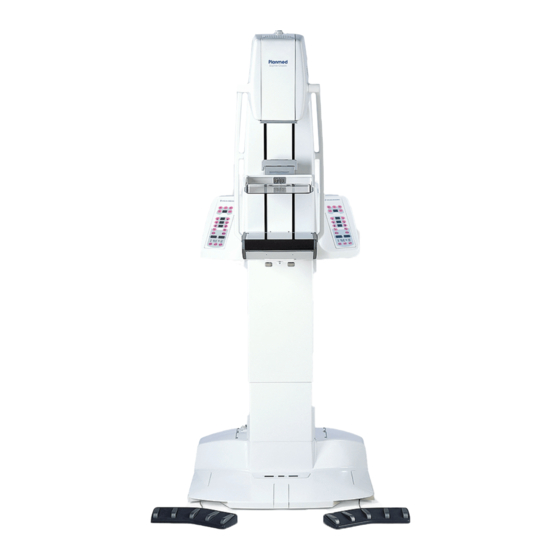
Chapter A - GENERAL & TECHNICAL DATA TECHNICAL SPECIFICATIONS (TOSHIBA E7272 X-RAY TECHNICAL SPECIFICATIONS (TOSHIBA E7272 X-RAY TUBE) ORIGINAL MANUFACTURER PLANMED Oy, Asentajankatu 6, 00810 Helsinki, FINLAND phone: +358-9-7590 5300, fax: +358-9-7590 5555 MODEL AND APPROVALS MODELS: PLANMED SOPHIE, PLANMED SOPHIE MOBILE... - Page 12 1.3 to 1.8 MECHANICAL DATA Dimensions (H x D x W) 1000 x 900 x 755 (mm) minimum (36.6 x 35.0 x 29.7 inch minimum) Weight 160kg (352lbs), unpacked Color RAL 9016 Sophie Mammography X-ray unit Technical Manual...
-
Page 13: User's Statement For Planmed Sophie (Toshiba E7272 X-Ray Tube
Chapter A - GENERAL & TECHNICAL DATA USER’S STATEMENT FOR PLANMED SOPHIE (TOSHIBA USER’S STATEMENT FOR PLANMED SOPHIE (TOSHIBA E7272 X-RAY TUBE) Radiation leakage technique factors The maximum-rated peak tube potential is 35 kVp and the maximum rated continuous tube cur- rent is 3.5mA for the maximum-rated peak tube voltage. - Page 14 Chapter A - GENERAL & TECHNICAL DATA USER’S STATEMENT FOR PLANMED SOPHIE (TOSHIBA The highest x-ray tube current together with the highest x-ray tube voltage obtainable from the high-voltage generator when operated at its highest x-ray tube current 120mA 24kV / 60Hz - large focal spot, 110mA 24kV / 50Hz - large focal spot...
-
Page 15: Toshiba E7272 X-Ray Tube Ratings
Chapter A - GENERAL & TECHNICAL DATA USER’S STATEMENT FOR PLANMED SOPHIE (TOSHIBA Toshiba E7272 x-ray tube ratings Manual exposures With manual exposures the tube kV, mAs and focal spot can be selected by the user. The mA value is automatically determined by the selected kV value, and the exposure time is determined by the selected mAs value. -
Page 16: Cooling Curves For X-Ray Tube
Chapter A - GENERAL & TECHNICAL DATA USER’S STATEMENT FOR PLANMED SOPHIE (TOSHIBA Table 2: Maximum mA for Tube E7272 vs. different modes and line frequencies MANUAL EXPOSURE MODE AUTOMATIC (AEC) EXPOSURE MODE Large focal spot Small focal spot Large focal spot Small focal spot (0.3 mm) -
Page 17: Technical Specifications (Toshiba E7290 X-Ray Tube
Chapter A - GENERAL & TECHNICAL DATA TECHNICAL SPECIFICATIONS (TOSHIBA E7290 X-RAY TECHNICAL SPECIFICATIONS (TOSHIBA E7290 X-RAY TUBE) ORIGINAL MANUFACTURER PLANMED Oy, Asentajankatu 6, 00810 Helsinki, FINLAND phone: +358-9-7590 5300, fax: +358-9-7590 5555 MODEL AND APPROVALS MODELS: PLANMED SOPHIE, PLANMED SOPHIE MOBILE... - Page 18 1.3 to 1.8 MECHANICAL DATA Dimensions (H x D x W) 1000 x 900 x 755 (mm) minimum (36.6 x 35.0 x 29.7 inch minimum) Weight 160kg (352lbs), unpacked Color RAL 9016 A-12 Sophie Mammography X-ray unit Technical Manual...
-
Page 19: User's Statement For Planmed Sophie (Toshiba E7290 X-Ray Tube
Chapter A - GENERAL & TECHNICAL DATA USER’S STATEMENT FOR PLANMED SOPHIE (TOSHIBA USER’S STATEMENT FOR PLANMED SOPHIE (TOSHIBA E7290 X-RAY TUBE) Radiation leakage technique factors The maximum-rated peak tube potential is 35 kVp and the maximum rated continuous tube cur- rent is 3.5mA for the maximum-rated peak tube voltage. - Page 20 Chapter A - GENERAL & TECHNICAL DATA USER’S STATEMENT FOR PLANMED SOPHIE (TOSHIBA The nominal x-ray voltage together with the highest x-ray tube current obtainable from the high-voltage generator when operated at its nominal x-ray tube voltage 35kV 91mA - large focal spot...
-
Page 21: Toshiba E7290 X-Ray Tube Ratings
Chapter A - GENERAL & TECHNICAL DATA USER’S STATEMENT FOR PLANMED SOPHIE (TOSHIBA Toshiba E7290 x-ray tube ratings Manual exposures With manual exposures the tube kV and mAs can be selected by the user. In order to keep the exposure times at minimum the required mAs is always achieved at highest possible tube current for the kV selected. -
Page 22: Cooling Curves For X-Ray Tube
Chapter A - GENERAL & TECHNICAL DATA USER’S STATEMENT FOR PLANMED SOPHIE (TOSHIBA Table 3: Maximum mA for Tube E7290 vs. different modes MANUAL EXPOSURE MODE AUTOMATIC (AEC) EXPOSURE MODE Large focal spot Small focal spot Large focal spot Small focal spot (0.3 mm) -
Page 23: Unpacking & Installation
UNPACKING & INSTALLATION PRE-INSTALLATION REQUIREMENTS Since the SOPHIE is a very small and light-weight unit, the installation can be performed by one person only. The unit is shipped complete so there is no need to perform special assembly or cal- ibrations on the field. -
Page 24: Radiation Protection
The radiation safety regulations of individual countries must be complied with. Radiation protec- tion devices should be used, as movable or stationary radiation shields. The mobile version of the Sophie has an integral radiation shield that must be attached to the unit. Safe distances without specific shielding A few exposures (without additional radiation shielding) can be made without exceeding the mR/ hour per month limit, if the operator distance is far enough from the unit. -
Page 25: Unpacking The Unit
Remove the four large Allen head bolts (item 1). Remove the accessory box from the crate. Remove the 8 screws (item 2) around the base of the crate and lift the rectangular crate carefully up and away. FRAGILE FRAGILE FRAGILE FRAGILE FRAGILE Accessory box Technical Manual Sophie Mammography X-ray unit... - Page 26 It’s always a good idea to use a helping hand or two. CAUTION NEVER lift it from the FOOT-PEDALS, C-ARM or HOOD. When handling the unit, lift the unit from the metal base and/or the transportation handle. Sophie Mammography X-ray unit Technical Manual...
-
Page 27: Driving The Unit Out Of The Transportation Position
ON/OFF switch CAUTION Do not rotate C-arm in its lowest position when the C-arm locking knob is in its place. CAUTION Never transport the unit without first driving it down to the transport position. Technical Manual Sophie Mammography X-ray unit... -
Page 28: Attaching The Unit To The Floor
Drill the holes (12mm in diameter and 60mm deep) and insert the 12x60 expansion anchors into the holes. Fasten the unit to its place with three 8x70 DIN 571 screws. Replace the removed covers. Remove the C-arm locking knob and attach the cover strip to its position. Sophie Mammography X-ray unit Technical Manual... -
Page 29: Unpacking The Accessories
Unpack carefully the accessories from the boxes found inside the crate. Note that the unit is nor- mally delivered without cassettes. NOTE The small accessories bag is located under the right cover strip of the unit base. Technical Manual Sophie Mammography X-ray unit... -
Page 30: Attachment Of Accessories
(please refer to the Spare Parts Manual) to connect to the remote control cable. This adapter is then connected to the printer with a straight 25-pin RS-232 cable. ADMARK darkroom film-marking system Please refer to the ADMARK manual how to install and use it with the SOPHIE mammographic unit. Sophie Mammography X-ray unit... -
Page 31: Setups And Checks Prior To Use
SETUPS AND CHECKS PRIOR TO USE Before using the unit for patient work, some initial setups and checks must be performed. Con- tinue with the setups described in “SPECIAL REGIONAL & INITIAL SETUPS” on page F-1. Technical Manual Sophie Mammography X-ray unit... -
Page 32: Re-Packing & Transportation Of The Sophie Unit
Chapter B - UNPACKING & INSTALLATION RE-PACKING & TRANSPORTATION OF THE SOPHIE UNIT RE-PACKING & TRANSPORTATION OF THE SOPHIE UNIT Driving the unit into the transportation position Make sure that there is enough room around the unit so that the C-arm can rotate without hitting any obstacles. -
Page 33: Mobile Sophie Handling & Transportation
MOBILE SOPHIE HANDLING & TRANSPORTATION MOBILE SOPHIE HANDLING & TRANSPORTATION The mobile version of the SOPHIE mammographic unit is intended to be easily transported. However, certain precautions must be followed to guarantee that no harm comes to the unit when turning the unit into and from the transport position. -
Page 34: Preparing The Mobile Unit For Transportation
Chapter B - UNPACKING & INSTALLATION MOBILE SOPHIE HANDLING & TRANSPORTATION Preparing the mobile unit for transportation Make sure that the C-arm locking knob is in its lowest position. Also make sure that the foot controls are on the floor and not on the base front cover plate. -
Page 35: Chapter C Keyboard Functions & Modes
Breast thickness display Time/force display Automatic/manual AAEC Sensor indicator lights READY exposure indicator lights PRET Automatic/manual exposure key Exposure/ready indicator lights CAUTION: X-RAYS Focal spot indicator lights ATTENTION: RAYONS-X Filtration/spot key and indicator lights Technical Manual Sophie Mammography X-ray unit C-1... -
Page 36: User Mode Functions Short-Form
Normal user functions The keyboards are always in the normal operating mode when the unit is turned on. Please refer to the SOPHIE USER’S MANUAL for descriptions for the normal keyboard operation and instruc- tions for normal everyday use of the unit. - Page 37 PLAYS 3 seconds mA LIMIT “mA limit (on/off)” on page F-7 hold for 3 seconds SERVICE MODE “How to enter the service mode” on hold for hidden ENTRY page F-8 4 seconds Technical Manual Sophie Mammography X-ray unit...
-
Page 38: Service Mode Functions Short-Form
Used only for sages factory diagnostic purposes. Breast thickness Actual measured X-ray tube cathode filament voltage (V) Selected kV Actual measured X-ray tube anode voltage (kV) Selected mAs Actual measured X-ray tube anode current (mA) Sophie Mammography X-ray unit Technical Manual... -
Page 39: Service Mode Settings & Special Displays
“X- ray tube filament pre- service FILAMENT heating voltage calibration” mode VOLTAGE on page F-14 hold for CALIBRATION 3 seconds tube type large focus bias setting hold until finished small focus bias setting exit without programming Technical Manual Sophie Mammography X-ray unit... - Page 40 “Print a list of the recent 49 hold for 3 seconds service ERROR MES- left OBL key errors” on page C-9 mode SAGES kV-VALUE FINE- “kV-value fine-adjustment” service hold for ADJUSTMENT on page F-16 mode 3 seconds Sophie Mammography X-ray unit Technical Manual...
-
Page 41: Service Mode Function Details
TUBEHEAD is not ideal, but fully sufficient for effective cooling of the power supply. If the temperature of the POWER SUPPLY heatsink increases more than mentioned, it could indicate that the power supply is not properly tightened into its place. Technical Manual Sophie Mammography X-ray unit... -
Page 42: Displaying The Real Density Value
Remember that the exposure counter memory is on the REAR CPU, replacing it also means that you loose the current exposure counter data. The exposure counter can be cleared (together with the error message list), but only by PLANMED. Spare REAR CPU boards have the exposure counter cleared at the factory. -
Page 43: Print A List Of The Recent 49 Errors
Error that are related with the safety of the unit cannot be ignored this way (such as X-ray tube related prob- lems). Technical Manual Sophie Mammography X-ray unit... -
Page 44: Diagnostic Display Of Internal Signals
05. UP/DOWN mechanism Hall-sensor signals & motor drive right upper segment = at highest position right middle segment = lift reference sensor signal right lower segment = at lowest position left middle segment = motor rotation sensor signal C-10 Sophie Mammography X-ray unit Technical Manual... - Page 45 14. Exposure switch signal vertical segment =exposure switch signal 15. Keyboard & Lamp test nn = matrix keyboard scan code 15.nn All LEDs should be lit on panels when you press the automaic/manual exposure key. Technical Manual Sophie Mammography X-ray unit C-11...
- Page 46 18. Power supply temperature sensor output nn = hexadecimal value of the power supply temperature sensor signal 18.nn This display shows (as a hexadecimal number) the power supply temperature sensor output (used for internal factory tests only). C-12 Sophie Mammography X-ray unit Technical Manual...
-
Page 47: Chapter D Help And Error Messages
ERROR codes. For flexibility, many of the HELP-messages are NOT shown when the unit is in the SERVICE-mode. If the unit is reporting help messages not found in this manual, please contact your Planmed dealer for a newer revision of the Technical Manual. -
Page 48: Help Messages Shortform Table
Release the exposure switch in the remote control The C-arm is not allowed to continue to rotate with- Press and hold any of the foot controls to continue HE28 out pressing any of the foot controls the movement of the C-arm Sophie Mammography X-ray unit Technical Manual... - Page 49 Increase the kV-setting first if you wish to use AAEC. ting. OR A lower kV-setting is not allowed with the AAEC. The advanced AEC mode can not be used with the Select the molybdenum filter. HE40 aluminium filter. Technical Manual Sophie Mammography X-ray unit...
-
Page 50: Error Messages Shortform Table
Bucky grid motor time-out. The grid does not move or there is no signal from sensor within a specified time Er24 Er25 MAG/LOAD motor error. No pulses from motor even if the motor is driven. Er26 X-ray tube anode doesn’t rotate properly, or a problem in the anode motor rotation sensing Sophie Mammography X-ray unit Technical Manual... - Page 51 Compression mechanism release limit sensor failure during calibration Er56 Er57 Exposure switch failure (short circuit) or pressed during self test Foot control switch failure (short circuit) or pressed during self test Er58 Er59 Failure in internal emergency STOP-system Technical Manual Sophie Mammography X-ray unit...
- Page 52 Software chip (EPROM) failure on REAR CPU REAR CPU attempted to execute an illegal program instruction Er73 Er74 REAR CPU watchdog reset occurred (please contact Planmed) Er75 REAR CPU illegal interrupt detected (please contact Planmed) Er76 REAR CPU timer interrupt error (please contact Planmed)
- Page 53 Chapter D - HELP AND ERROR MESSAGES ERROR MESSAGES SHORTFORM TABLE Table 14: Error Codes Short Form Table (Continued) ERROR MESSAGE EXPLANATIONS No pulses from the MAG/LOAD motor rotation sensor, or the motor does not rotate even if commanded Er97 Technical Manual Sophie Mammography X-ray unit...
-
Page 54: Detailed Error Message Explanations
Check the wiring starting from inside the labeling device. The signal goes from the switch through the LABELING PCB and SHELF COLLECTOR PCB to the TUBE CPU. Change the TUBE CPU as last remedy. Sophie Mammography X-ray unit Technical Manual... -
Page 55: Errors 10-16 (X-Ray Safety And Aec-Sensor Related
AEC-sensor calibra- tion values. These parameters must be re-calibrated whenever the TUBE CPU is replaced (alone, or together with the POWER SUPPLY). Technical Manual Sophie Mammography X-ray unit... -
Page 56: Errors 20-29 (Motion And Compression Related
The signal reaching the TUBE CPU can be monitored in the service mode for easier faultfinding. Check the position of the mag- net and sensor if the mechanism seems to work properly. D-10 Sophie Mammography X-ray unit Technical Manual... - Page 57 A fault in the tube head internal stator winding or its wiring could also be the case. Check the winding resistances through the 32-way connector, after you have removed the power supply. Technical Manual Sophie Mammography X-ray unit D-11...
-
Page 58: Errors 30-38 (Tube Head And Power Supply Related
(<0.5 ohm) through the 32-way tubehead connector, please refer to the schematics. Check also the mA-feedback resistance through this same connector. If the error occurs con- stantly replace the POWER SUPPLY, TUBE CPU, TUBE-HEAD (replace in this order). D-12 Sophie Mammography X-ray unit Technical Manual... -
Page 59: Errors 40-49 (Sensor & Switch Related
Check also the operation and correct adjustment of the paddle size identification switches. The signals reaching the REAR CPU can be monitored in the service mode for easier faultfinding. There are also LEDs on the front-collimator PCB displaying the signals from these two microswitches. Technical Manual Sophie Mammography X-ray unit D-13... - Page 60 At the stereotactics center position the disk is at maxi- mum distance from the sensors. Carefully bend the sensors closer to the disc, ensuring that the sensors does not touch the reflecting disc when it is at is closest position. D-14 Sophie Mammography X-ray unit Technical Manual...
-
Page 61: Errors 50-59 (Temperature & Special Sensor Related
Any of the foot-control switches was activated during the self test. Check for mechanical damage on the switches. There are status indicators LEDs on the BASE PCB that can be used for fault- finding. The foot-control switch signals can be also displayed in the service mode. Technical Manual Sophie Mammography X-ray unit D-15... -
Page 62: Errors 60-68 (Serial Communication & Cpu Voltage Related
The errors 71...77 usually indicate an error, that is either processor circuitry related, or an internal software error. In this case, please contact Planmed and, if possible, report the exact circum- stances when this error occurred as well as the software version and unit serial number. -
Page 63: Errors 80-87 (Cpu Hardware Related
Please replace the whole board for repair at the PLANMED factory. Please remember that the possibility for these errors is very low. They are added to the error list just because of maximal system and patient safety. -
Page 64: Errors 90-97 (Erroneous Sensor Signals
(please see “Regional setups before using the unit” on page F-1 for instructions). This country code is normally cleared in new units at the PLANMED factory, especially if the end customer is not known. Spare REAR CPU:s (that contain this data) are also cleared at the PLANMED factory to guarantee that this code is set initially by the service technician, before operating the unit with patients. - Page 65 Follow this signal all the way from the REAR CPU board to the TUBE CPU, there is a break somewhere. If no error is found and the STOP circuitry is otherwise operational, then replace the TUBE CPU board. Technical Manual Sophie Mammography X-ray unit D-19...
- Page 66 Chapter D - HELP AND ERROR MESSAGES DETAILED ERROR MESSAGE EXPLANATIONS D-20 Sophie Mammography X-ray unit Technical Manual...
-
Page 67: Preventive Maintenance
Remove the cassette and replace it with a small scale. Put a soft spacer between the paddle Compress with the front edge of the paddle a small scale and compare the value with the com- pression display in the unit. The deviation should be less than ± 15%. Technical Manual Sophie Mammography X-ray unit E-1... -
Page 68: Preventive Maintenance Checks
TIVE MAINTENANCE CHECKS” on page E-2) must be performed once a year. Calibration and verification of the instruments The used measurement and test instruments must be calibrated once a year by authorized cali- bration officials, to ensure long-term accuracy. Sophie Mammography X-ray unit Technical Manual... -
Page 69: Determining Half Value Layer (Hvl / Beam Quality
Select the “PULSE EXPOSURE” mode from the “MODE SELECTOR”. Measurement procedure Select 30 kV, 50 mAs manual exposure and filter 1 (30µm Mo) from the SOPHIE control panel. Take an exposure and record the mR-reading (R normal) Place the 0.3 mm aluminum block to the beam, just outside the collimator... -
Page 70: Checking X-Ray Tube Efficiency (Radiation Output
Please follow the operating instructions of the Star Pattern. Repeat the procedure for both focal spots. Because the focal spot size variations that depend on the used kV and mA are compen- sated for in Sophie, it is not necessary to perform the focal spot size measurements at different technique factors. -
Page 71: Image Quality Evaluation
If the value of the feedback resistance is unknown, turn power off from SOPHIE and measure the resistance of the feedback resistor from the connector on the generator module and record it. -
Page 72: Other Preventive Checks
Select 27 kV, 50 mAs, filter 1 (30 µm Mo), large focus from the SOPHIE panel. Make sure that the Automatic kV selection and the AEC modes are not selected. - Page 73 The X-ray unit may be damaged if the power is turned on when the multimeter is on the resistance range. E7272 tube: Select 20kV, 50mAs and small focus from the control panel of SOPHIE. E7290 tube: Select 20kV, 100mAs and small focus from the control panel of SOPHIE.
-
Page 74: Verifying The Tube Current (Ma) And The Exposure Time (Toshiba E7272 X-Ray Tube
The X-ray unit may be damaged if the power is turned on when the multimeter is on the resistance range. Select 20kV, 50mAs and small focus from the control panel of SOPHIE. Make sure that the Automatic kV selection and the AEC modes are not selected. -
Page 75: Verifying The Tube Current (Ma) And The Exposure Time (Toshiba E7290 X-Ray Tube
The X-ray unit may be damaged if the power is turned on when the multimeter is on the resistance range. Select 20kV, 50mAs and small focus from the control panel of SOPHIE. Make sure that the Automatic kV selection and the AEC modes are not selected. -
Page 76: Verifying X-Ray Beam Alignment
E7272 tube: Select 20 kV, 50 mAs. E7290 tube: Select 20 kV, 100 mAs. Adjust the field size to its maximum using the size adjust buttons on the control panel of SOPHIE. Turn off the lights in the room. Take an exposure and check that the yellow area that can be seen on the fluorescent screen is symmetrical, and stays within tolerances. -
Page 77: Verifying Visually Defined X-Ray Fields
Check visually for wear out or extensive slack when unit is driven to its lowest position. Rear cov- ers of the column must be removed. External cable conditions Check visually the remote control cable, and the spiral cable to the exposure switch Technical Manual Sophie Mammography X-ray unit E-11... - Page 78 Chapter E - PREVENTIVE MAINTENANCE OTHER PREVENTIVE CHECKS E-12 Sophie Mammography X-ray unit Technical Manual...
-
Page 79: Adjustment & Calibration
To ensure correct optical density, please set this parameter according to the type of film and intensifying screens used. Please refer to the “Sophie User’s Manual”. If you want to use film/ screen combination which is not listed in the user’s manual, adjust the AEC for the selected combination as follows: •... - Page 80 (sensor 1)” on page F-18. Printer/Label type (option) Ignore this setup if you do not use a printing device attached directly to the Sophie unit. One of three different printer systems can be used. For printer type selection see “11. Setting type of printer and/or height of labels used”...
-
Page 81: Keyboard-Controlled (In Normal Mode
The following pages lists all these special adjustments that can be performed in the normal (user) keyboard mode. These are also explained in the “Sophie User’s Manual”. Space is reserved under each heading for writing down the current setting for this particular unit. -
Page 82: Default Magnification Factor
In this mode the force measurement is totally ignored. Compression starts at a moderate speed and continues only at crawling speed, after the compression movement is shortly interrupted by releasing the control switch. Sophie Mammography X-ray unit Technical Manual... -
Page 83: Compression Speed Decrease Rate
The TIME/CM-display shows the current setting. The fac- tory default is 4. The maximum lift motor speed can be set in the service mode, see “03. Maxi- mum speed of UP/DOWN movement” on page F-17 Technical Manual Sophie Mammography X-ray unit... -
Page 84: 2.10 Setting Correct Time And Date
This key sequence sets the automatic film labeling either on or off. It is useful to disable the film marking, if another film marking system is used, or if the marking system is causing some errors (these would be then ignored). The factory default is ON. Sophie Mammography X-ray unit Technical Manual... -
Page 85: 2.14 Disabling Bucky Grid Movement
“Toshiba E7290 x-ray tube ratings” on page A-15. The factory default is off. 0n c mA limit is on. The maximum mA value that is used is 80 mA. Technical Manual Sophie Mammography X-ray unit... -
Page 86: Keyboard-Controlled (In Service Mode
“AHHH” and then replaced by the temperature display of the tube head assembly. CAUTION This special service mode is intend only for the experienced service technician, and should not be entered (under normal circumstances) by the user. Sophie Mammography X-ray unit Technical Manual... -
Page 87: Factory Preset (Recalling Settings For All Parameters
Density offset adjustment 0 (no offset) page F-6 AAEC contrast adjustment 0 (normal contrast) page F-6 Automatic film labeling page F-6 BUCKY grid movement page F-7 Alarm sound frequency (loudness) 5 (moderate) page F-7 Technical Manual Sophie Mammography X-ray unit... - Page 88 F-20 29. Mode of magnification/spot collimator operation page F-20 30. AEC optical density selection 0 (1.2) page F-20 31. Sophie/Sophie CLASSIC selection 0 (Sophie) page F-20 32. Filter selection in the spot mode 0 (spot collimator) page F-20 33. Intermediate compression stopping force offset...
- Page 89 F-21 47. Mode of LOAD/ready page F-22 48-77. Parameters transformed from the Mammotool page F-22 software 78. mA limit 0 (limit off) page F-23 79. Mode of Mammotool parameters usage page F-23 Technical Manual Sophie Mammography X-ray unit F-11...
-
Page 90: C-Arm Upright Position Calibration
For a more precise breast thickness display, the residual gap between the upper and lower compression paddles can be compensated for. Please see page F-19 (special system parameters) how to correct or zero the display reading. F-12 Sophie Mammography X-ray unit Technical Manual... -
Page 91: Compression Force Measurement Calibration
Make sure there is room around the unit for this movement. NOTE For convenience, the old calibration values are not overwritten if the signal from the force sensor it totally out of range. Technical Manual Sophie Mammography X-ray unit F-13... -
Page 92: X- Ray Tube Filament Preheating Voltage Calibration
Press the density down -key to select the generator type. The text in the time/force display starts to flash. Use the field/light -keys to select the right generator: • GE.1 = new generator (blue) • GE.0 = old generator (black) F-14 Sophie Mammography X-ray unit Technical Manual... -
Page 93: Aec-Sensor Calibration
(using the CTL-key) and continuing the cycle. Only those sensors that are calibrated properly can be used during AEC exposures. CAUTION Radiation is emitted during the whole calibration cycle (duration ð 30 sec). Always shield yourself again unnecessary radiation. Technical Manual Sophie Mammography X-ray unit F-15... -
Page 94: Kv-Value Fine-Adjustment
Press the kV UP-key to change the kV gain value. The value in the kV-display starts to flash. Use the field/light keys to change the value. Press the CTL-key to exit and store the new parameter values into memory. F-16 Sophie Mammography X-ray unit Technical Manual... -
Page 95: Special System Parameters Setup
= 2; Gilardoni bucky (factory default) this unit: 09. Film/screen combination 0 (zero) gain n = film/screen combination 0 gain value Setting in 09.n range: from 2 (darkest) to 99 (lightest), this unit: factory default is 10 Technical Manual Sophie Mammography X-ray unit F-17... - Page 96 With selection code 4 the Agfa Film Printer can be used. With selection code 5 the communication between the Sophie and PC is enabled. This is needed when the AEC is fine-tuned by using the MAMMOTOOL software, refer to section “FINE TUNING SOPHIE AEC FOR NONSTANDARD FILM/SCREEN COMBINATIONS”...
- Page 97 = 0; HE37 disabled Setting in 22.n n = 1; HE37 enabled this unit: n=0; HE37: The bucky grid is not connected is disabled. The factory default is 0. n=1; HE37 is enabled. Technical Manual Sophie Mammography X-ray unit F-19...
- Page 98 31.n n = 1; SOPHIE CLASSIC software this unit: The text SOP (Sophie) or CLA (Sophie Classic) is shown briefly on the breast thickness display when switching on the unit. 32. Filter selection in the spot mode n = 0; The spot collimator is selected Setting in 32.n...
- Page 99 The factory default is n = 0. 46. Maximum kV value in AAEC mode n = maximum kV value. Setting in The range is from 30 kV to 35 kV. 46.n this unit: Factory preset is 35 kV. Technical Manual Sophie Mammography X-ray unit F-21...
- Page 100 1...99 (value 43 corresponds to the 0% adjustment level, which is also the factory default for each parameter). In order to establish the connection between Sophie and computer, the value 5 must be set in the service mode parameter 11. Please refer to section “FINE TUNING SOPHIE AEC FOR NONSTANDARD FILM/SCREEN COMBINATIONS”...
- Page 101 = 3; adjustment is used for both focus sizes This feature defines if the correction parameters from the Mammotool software are used for the large focus (n=1), the small focus (n=2) or both (n=3). The factory default is n=3. Technical Manual Sophie Mammography X-ray unit F-23...
-
Page 102: Fine Tuning Sophie Aec For Nonstandard Film/Screen
PC computer is required on the site. The PC serial port 'COM1' (or ‘COM2’, the file/option menu can be used to change the port) is connected to the Sophie connec- tor using a cable (order code 7827752) and a special connection box (order code 10000140). - Page 103 The MAMMOTOOL software has three main functions: receive, modify and send back the cur- rent AEC compensation values to and from the Sophie. In addition to that the current values can be saved/loaded to/from the PC hard disk, which makes it possible for the service technician to collect settings on his/her PC hard disk.
-
Page 104: Adjusting The Filter And Imaging Mode Adjustments
Finally the full test protocol is performed. To test that the connection between Sophie and the PC is functioning, click the 'Receive' button. The status control should briefly display the text “Waiting” and then text 'Ready'. - Page 105 Chapter F - ADJUSTMENT & CALIBRATION FINE TUNING SOPHIE AEC FOR NONSTANDARD Test Exposure protocol AEC: AAEC: _______ ______ ______ ____ _______ ______ ______ _______ ______ ______ ____ _______ ______ ______ _______ ______ ______ ____ _______ ______ ______ _______ ______ ______...
-
Page 106: Mechanical Adjustments
(from limit sensor to limit sensor) C-arm in upright position would restore the positional information if it was wrong. Please perform this movement if you have replaced the REAR CPU board (with or without the POWER SUPPLY). F-28 Sophie Mammography X-ray unit Technical Manual... -
Page 107: X-Ray Beam Adjustment (Toshiba E7272 X-Ray Tube
TUBEHEAD (Fig. F.2, 2), to make sure that the X-ray beam reaches over the cassette table front edge (Fig. F.2, 3). The final adjustment of the X-ray beam front edge is performed with the stationary collimator primary front edge (Fig. F.2, 4). Figure F.2 Technical Manual Sophie Mammography X-ray unit F-29... - Page 108 The side direction adjustment is performed by moving the collimator magnet holder (Fig. F.3, 3). The front edge adjustment is performed by moving the stationary collimator primary front edge (Fig. F.3, 4). 18x24 24x30 Figure F.3 F-30 Sophie Mammography X-ray unit Technical Manual...
- Page 109 Check that the exposed area is straight on the film. Adjust the collimator magnet holder when needed (Fig. F.3, 3), and if that does not correct the situation, turn the collimator assembly slightly (Fig. F.2, 5). Technical Manual Sophie Mammography X-ray unit F-31...
- Page 110 (1). The exposed area must be between 2 mm - 4 mm. 2-4mm Figure F.6 If needed, the front edge adjustment is performed by moving the stationary collimator primary front edge (Fig. F.3, 4). F-32 Sophie Mammography X-ray unit Technical Manual...
- Page 111 Check the exposed area. Clean the filter if needed, use soft cloth moistened with alcohol-con- taining preparation (e.g. Solventol). • If the cleaning does not improve the image quality, change the filter ladder assembly. Technical Manual Sophie Mammography X-ray unit F-33...
- Page 112 Check the exposed area. Clean the filter if needed, use soft cloth moistened with alcohol-con- taining preparation (e.g. Solventol). • If the cleaning does not improve the image quality, change the filter ladder assembly. F-34 Sophie Mammography X-ray unit Technical Manual...
-
Page 113: X-Ray Beam Adjustment (Toshiba E7290 X-Ray Tube
Loosen the collimator screws (Fig. F.8, 1) and pull the collimator assembly to the front at the TUBEHEAD (Fig. F.8, 2), to make sure that the X-ray beam reaches over the cassette table front edge (Fig. F.8, 3). Figure F.8 Technical Manual Sophie Mammography X-ray unit F-35... - Page 114 Loosen the cutter assembly screws (Fig. F.9, 1) and move the assembly forward as far as it goes (Fig. F.9, 2) to make sure that the cutter does not limit the beam front edge (Fig. F.9, 3). Figure F.9 F-36 Sophie Mammography X-ray unit Technical Manual...
- Page 115 If needed, adjust the collimator limit sensors, see “Collimator mechanism limit sensors” on page F-44. Cassette Film Film 80-85 mm 80-85 mm Figure F.10 Technical Manual Sophie Mammography X-ray unit F-37...
- Page 116 Check that the exposed area is straight on the film. Adjust the collimator magnet holder when needed (Fig. F.12, 1), and if that does not correct the situation, turn the collimator assembly slightly. F-38 Sophie Mammography X-ray unit Technical Manual...
- Page 117 Place the film A on the top of the film B. Measure the area that has exposed over the cassette table front edge (1). The exposed area must be between 2 mm - 4 mm. 2-4mm Figure F.14 Technical Manual Sophie Mammography X-ray unit F-39...
- Page 118 (Fig. F.16, 1). Adjust the cutter position so that the area that has exposed over the cassette table front edge is between 2 mm - 4 mm (see Fig. F.14 on previous page). Figure F.16 F-40 Sophie Mammography X-ray unit Technical Manual...
- Page 119 Check the exposed area. Clean the filter if needed, use soft cloth moistened with alcohol-con- taining preparation (e.g. Solventol). • If the cleaning does not improve the image quality, change the filter ladder assembly. Technical Manual Sophie Mammography X-ray unit F-41...
-
Page 120: Light Field Beam Adjustment
Repeat the above procedure if needed. If the misalignment in the back/front direction is more than ±4 mm (Fig. F.17, 7), adjust the light field with the mirror angle adjusting screw (Fig. F.17, 8). Figure F.17 F-42 Sophie Mammography X-ray unit Technical Manual... -
Page 121: Filter Position Adjustment
Fixing nut gas spring (don’t open) Adjust the tension adjuster only when the (not shown) arm is upright (in CC-proj). The gas spring must be pushing, not pulling. Gas spring Technical Manual Sophie Mammography X-ray unit F-43... -
Page 122: Adjusting Sensors & Switches
Drive the C-arm to the upright position, turn off the power. Remove the C-arm covers, see chapter H, section 1.4. Remove the collimator cover, see chapter H, section 1.7. Turn the power on. F-44 Sophie Mammography X-ray unit Technical Manual... - Page 123 (arrows on Fig. F.19). To prevent this adjust the position of the COLLIMATOR PCB (Fig. F.19, 6). The final adjustment of the filter position is performed according to instructions described in chapter F, section 4.3. Especially the spot collimator adjustment must be checked. Technical Manual Sophie Mammography X-ray unit F-45...
- Page 124 The mirror may not hit the collimator frame, adjust the mirror magnet holder (Fig. F.20, 5) if needed. The final adjustment of the mirror position is performed according to instructions described in chapter F, section 4.4. F-46 Sophie Mammography X-ray unit Technical Manual...
- Page 125 (arrows). To prevent this adjust the collimator magnet holder (Fig. F.21, 5) in up/ down direction. The final adjustment of the collimator positions is performed according to instruc- tions described in chapter F, section 4.3. Figure F.21 Technical Manual Sophie Mammography X-ray unit F-47...
- Page 126 F, sections 4.3 and 4.4 is recommended. Figure F.22 If the signal(s) on the display does not light when the magnet is at the sensor, or there are electrical problems, “COLLIMATOR” on page G-4. F-48 Sophie Mammography X-ray unit Technical Manual...
-
Page 127: Compression Mechanism Limit Sensors
1-2 mm space between the paddle and the Bucky. If f the compression mechanism display signal(s) does not light, or there is a electrical problem, “Compression” on page G-3. Figure F.23 Technical Manual Sophie Mammography X-ray unit F-49... - Page 128 2-3 mm 9 mm Figure F.24 NOTE Wrong adjustment of the spring holder screw (Fig. F.24, 5) may cause the twincomp latch assembly to hit and damage the bracket’s edge (Fig. F.24, 9). F-50 Sophie Mammography X-ray unit Technical Manual...
- Page 129 When the adjustment is done in the both sides, secure the screws (Fig. F.25, 2) with the nuts (Fig. F.25, 3). Check the tightness of other nuts in the assembly. max 1,5 max -1,5 Figure F.25 Technical Manual Sophie Mammography X-ray unit F-51...
-
Page 130: Mag/Load Mechanism Limit Sensors
• Drive the cassette table to Mag-up position, the space between frame side and table guide should be 2-3 mm (Fig. F.26, 5). • Adjust the magnet holder until the space is correct. F-52 Sophie Mammography X-ray unit Technical Manual... - Page 131 Mag-down position (Fig. F.26, 6). Figure F.27 If the signal(s) on the display does not light when the magnet is at the sensor, or there are electrical problems, see “MAG/LOAD mechanism” on page G-2. Technical Manual Sophie Mammography X-ray unit F-53...
-
Page 132: Labeling Head Disk Position Sensor
Remove the necessary covers, see instructions described in chapter H, sections 1.1, 1.2, 1.3, and 1.5. Note that the hood should be removed if the place of the Rotation lower limit sensor is adjusted. F-54 Sophie Mammography X-ray unit Technical Manual... - Page 133 The C-arm is must be slightly over 180° position before the right lower signal lights, adjust the position of the Rotation lower limit sensor (Fig. F.30, 4) if needed. Check the C-arm rotation and readjust, if needed. back view Figure F.30 Technical Manual Sophie Mammography X-ray unit F-55...
- Page 134 If this does not happen, adjust the position of the Rotation upper limit sensor (Fig. F.31, 3). Check the rotation and readjust, if needed. back view Figure F.31 F-56 Sophie Mammography X-ray unit Technical Manual...
- Page 135 Check after adjustments that the worm screw nut has a free movement with respect to Tele- scopic column installation plate, Rotation reference circuit board and the cables. Check that the Rotation upper hall-sensor does not hit the spacer. Technical Manual Sophie Mammography X-ray unit F-57...
-
Page 136: Up/Down Mechanism Sensors
Check that the right lower signal on the display (5) lights when the worm-screw nut (Fig. F.33, 6) is at 4.5 ± 0.5 mm space from the spacer (Fig. F.33, 1). 4.5±0.5 mm Figure F.33 F-58 Sophie Mammography X-ray unit Technical Manual... - Page 137 Check that the right upper signal on the display (Fig. F.35, 1) lights when the worm-screw nut (Fig. F.35, 2) is at 4.5mm ±0.5 space from the worm-screw cap (Fig. F.35, 3). 4.5±0.5 mm Figure F.35 Technical Manual Sophie Mammography X-ray unit F-59...
- Page 138 When the detector plate (Fig. F.36, 1) hits the opto-sensor on the lift reference PCB (Fig. F.36, 2), the right middle segment lights. Adjust the position of the detector plate as follows (standard Sophie unit): • Insert the C-arm locking knob to the unit’s base.
-
Page 139: Cassette Table Size Identification Switches
Adjust the movement of the lever assembly stop to this position with the lever holders. • Tighten the lever holder screws. Check the adjustment and repeat, if needed. • Perform the same adjustment with the large cassette. 5-10mm Figure F.37 Technical Manual Sophie Mammography X-ray unit F-61... - Page 140 Pull the labeling head to the front position (small cassette). • The right lower signal (Fig. F.38, 2) on the display should light when the labeling head is 5 - 10 mm from the extreme position. 5-10mm Figure F.38 F-62 Sophie Mammography X-ray unit Technical Manual...
- Page 141 Press the sensing button (Fig. F.40, 1) and check that the right middle signal (Fig. F.40, 2) on the display lights. Figure F.40 If some of the signals on the display does not light, see “Paddle holder related” on page G-6. Technical Manual Sophie Mammography X-ray unit F-63...
-
Page 142: Lower Paddle Identification Switches
Perform the same checking with the large lower compression paddle (Fig. F.41, 4 and 5) and the small and large bucky grids. Note, that when there is no paddle inserted, no display light is on. F-64 Sophie Mammography X-ray unit Technical Manual... - Page 143 Is the spring (2) whole and straight. • Adjust the screw (3). Figure F.42 If the signal(s) on the display does not light or there is a mechanical problem, see “Paddle holder related” on page G-6. Technical Manual Sophie Mammography X-ray unit F-65...
- Page 144 Chapter F - ADJUSTMENT & CALIBRATION ADJUSTING SENSORS & SWITCHES F-66 Sophie Mammography X-ray unit Technical Manual...
-
Page 145: Chapter G Troubleshooting & Faultfinding
The POWER SUPPLY as well as many of the other circuit boards contains self-resetting overcurrent circuit breakers. These would be triggered because of short-circuits or over- loads on the voltage supply lines. To reset them, simply turn off the power for at least 30 seconds. Technical Manual Sophie Mammography X-ray unit G-1... -
Page 146: Motor & Motion Related Problems
If needed, check all the wiring from the SHELF COLLECTOR PCB (1) to TUBE CPU (2). If the signals are OK, but the signals on the display do not lit, change the TUBE CPU. Figure G.1 Sophie Mammography X-ray unit Technical Manual... -
Page 147: Stepper Motors
If the LEDs on the FRONT COLLECTOR PCB has lit but the display signals do not light, the fail- ure is between the FRONT COLLECTOR PCB and the REAR COLLECTOR PCB or in them. Technical Manual Sophie Mammography X-ray unit... - Page 148 If needed, measure the resistances of all Generator to Collimator cable wires. FROM Generator to collimator cable Tube interface cable Connector Connector 1 (CRL) 2 (FRL) 3 (MRL) Sophie Mammography X-ray unit Technical Manual...
- Page 149 Chapter G - TROUBLESHOOTING & FAULTFINDING MOTOR & MOTION RELATED PROBLEMS If all signal lines are OK, but the display signal(s) still does not light, change the TUBE CPU (1) or COLLIMATOR PCB (2). Figure G.3 FILTER MIRROR Technical Manual Sophie Mammography X-ray unit...
-
Page 150: Mechanical Problems
TUBE CPU. FROM Shelf Collector PCB Tubehead interface cable Connector Connector 1 (GND) A 13 2 (CDBL) 1 (GND) A 13 2 (CDSL) C 12 Sophie Mammography X-ray unit Technical Manual... - Page 151 FRONT COLLECTOR PCB. If the signals are OK, but the signals on the display do not lit, change the REAR CPU. FROM Front Collector PCB Rear Collector PCB Connector Connector 1 (GND) A 26 2 (CDRL) 1 (GND) A 26 2 (CDLL) Technical Manual Sophie Mammography X-ray unit...
-
Page 152: Before Calling For Assistance
How to report image quality problems Please record the circumstances where or when the problem occurred, used cassette type, used film type, film processor type, type of developer liquids used, and any other relevant data. How to contact Planmed head office • Phone intl +358 - 9 - 7590 5500 •... -
Page 153: Chapter H Parts Replacement & Repair
(2) Stationary column rear cover C-arm vertical cover Base rear cover Support plate Telescopic column front cover Base side cover plate (2) Base front cover plate C-arm left side panel Figure H.1 Technical Manual Sophie Mammography X-ray unit H-1... -
Page 154: Base Covers
Telescopic column covers Hood bottom cover plates (2 pcs) (Fig. H.4, 1) Remove the plate screws (4 pcs). Disconnect the bottom plate ground cable from the hood support arm. The plate can now be removed. Sophie Mammography X-ray unit Technical Manual... -
Page 155: Stationary Column Covers
Stationary column rear cover (Fig. H.4, 5) The stationary column rear panel must be removed. Remove the screws (6 pcs) that hold the column cover to the column and base and lift the cover off. Hood Figure H.4 Technical Manual Sophie Mammography X-ray unit... -
Page 156: C-Arm Covers
Remove the beam window (Fig. H.5, 2) from the underside of the tubehead assembly by unscrewing its three screws. The screws secure also the top cover and side panels in position. Loosen the top cover screws (Fig. H.5, 3) and lift the top cover off. Sophie Mammography X-ray unit Technical Manual... - Page 157 Support the side panel with your hand and remove the screw located at the back of the unit (Fig. H.5, 15). Remove the side panel. Side handles (Fig. H.5, 16) Remove the four screws (Fig. H.5, 17) from the side panel. Remove the side handle. Technical Manual Sophie Mammography X-ray unit...
-
Page 158: Hood
Remove the screws that hold hood to the support plates (Fig. H.6,3). There are two screws on each side of the unit. Lift the hood up slightly and disconnect the right and left keyboard cables from respective Display PCB. The hood can be removed. Figure H.6 Sophie Mammography X-ray unit Technical Manual... -
Page 159: Cassette Table Cover
Disconnect the labeling head cable from SHELF COLLECTOR PCB. Lift up the table cover slightly and pull it from the table casting (Fig. H.7, 3). Figure H.7 Collimator cover Remove the collimator cover screws. Remove the cover. Figure H.8 Technical Manual Sophie Mammography X-ray unit... -
Page 160: Software Version Updating
Drive the C-arm to -90° (Fig. H.9, 1) for easier access. Turn off the power. Replace the rear cpu chip (Fig. H.9, 2). Replace the removed parts, turn on the power and check that the unit is functioning Sophie Mammography X-ray unit Technical Manual... - Page 161 Replace the software chip. Replace the board and make a brief check with the power connected to see that the unit passes the self-test. Replace the covers in reverse order. Technical Manual Sophie Mammography X-ray unit...
-
Page 162: Replacing Fuses
The 5 AT fuse is situated inside a black horizontal fuse holder that is mounted on a small vertical PCB. The fuse socket must be slightly and carefully pulled upwards to replace the fuse. H-10 Sophie Mammography X-ray unit Technical Manual... - Page 163 Remove the single screw(Fig. H.12, 3) holding the Tube CPU in place and carefully remove the board by first pulling it from the edge connector until it opens. Replace the required fuse (Fig. H.12, 4 or 5). Technical Manual Sophie Mammography X-ray unit H-11...
-
Page 164: Lightfield Bulb Replacement
Pull the bulb (Fig. H.13, 5) out of the housing and replace with a similar one (12V/30W). Replace the removed parts in reverse order. Turn on the power and check that the bulb adjustment (see section “Light field beam adjustment” on page F-42), before replacing the covers. H-12 Sophie Mammography X-ray unit Technical Manual... -
Page 165: Replacing The X-Ray Tubehead
Removing the Magnification motor during this procedure loosens the cassette table mechanism. The whole mechanism can fall out. Extreme caution is needed to prevent injuries or harm to the equipment. locking device Figure H.14 Technical Manual Sophie Mammography X-ray unit H-13... -
Page 166: Preparations Before Changing The Tubehead
90 degrees (slightly past horizontal) so that the cassette table is slightly higher that the tubehead. Drive the cassette table to MAG 1.06 position.Turn off the power and unplug the unit. (Fig. H.15, b) Figure H.15 H-14 Sophie Mammography X-ray unit Technical Manual... - Page 167 Disconnect the generator to mag control cable from the MAG PCB (Fig. H.16, 8). Disconnect all the connectors from tubehead interface cable (Fig. H.16, 9). Remove the capacitors (Fig. H.16, 10). Remove the mag down hall cable from the tubehead (Fig. H.16, 11) Technical Manual Sophie Mammography X-ray unit H-15...
- Page 168 Allen key used is in good condition since the screws are locked with Loctite 222 glue. If needed, the screws can be warmed up with the hot-air blower. Pull the ball screw assembly (Fig. H.17, 5) from the tubehead. Remove the cable guide screw (Fig. H.17, 6). H-16 Sophie Mammography X-ray unit Technical Manual...
-
Page 169: Removal Of The Tubehead
Replace the removed parts in reverse order. Secure the bearing holding bracket screws with the Loctite 222 glue. Turn on the power. Perform the checks described in chapter E, sections 3.1 - 3.7. Technical Manual Sophie Mammography X-ray unit H-17... -
Page 170: Replacing The Power Supply
Support the power supply (Fig. H.19, 1) with the other hand while removing the nut (Fig. H.19, 2). Pull the power supply straight out. Figure H.19 Replace the new power supply in reverse order. H-18 Sophie Mammography X-ray unit Technical Manual... -
Page 171: Replacing Circuit Boards
Shelf collector PCB AEC sensor PCB Labeling PCB Force sensor PCB Front collector PCB Tube processor PCB Mag control PCB Collimator PCB Bucky grid reference PCB Stereotactic control PCB Lift reference PCB Figure H.21 Technical Manual Sophie Mammography X-ray unit H-19... -
Page 172: Boards In The Base & Column
Disconnect all connectors from the PCB. Detach the PCB from its holders, see instructions given in section “REPLACING CIRCUIT BOARDS” on page H-19. Insert the new PCB. Connect all wires to the PCB. Replace the Cassette table cover. H-20 Sophie Mammography X-ray unit Technical Manual... - Page 173 The AEC sensor and the cover can not be separated from each other. Always change the whole AEC sensor assembly. Insert the new sensor assembly to its position. The sensor cover must be at the same level as the cassette table cover. Technical Manual Sophie Mammography X-ray unit H-21...
-
Page 174: Tubehead Assembly Boards
Unscrew the six nuts of the Display PCB assembly (Fig. H.25 , 1) and remove the assembly from the hood (Fig. H.25, 2). Install the new assembly. When the membrane is changed, clean the surface carefully before sticking the new membrane. Figure H.25 H-22 Sophie Mammography X-ray unit Technical Manual... -
Page 175: Replacing Sensors & Switches
8. Lower paddle identification microswitches Motor rotation sensor 9. Cassette table control microswitches C-arm rotation sensor 10. Exposure control microswitch UP/DOWN mechanism sensors 11. Emergency stop microswitch C-arm control microswitches 12. Foot pedal microswitches Technical Manual Sophie Mammography X-ray unit H-23...
Need help?
Do you have a question about the SOPHIE and is the answer not in the manual?
Questions and answers
What is a PIG board on a mammography unit and should a physicist test once it is replaced and before patient exams are performed