Table of Contents
Advertisement
Quick Links
Advertisement
Table of Contents

Related Manuals for Advan Int'l AMM213TD2

Summary of Contents for Advan Int'l AMM213TD2
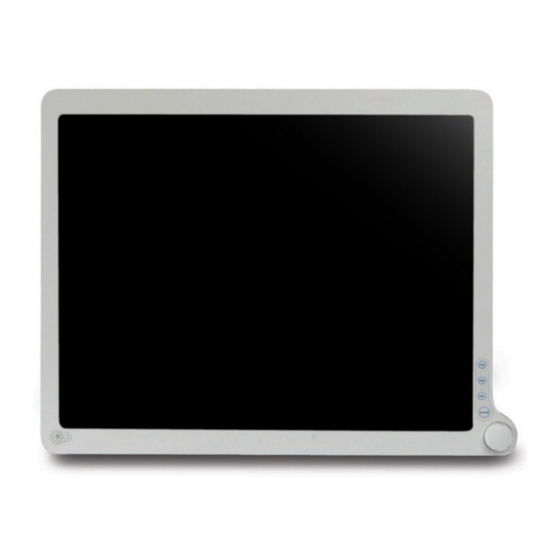
- Page 1 AUTO - SCANNING WITH DIGITAL CONTROL LCD COLOR MEDICAL MONITOR AMM213TD2 Operation Manual For future reference, record the serial number of your display monitor in the space below : Serial Number The serial number is located on the back of the monitor...
- Page 2 AMM213TD2 1 back of the monitor WARNING The title «WARNING» is used to inform the users of pos- sible causes that could inflict the injury, death, or property damage to the patients. CAUTION The title «CAUTION» is used to inform the users of pos- sible causes that could inflict the patients although it might not severe enough to cause deaths.
-
Page 3: Table Of Contents
PIP / POP / PBP function................DDC ......................Installation ....................Connecting the Power Cord ..............User Function / Messages................. OSD Section ....................Troubleshooting ..................Specification (AMM213TD2)..............Classification ..................... Electromagnetic Compatibility ..............Dimension Drawing (mm) of AMM213TD2 ..........Connectors ....................Description of Warranty ................ -
Page 4: Product Description And Intended Use
Please check the following items are present when you unpack the box, and save the packing materials in case you will need to ship or transport the monitor in future. • AMM213TD2 LCD Monitor and two video cables (1) HD15 VGA cable (1) DVI-I cable •... -
Page 5: Warnings And Cautions
Federal law (United States of America) restricts this device to use by, or on order of a physician. The ADVAN Int’l Corp AMM213TD2 monitor has been tested under UL 60601-1 standard and UL listed for Medical application. ADVAN Int’l Corp reserves the right to make improvements in the product(s) described herein. - Page 6 AMM213TD2 5 Warnings 1. Read the operating manual thoroughly and be familiar with its contents prior to using this equipment. 2. Carefully unpack the unit and check if any damage occurred during shipment. 3. Should any solid object or liquid fall into the panel, unplug the unit and have it checked by qualified personnel before operating it any further.
- Page 7 Cautions 1. The AC Adapter must be plugged into a Grounded power outlet. 2. Use only the proprietary AMM213TD2 power supply for the AMM213TD2 monitor. Make a proper connection by ensuring that the shrink tubing completely secures the connection between the DC power cord and the extension cord.
-
Page 8: Symbol Explanations
AMM213TD2 7 Symbol Definitions Symbol Definitions Dangerous: High Voltage Indicates protective earth ground. For indoor use only. Direct Current Tested to comply with FCC Serial Number Class B standards. This way up DC power control switch Fragile, handle with care... -
Page 9: Eu Declaration Of Conformity For Medical Applications
For a copy of the Declaration of Conformity document, please contact ADVAN Int’l Corp. and request for AMM213TD2 DOC. Prepare for Unpack Before you unpack your monitor, prepare a suitable workspace. You... -
Page 10: Safety Precaution
AMM213TD2 9 SAFETY PRECAUTION · Avoid placing the monitor, or any other heavy object, on the power cord to prevent fire or electrical shock from damage to the power cord. · Do not expose the monitor to rain, excessive moisture, or dust to avoid fire or shock hazard. -
Page 11: Power Management Function
LED blinks for 1 seconds On and 1 second Off. The screen is displayed after the vertical and horizontal sync signals are restored. Power Management System The AMM213TD2 Medical Monitor power management proposal. Provides four phases of power-saving modes by detecting the horizontal sync signal as shown in the table below. -
Page 12: Preset Modes
AMM213TD2 11 PRESET MODES DVI and VGA input signal formats Horizontal Vertical Pixel clock Resolution frequency frequency ( MHz ) ( KHz ) ( Hz ) 640 x 350 @70Hz 31.469 70.087 25.175 640 x 480 @60Hz 31.469 59.940 25.175 640 x 480 @75Hz 37.500... -
Page 13: Video Signals
User’s Guide Video Signals Component / RGB VGA/ Format Video SDI1/2 RGB+ RGB+ Y/Pb/Pr NTSC 480/59.94i 480/59.94p 576/50i 576/50p 720/50p 720/59.94p 720/60p 1080/23.98p 1080/24p 1080/25p 1080/29.97pp 1080/30p 1080/50i 1080/30p 1080/509.94i 1080/60i 1080/60i 1080/50p 1080/60p *1 NTSC-M, NTSC-433 *2 PAL-BDGHI, PAL-M, PAL-N, PAL-60 *3 3G-SDI Signal... -
Page 14: Pip / Pop / Pbp Function
AMM213TD2 13 PIP / POP / PBP function The following combination options are available to you: Component Main SDI1 SDI2 C-Video S-Video / RGBs SDI1 SDI2 C-Video S-Video Component / RGBs... -
Page 15: Ddc
User’s Guide To make your installation easier, the monitor is able to Plug and Play with your system if your system also supports DDC protocol. The DDC (Display Data Channel) is a communication protocol through which the monitor automatically informs the host system about its capabilities, for example, supported resolutions and corresponding timing. -
Page 16: Connecting The Power Cord
AMM213TD2 15 CONNECTING the POWER CORD * Check first to make sure that the power cord you use is the correct type required for your area. * This monitor has an universal AC adapter that allows operation in either AC 100 - 240 V ac voltage area. No user-adjustment is required. -
Page 17: User Function / Messages
User’s Guide User Functions / Messages Key Name and Function Power LED : Lights up to indicate the power is turned ON. Standby Power Button : To power ON or OFF the monitor. Rotary switch : With the OSD menu activated, increases the value of the selected (Turn Right) parameter or moves rightward in OSD menu. -
Page 18: Osd Section
AMM213TD2 17 OSD Section Main Menu Chromatic Adjust Color Temp, Gamma Visual Adjust Brightness, Contrast, Phase, Chroma, Sharpness-H, Sharpness-V Setting Adjust Scale Mode, Color Space, Mirror, Freeze Frame, Zoom / Pan, PIP, POP, PBP Advanced Adjust OSD Position Control, Screen Control, DPMS, Auto... - Page 19 User’s Guide OSD Section Chromatic Color Temp Change the color temperature - D65, D93, S1, S2 Gamma Change the gamma value - 1.8, 1.9, 1.95, 2.1, 2.1S, 2.2, 2.3, 2.4, 2.4S, S0, Radio graph Exit Exit the menu Visual Brightness Adjust the brightness of panel (Range 0 - 100) Contrast Adjust the contrast of video (Range 0 - 100)
- Page 20 AMM213TD2 19 OSD Section Setting Scale Mode Change the scale mode - Fill all, One to One, Vertical - fill, Horizontal - fill, Fill aspect ratio Color Space Change color space between RGB and YPbPr available for Component and RGBS...
- Page 21 User’s Guide OSD Section Sub menu of PIP Mode PIP Mode ON / Off Source PIP sub screen source - SDI1,2, C-Video, S-Video, Component, VGA, DVI, SOG Position PIP sub screen position - Top L, Top R, Bottom L, Bottom R Size PIP sub screen size - Small, Medium, Large Blending...
- Page 22 AMM213TD2 21 OSD Section Sub menu of POP Mode POP Mode ON / Off Source POP sub screen source - SDI1,2, C-Video, S-Video, Component, VGA, DVI, SOG Position POP sub screen position - Top L, Top R, Bottom L, Bottom R...
- Page 23 User’s Guide OSD Section Advanced OSD Position Change the OSD menu - Position, Background, Control OSD time out, Language Screen Control Control and adjust H and V position, Freqency, Phase Noise Reduction, Motion Offset DPMS Change the DPMS Auto Source Adjust Auto Source Select between on and off Select Smart Select...
- Page 24 AMM213TD2 23 OSD Section Sub menu of OSD Control H-position Adjust OSD H - position (Range 0 - 100) V-position Adjust OSD V - position (Range 0 - 100) Back ground Adjust transparency of OSD back ground (Range 0 - 100)
- Page 25 User’s Guide OSD Section Information Custom Entry Change the user or monitor’s name Display the serial number Run Time Display the total run time Input Format Display the current input resolution and vertical frequency Exit Exit the menu...
-
Page 26: Troubleshooting
AMM213TD2 25 TROUBLESHOOTING Before sending your LCD monitor for servicing, please check the troubleshooting list below to see if you can self-diagnose the problem. Problems Current Status Remedy No Picture LED ON · Using OSD, adjust brightness and contrast to maximum or reset to their default settings. -
Page 27: Specification (Amm213Td2)
User’s Guide SPECIFICATION Model AMM213TD2 Description a-Si TFT Active Matrix, LED Backlight Active Screen Size 21.3 inches diagonal Resolution 1600 (H) x 1200 (V) @60Hz Pixel Pitch 0.270 mm Display Color 16.7M colors Color Tone Up to 256 color tone Response Time Rise time (Tr) : 11ms Fall time (Tf) : 9ms Typ. -
Page 28: Classification
51LJ Medical Equipment E215822 This monitor is intended for use in Health Care Facilities model AMM213TD2 Equipment is not suitable for use in the presence of flammable anesthetic mixture with air or with oxygen or nitrous oxide. No user serviceable parts inside, ask qualified personnel when accessing inside. -
Page 29: Electromagnetic Compatibility
Consult the tables below for guidance in placing the AMM213TD2. Manufacturer’s declaration - electromagnetic emission The Model AMM213TD2 is intended for use in the electromagnetic environment specified below. The customer or the user of AMM213TD2 should assure that it is used in such an environment. Emission test Compliance... - Page 30 To assess the electromagnetic environment due to fixed RF transmitters, an electromagnetic site survey should be considered. If the measured field strength in the location in which the AMM213TD2 is used exceeds the applicable RF compliance level above, the AMM213TD2 should be observed to verify normal operation. If abnormal performance is observed, additional measures may be necessary, such as reorienting or relocating the AMM213TD2.
- Page 31 Recommended Separation Distances Between Portable and Mobile RF Communications Equi- pement and the AMM213TD2 System The AMM213TD2 system is intended for use in an electromagnetic environment in which radiated RF disturbances are controlled. The user of the AMM213TD2 system can help prevent electromagnetic...
-
Page 32: Dimension Drawing (Mm) Of Amm213Td2
AMM213TD2 31 Dimension Drawing (mm) of AMM213TD2... -
Page 33: Connectors
User’s Guide Connectors DC Input Connector Jack Power Input Description Description VCC_24V VCC_24V Video Input 24 pin DVI-I connector. DDWG or equivalent connector. Description Description Description T.M.D.S. Data2- T.M.D.S. Data1 Shield T.M.D.S. Data2+ T.M.D.S. Clock Shield T.M.D.S. Data2 Shield T.M.D.S. Clock+ +5V Power T.M.D.S. -
Page 34: Description Of Warranty
AMM213TD2 33 Description of Warranty ADVAN warrants to the first Buyer (Buyer) that the product purchased when shipped in its original container will conform to ADVAN specifications, and to any ADVAN approved specifications furnished to ADVAN by the Buyer, and will be free of defects in materials and workmanship. - Page 35 User’s Guide Return Material Authorization (RMA) Procedure All claims must be submitted through the ADVAN website, whether in warranty or out, first Buyer, distributor or OEM. End Users who have purchased through a distributor or OEM, please contact the distributor or OEM. http://www.advancorprma.com Follow the instructions to receive an RMA number, shipping instructions and a shipping label to be placed on the outside of the shipping container.
- Page 36 AMM213TD2 35 Out-of-Warranty ADVAN or its ASC will repair or replace if defective in material or workmanship with fee, any product which the warranty period has expired (out-of-warranty). Buyer must notify ADVAN or its ASC of the defect and request an RMA number. If the configuration has been modified in any manner, the product must be returned to its original configuration before any service will be performed by ADVAN or its ASC.
- Page 37 User’s Guide Disclaimer THE FORGOING IS THE COMPLETE WARRANTY FOR ADVAN PRODUCTS AND SUPERSEDES ALL OTHER WARRANTIES AND REPRESENTATIONS, WHETHER ORAL OR WRITTEN. EXCEPT AS EXPRESSLY SET FORTH ABOVE, NO OTHER WARRANTIES ARE MADE WITH RESPECT TO ADVAN PRODUCTS AND ADVAN EXPRESSLY DISCLAIMS ALL WARRANTIES NOT STATED HEREIN, INCLUDING, TO THE EXTENT PERMITTED BY APPLICABLE LAW, ANY WARRANTY THAT MAY EXIST UNDER NATIONAL, STATE, PROVINCIAL OR LOCAL LAW INCLUDING BUT NOT LIMITED TO ANY IMPLIED...
- Page 38 ADVAN Korea #605, Kolon Science Valley 2-cha, 55, Digital-ro, 34-gil, Guro-gu, Seoul, 152-728 Korea Tel : +82 2 783 5197 Fax : +82 2 868 0880 Web Page : http://www.advancorp.com Manufacturer ADVAN INT’L CORP 47817 Fremont Blvd. Fremont, CA 94538, USA Tel : 1 510 490 1005 Fax : 1 510 490 1151 Web Page : http://www.advancorp.com...
Need help?
Do you have a question about the AMM213TD2 and is the answer not in the manual?
Questions and answers