
Subscribe to Our Youtube Channel
Related Manuals for Skinact Spa Equipment

Summary of Contents for Skinact Spa Equipment
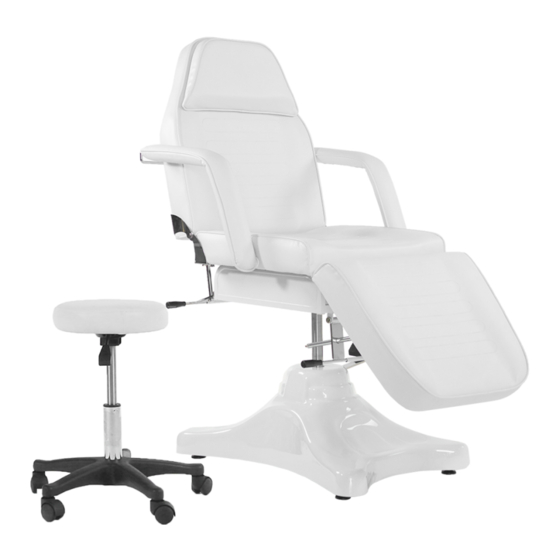
- Page 1 Hydraulic Spa Treatment Table 90° Full Sitting Position User Manual & Equipment www.skinact.com Toll Free: 1.800.418.0830 International: 818.834.6640 www.spaandequipment.com...
- Page 2 Spa and Equipment/SkinAct shall not be liable for incidental or consequential damages arising out of the furnishing, per- formance, or use of this document and the program material which it describes.
- Page 3 • If you have gone through the troubleshooting steps in this manual and an issue persists, please call Spaandequipment/ SkinAct for further assistance: 1(800)418-0830 • OPERATE AT YOUR OWN RISK AND USE COMMON SENSE: OWNER/OPERATOR IS RESPONSIBLE FOR HIS/HER OWN SAFETY AS WELL AS ANYONE NEAR OR ON THE UNIT.
- Page 4 Removing From The Box • To see a video about removing your item from the box, visit https://youtu.be/OGIz0NLdW1I or scan the QR code below. Scan to see video INSTRUCTIONS • When you receive the box, carefully cut the tape on the top flaps and open the top (see photo below).
- Page 5 Removing From The Box • Please keep all packaging materials. This helps in the event that you need to return the unit for whatever reason. • TEAM LIFT: Make sure to have at least two people to lift and move the unit. •...
- Page 6 Installation/Assembly • To see an assembly video for this unit, please visit https:// youtu.be/2P6PTDwT_y0 or scan the QR code below. Scan to see video INSTRUCTIONS • Please hold on to all original packaging at least until you have tested all of the functions of the unit. •...
- Page 7 Installation/Assembly • Replace the screw at the end of each backrest rod. • The process is the same for connecting the foot rest. • Remove the screw at the end of each rod. • Insert the rods into the holes on their bracket. Replace screws •...
- Page 8 Installation/Assembly • Then you can put the arm rests into their places. Simply insert the rods of the arm rests into the holes and push until they are seated. • Finally you can put the complementary pillow into its place.
-
Page 9: Leveling The Base
Leveling The Base • All of our hydraulic chairs come with leveling feet on the bot- tom of the base. These are super useful when the floor below is slightly uneven. • This chair has four leveling feet, one at each corner of the base. - Page 10 Adjusting The Backrest and Foot Rest • NOTE: When adjusting the backrest or foot rest, always keep a hand on the backrest or foot rest to avoid abrupt movements. • When the backrest is upright like in the photo below, to bring the backrest down, lift up on the bracket and bring the backrest to the desired angle.
- Page 11 Adjusting The Chair Height • All our hydraulic units come with a foot pump for raising and lowering the chair. • To raise the chair simply pump the foot pedal down multiple times rapidly until the chair is at its desired height. Pump down many times rapidly...
-
Page 12: Getting On And Off
Courtesy Stopper • All our hydraulic units have a “courtesy stopper.” The stopper helps to stop the chair from quickly spinning accidentally. It does not lock the rotation but it does make it harder to spin. • To engage the courtesy stopper, simply lift the foot pedal up towards the ceiling with your foot until it does not go higher. - Page 13 Safe Use • Once a client is on, we recommend keeping the courtesy stop- per up whenever the chair does not need to rotate. • For the most stability, keep the top portion of the chair in line with the base. Top portion in line with the base Top portion in line...
- Page 14 Measurements 72.5” 37” Adjustable Height: 24.5”-31.5” P.14...
- Page 15 Measurements 37” 24” P.15...
-
Page 16: Dimensions & Specifications
Lysol wipes work well for sanitizing the uphol- stery. • Clean and sanitize the upholstery after each treatment. • Every six months, visually inspect the parts of the unit. If there are any abnormal noises or vibrations during operation, call Spaandequipment/SkinAct and describe the situation. P.16... -
Page 17: Troubleshooting
Troubleshooting Issue Possible Reason Solution Chair base wobbles Floor is not flat 1) Adjust leveling feet (see page 9) Leveling feet are differ- 1) Adjust leveling feet ent heights (see page 9) Warranty • This item has a 1-year limited warranty for malfunctions and manufacture defects only (parts, labor, and shipping not includ- ed).
Need help?
Do you have a question about the Spa Equipment and is the answer not in the manual?
Questions and answers