Table of Contents
Advertisement
Quick Links
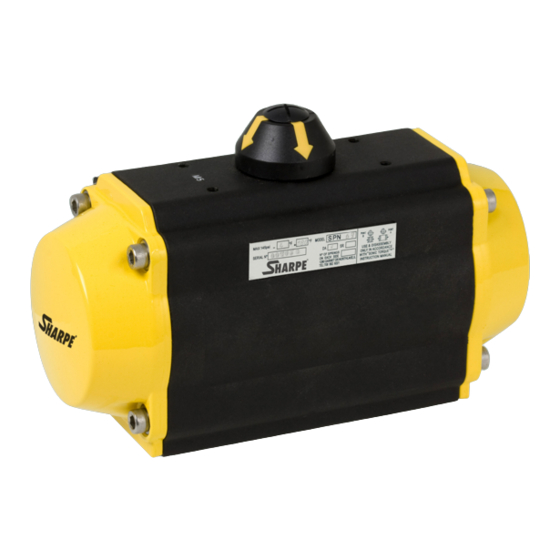
Installation, Operation, and Maintenance Manual
MODEL: SPN 032, 050, 063, 075, 085, 100, 115, 125, 145, 160, 180, 200, 240, 265
WARNING AND SAFETY INSTRUCTIONS:
1. Read this Installation, Operation & Maintenance manual before using the actuator.
2. Sharpe Valves cannot anticipate all of the situations a user may encounter while installing and using the
SPNII Actuator. The user must know and follow all applicable industry specifications on the safe
installation and use of these actuators. Only qualified personnel or technicians who are trained for
maintenance work and have read the instructions are to assemble and disassemble the actuator.
Misapplication of the product may result in injuries or property damage.
3. Before operating an actuator which is connected to a valve in the pipeline, make sure you know the
valve function.
4. Make sure the actuator is not connected to the air supply or electrical system before attempting to do
any maintenance.
5. Before removing the actuator from the valve, always make sure the line has been depressurized and
drained. Cycle the valve a few times to relieve any pressure that could be trapped in the body cavity.
6. Use only Sonic Torque components and spare parts supplied in the repair kits.
7. Do not use air pressure to remove actuator pistons when covers have been removed.
8. Do not leave any grip key or shaft connection attached to the actuator, or try to manually operate the
actuator while it is still connected to the air supply.
9. The user must follow and observe any national or local safety law imposed for
for his system.
STORAGE
The Sonic Torque SPNII Actuator has been packaged to provide protection
during shipment and storage. It is however, possible that the actuator can be
damaged during transport. Inspect actuator for shipping damage prior to storage.
Keep the actuator in their original boxes and store indoor in a clean dry
environment until ready for use. Keep plastic plugs in the air ports to prevent
liquids or other materials from entering the actuator during storage. It is
recommended to stroke them periodically to prevent setting of seals.
LUBRICATION:
The actuators are pre lubricated from the factory and under normal operating conditions
do not require re-lubrication. In the event of actuator maintenance it is recommended
to use the following lubricants:
For NBR O-rings use EP1. The lubricant is suitable for use from -20ºC to +80ºC
SONIC TORQUE SPNII SERIES
Pneumatic Actuators
300, 350, & 400.
IM-SPNII
12/22/2010 / REV.
Page 1 of 8
Advertisement
Table of Contents

Summary of Contents for Smith-Cooper SONIC TORQUE SPNII Series
- Page 1 IM-SPNII 12/22/2010 / REV. Page 1 of 8 Installation, Operation, and Maintenance Manual SONIC TORQUE SPNII SERIES Pneumatic Actuators MODEL: SPN 032, 050, 063, 075, 085, 100, 115, 125, 145, 160, 180, 200, 240, 265 300, 350, & 400. WARNING AND SAFETY INSTRUCTIONS: 1.
- Page 2 IM-SPNII 12/22/2010 / REV. Page 2 of 8 (-4ºF to +176ºF) with AIT/Flashpoint> (T-class +50K) For Viton O-rings use Molykote 111 or OKS 1110. The lubricant is suitable for use from -40ºC to +140ºC (-40ºF to +284ºF). For EPDM O-rings use only Silicone grease SUPPLY PRESSURE Double-acting and Spring Return: Max.
- Page 3 IM-SPNII 12/22/2010 / REV. Page 3 of 8 wall and come out in two places in the cylinder near the cover. Each piston receives the air flow from two directions which ensures a quick response. Looking from the top of the actuator. A port is on the left ;...
- Page 4 IM-SPNII 12/22/2010 / REV. Page 4 of 8 Fig. 8 Bottom View Travel Adjustment The actuator comes factory adjusted to produce 90°rotation with options available for 120° and 180°. The rotation is restricted by adjustment of stop bolts (2) which provide fine tuning or a limiting stroke. Fig.
- Page 5 IM-SPNII 12/22/2010 / REV. Page 5 of 8 Fig 10 Fig 11 Pinion Shaft Disassembly 4.1 Remove the snap-ring (18) using the snap-ring pliers. 4.2 Apply downward force to top of pinion until it is partially out of the bottom of the body. Then pull the pinion completely.
- Page 6 IM-SPNII 12/22/2010 / REV. Page 6 of 8 with the pinion teeth. 6.4 Hold both ends of the body with both hands, apply pressure to the pistons until pistons are flush to the body. 6.5 Place the actuator on top of the couple in the vise 6.6 Rotate the body CCW until both pistons are pulled inside.
- Page 7 IM-SPNII 12/22/2010 / REV. Page 7 of 8 8.3 On double acting actuators, air supplied to Port A will cause the actuator shaft (and position indicator) to rotate Counterclockwise, towards the “valve open” position. 8.4 To adjust the “Valve Open” position (as observed on the position indicator), loosen the jam nut on the left hand adjusting screw (above Port A) and turn the screw clockwise to rotate the shaft clockwise.
- Page 8 IM-SPNII 12/22/2010 / REV. Page 8 of 8 PARTS AND IDENTIFICATION Fig. 16 Fig. 17...
Need help?
Do you have a question about the SONIC TORQUE SPNII Series and is the answer not in the manual?
Questions and answers