Table of Contents
Advertisement
Quick Links
Advertisement
Table of Contents

Summary of Contents for Zingui Zingui Plus
- Page 1 Zingui manual...
-
Page 3: Table Of Contents
2 - Fill in the content of a cell: the action 3.3 Switch off ....................5 3.4 Reset...................... 5 2.1 Overview of the different actions............19 2.1.1 Spoken message (only for Zingui Plus) ............20 4 - Connectors and indicators 2.1.2 Sound ......................20 2.1.3 Go to page ....................21 4.1 At the display side .................. - Page 4 4.2.4 Startwords....................33 9 - Battery level 5 - Recording messages 9.1 Battery level message (only for Zingui Plus) .......... 51 5.1 Making recordings in Recording mode..........35 9.2 Battery level visual................51 5.2 Making recordings in Mouse mode ............36 10 - Options 5.3 Making recordings in Edit mode............
- Page 5 3.2 Save and use own sounds and images ..........77 3.3 Styles ....................78 4 - The content of a cell: the action 4.1 Overview of the different actions............80 4.1.1 Message (for Zingui Plus only) ..............80 4.1.2 Sound......................80 4.1.3 Command....................81 4.2 Remarks....................81...
-
Page 7: Device
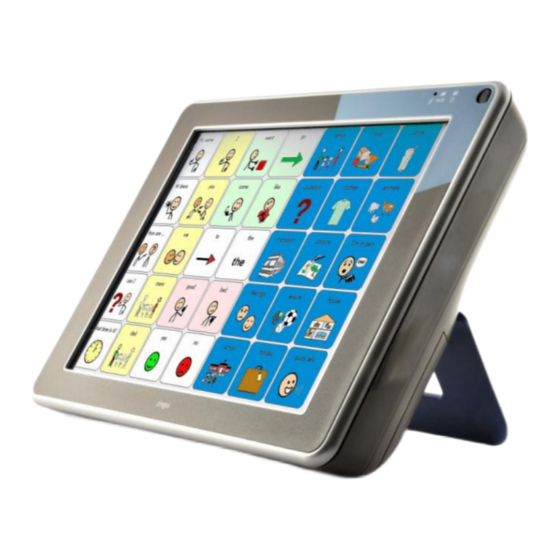
Zingui should not be used for clinical, therapeutic or diagnostic applications. The Zingui is portable but it can also be mounted on a wheelchair. To ease the portability and to additionally protect the device a carry case is provided with the device. -
Page 9: Safety And Maintenance
Zingui in its carry case and carry it in combination with the strap. This will avoid that the device drops from your hands on the • The Zingui has a desk stand to allow you to put and use the device upright floor. -
Page 10: The Carry Case
2.3 The carry case The carry case allows you to carry and use the Zingui safely. The carry case will also protect the Zingui from dirt, moisture, shocks and bumps. Use the carry case in combination with the strap to avoid that the device can drop from your hands on the floor. -
Page 11: Switch On/Off The Zingui
The on/off indicator will now blink every 4 seconds. The power consumption in standby mode is very low. Press the on/off switch to wake up the Zingui from the Standby mode. Waking up will take no time so that you can immediately restart to communicate. -
Page 13: At The Display Side
The on/off switch (5) controls the power state of the Zingui. When completely switched off a short press on the on/off switch powers on the Zingui. Once the Zingui is powered on, a short press on the on/off switch will put the Zingui in 4.1.2 Microphone standby. -
Page 14: Left Hand Side
This is a 3.5 stereo mini-jack input connector for headphones. 4.2.3 USB port (slave) (3) The Zingui has two USB ports: a master and a slave. This mini USB port is the slave port. It is used to connect the Zingui to a computer to allow exchange of data between the computer and the Zingui. -
Page 15: At The Back
Zingui 4.3 At the back... -
Page 16: Usb Port (Master) (1)
Zingui 4.3.1 USB port (master) (1) The Zingui has two USB ports: a master port and a slave port. This is the master USB port. It can be used to connect a USB keyboard or USB mouse to the Zingui. -
Page 17: Reset Button (5)
4.3.5 Reset button (5) In the event that the Zingui should not react anymore you can execute a reset by pressing the Reset button. The Zingui will be switched off. Press the on/off switch shortly to restart the Zingui. -
Page 19: Batteries
Zingui is not active, charging the standard battery will take about 90 minutes (or Screw the battery lid back on the Zingui housing. 3 hours for the double capacity battery). You can use the Zingui while it is charged. In that case it will take longer to fully charge the battery. - Page 20 The Zingui will wake up instantly so that you can immediately continue to use the device. When you are using the Zingui every day you can put the Zingui in standby in the evening, charge it and wake up the Zingui in the morning.
-
Page 21: How To Create A Communication Book
The set of pages of a communication book is stored into a file. If you want to build a new set of pages for a new communication book you need to create a new file. To create a new file; The page setup screen will now appear on the Zingui. 1. Select F F ile. -
Page 22: Fill In The Content Of A Cell: The Symbol
8. Tap when you are ready. The first page with 16 empty cells (4 by 4) appears on the Zingui. 2. Select E E dit mode. The Zingui is now in Edit mode allowing you to change the content of the cells. - Page 23 You can also define the text on screen (label), and the style of your text and cell. • L L evel 1, 2 and 3 (1) are the different sets of messages (Zingui Plus), words or commands that can be linked to that specific cell.
-
Page 24: Styles
Zingui For more information on Styles see “Styles” on page 18. 3. Define the background color by tapping on the Color box. You can make a cell transparent. A transparent cell shows the background color of the page. 10. The width setting allows you to change the width of a cell. -
Page 25: Fill In The Content Of A Cell: The Action
The default action is the text on the screen of the chosen symbol, • Go to page in this example the spoken message “dog” (for Zingui Plus only). • Open file 3. Make a choice from the A A ction list b b ox if you want to add a new action to the •... -
Page 26: Spoken Message (Only For Zingui Plus)
7. When you select V V erb, N N oun or P P ersonal pronoun you can tap on Data. If • Calculator necessary the Zingui will ask you to fill in some data about the Noun, Verb • Battery or Personal Pronoun. -
Page 27: Go To Page
The record button will turn into green while recording. 2. Tap to stop recording. The Zingui automatically gives a new recording a name sndx, where x is a number. 3. To change the name of the recorded sound tap its filename and edit it. -
Page 28: Open File
Zingui 2.1.4 Open file 1. Choose Go to level in the Action list box to activate another level. 2. Choose the level you want. To open a specific file from a cell: Completing the content of a cell on Level 2 and Level 3 is similar to 1. -
Page 29: Grammar (Only For Zingui Plus)
2.1.7 Letter functions Zingui allows you to create and to prepare sentences. You can get a visual feedback of the message you are creating in the letter window. Both text and symbols can be displayed. (Zingui Plus) To use the grammar functions: 1. -
Page 30: The Letter Window
Zingui • W W rite: Activate the letter window so you can start adding symbols to the 1. Select in the menu D D ocument > Page Settings and enable the Letter letter window box. • R R ead letter: Read out loud the sentence or letter completely. -
Page 31: Stop All Sounds
Choose S S ay date in the Action list box to let the Zingui say the date and then tap • Enable N N o speech when adding to letter when you do not want auditory feedback while creating a letter or sentence. -
Page 32: Battery
49. For more information on the Battery see“Battery level” on page 51. 2.1.18 Zingui Tool For more information on how to use the Zingui Tool see “Zingui Tool” on page 39. 2.2 Remarks • You can use the Q Q uick Edit mode to edit just one cell. After editing the Zingui automatically returns to the User mode. -
Page 33: Speech Settings (For Zingui Plus Only)
3.1 Speech 3.2 Speech dictionary Zingui uses high quality text-to-speech engines. The speech settings allow you Some words might have a wrong pronunciation. This can happen with words to change the language and voice (if more than one is available), the volume and from another language or with names.You can change the pronunciation in the... - Page 34 Zingui 6. Tap when you are ready. To delete a word in the Word list, first select the word, then tap to make a new list.
-
Page 35: Word Prediction (For Zingui Plus Only)
The pages on the Zingui can contain cells that show word predictions. To make this happen a cell must be defined as a word prediction cell. The content window of a cell has a tab called Extra in which you can change the Field type to define whether a cell contains a symbol/text (the default) or a Prediction. -
Page 36: Word Prediction Settings
This will also affect the probability of the words in the list. 4.2 Editing the word prediction list Zingui uses a word prediction list of about twenty thousand words. You can edit the list, add and delete words, change frequencies. To edit word prediction lists: 1. -
Page 37: Editing Words
Zingui 4.2.1 Editing words To make a new word prediction list. You can add words manually, but you also can use the auto learn function. The word prediction will learn automatically words while using it. Duplicate the current word prediction list. You will be asked to give the list a new name. -
Page 38: Word Pairs
Zingui A list with all the possibilities appears: 4. Tap to add a word to the list. 3. A list of words with their corresponding frequency will appear. 5. Fill in the new word and the frequency. Compare with existing frequencies 4. -
Page 39: Abbreviations
Zingui 4.2.4 Startwords 4.2.3 Abbreviations To extend the word prediction list with abbreviations: These words will appear in the prediction cells when you start a new sentence. You can add words to the list.You can add starwords to this list by typing them 1. -
Page 41: Recording Messages
Zingui 5 - Recording messages The Zingui allows you to make quick recordings. You can make recordings in 3. The window Record appears on your screen: recording mode, in editing mode and you can also make recordings in mouse mode (if the option “Allow recording in mouse mode” is enabled.) 5.1 Making recordings in Recording mode... -
Page 42: Making Recordings In Mouse Mode
2. When you are working in Mouse mode and you want to make a recording, press the ESC button on the back of the Zingui and then select a cell. The 5.3 Making recordings in Edit mode window Record appears on the screen. - Page 43 Zingui To activate Record using noise reduction: 1. Go to T T ools > Zingui and select S S ettings. 2. Select R R ecord using n n oise reduction.
-
Page 45: Zingui Tool
1. Go to T T ools > Zingui and select Settings. 4. Select R R ecord using n n oise reduction.When this option is activated Zingui will filter out the noise to improve the quality of recording. When R R ecord using noise reduction is active, wait a moment before speaking while recording and do not speak too loud. -
Page 46: Brightness
When you record several wave files under a specific cell, the wave files that are not in use are still stored on the flash disk of the Zingui. When the hard disk is Changed settings will be operational after restarting the Zingui. -
Page 47: Copy Disk To Usb
3. Restart the device. You can copy the content of the Zingui to an USB stick. Insert an USB stick in the computer and go to T T ools > Zingui ans select C C opy Disk To USB. This option is meant as a backup function of the Zingui. If any problem occurs in... -
Page 48: Go To Standby Mode
4. A window appears that asks you if you want to restore the files on the Flashdisk. To put the Zingui in standby mode go to T T ools > Zingui and select G G o to Standby mode. 5. Select Yes or No. -
Page 49: Shutdown
• S S peaker on: sound goes to the speakers • S S peaker off: stop sound to the speakers. To shut down the Zingui go to T T ools > Zingui and select S S hutdown. • T T oggle speaker: sound goes to speaker on/off. -
Page 51: Gewa: Sending Infra Red Codes
The Zingui can optionally be equipped with a programmable infrared remote 7.1 Programming IR codes control unit. With this module the Zingui can learn to transmit infrared codes and First of all you need to select the COM port of the Zingui. - Page 52 10. This procedure will be repeated in order to learn the code for a second television or cd player) in front of the IR window of the Zingui. The distance time: The red light in the IR window will turn on again and the status line between your remote control and the IR window should be about two will ask to press the (same) remote control button again.
-
Page 53: Transmitting Ir Codes
39. P P ause allows you to add a pause after sending the corresponding IR code. Insert the D D uration of the Pause in milliseconds. To send IR codes with the Zingui you have to link the command Send Gewa to a cell. -
Page 55: The Calculator
Zingui Chapter 8 - The calculator 8.1.2 Operations • difference: Fill - in under O O perations • sum: Fill + + in under O O perations 8.1 How to make a calculator • quotient: Fill / / in under O O perations •... -
Page 56: Delete Signs And Delete The Content Of The Display
The calculations and the response will be displayed in this cell. 4. Select R R ead out the operations if you want the operations tho be read.(only for Zingui Plus). 5. Select R R eset at pageload if you want a reset of the display when you are opening the calculator page. -
Page 57: Battery Level
There are two ways to get informed about the status of the battery: a spoken message, or visual information in a cell. 9.1 Battery level message (only for Zingui Plus) 1. Go to E E dit > Edit mode and open the Edit window of a cell. -
Page 59: Options
10.1 Options A blinking colored bar appears above the menu while working in Edit mode. There are some general settings of the Zingui that can be modified. 10.1.1 Edit mode indicator The E E dit mode indicator indicates that you are working in the Edit mode. -
Page 60: Show Menubar On Startup
To make the menu visible, press the escape button When pressing the ESC button to make the menu visible again, Mind Express on the back of the Zingui. will ask for a password. For more information on using the Escape button see“ESC system switch (4)”... -
Page 61: General Volume
Zingui 10.1.5 General volume The next time you turn on the Zingui you will be asked if you want the Zingui to recover the data.: You can adjust the general volume of the Zingui on this slider. If you select Yes a copy of the last file you were working with will appear on the screen. -
Page 62: Date/Time
Zingui 10.3 Preferences The window A A dd-ons appears on the screen. 10.3.1 Drag and drop You can drag the cells in a grid to a different location. To do this, click the cell and drag it to its new location while holding down the left mouse button. Release the left mouse button when the cell has reached its new location. -
Page 63: Use Specific Selection Settings
Zingui 10.3.4 Use specific selection settings 1. Select U U se specific settings, to set the user mode (mouse or scanning) of the file. The file will start up in this user mode. . 2. Tap to confirm. For more information on selection settings see“Selection options” on... -
Page 65: Selection Options
3. Enable o o n release if you want the Zingui to accept the selection as soon as you lift your finger or stylus from the touch screen. 4. Enable o o n press if you want the Zingui to accept the selection as soon as you hit the screen. -
Page 67: Scanning Selection
Zingui 2 - Scanning selection The Zingui offers you a number of scanning methods, modes and options that A warning window can appear to ask if you want to change the allow you to configure the grid scanning to best suit the needs and skills of the document’s preferences. -
Page 68: Automatic Advance
Zingui 2.1 Automatic advance 6. Select the scanning P P references of your choice. In this scanning mode, the next line, column or cell is scanned automatically. The navigation speed can be set by entering the Advance time (in seconds). - Page 69 Zingui Preferences Description Pause scanning After selection of a cell After selection of a cell the scanning will pause. Pause with switch 2 You can pause the scanning by pressing switch 2 Pause scanning after a After scanning a specific number of rounds, scanning will be number of rounds...
-
Page 70: Tap Switch
Zingui 2.2 Tap switch In this scanning mode you can move through the grid by pressing switch 1. 1. Select Tap switch in the A A dvance window if you want to work in this scanning mode. 2. To select a cell you can choose between three options: •... - Page 71 Zingui change the time setting, tap the time you want to change and a time scale appears. Now you can adjust the time on the time scale. Preference Description Restart scanning The scanning restarts automatically after the selection of a cell.
-
Page 72: Hold Switch
Zingui 2.3 Hold switch Selection Time Description In this scanning mode you can step by holding switch 1. automatic Auto select time The standard Auto select time is 1 sec. (after time- This means that the cell automatically will 1. Select Hold switch as Advance mode if you want to work in this scanning... - Page 73 Zingui 6. In the tab T T iming you can adapt the A A uto Select time (only with automatic 5. Select the scanning preferences of your choice. after time-out) A A dvance time, Acceptance time and/or the P P ost selection time.
-
Page 74: Scanning Methods
Zingui For more information on the General settings see“General scanning 2.4 Scanning Methods settings” on page 69. Scanning method Description Linear All the cells are scanned cell by cell from left to right, starting at the left top line. Linear (column) All the cells are scanned cell by cell from top to bottom of a column. -
Page 75: General Scanning Settings
Zingui 2.5 General scanning settings 1. Choose the type of I I ndicator you want. You can choose between: • None • Border: tap the color box to select the border’s color. • Inverse: the color of the scanned cell, row, column differs from the color of the other cells, so they are in contrast with the other cells. -
Page 77: Creating A Communication Book On Pc
Type D D :\setup.exe and press <Enter> or click ENTER or OK (where D is the letter of your CD-ROM drive). The first time you launch Mind Express a prompt on the screen will ask for an activation. If you want to activate the software you need to connect the Zingui to the PC. -
Page 79: Using Mind Express Zingui
Zingui 2 - Using Mind Express Zingui Double click the Mind Express Zingui icon on your desktop or launch the 1. Give the page a N N ame. software using S S tart > All Programs > Mind Express Zingui. -
Page 80: View
You can modify the view of your screen. You can modify the size of the screen but you also can modifiy the Zingui frame. To modify the size of the screen or the Zingui Frame go to the Mind Express Zingui menu and select view. Select a size and/or Design. -
Page 81: Fill In The Content Of A Cell: The Symbol
Level 1, 2 and 3 are the different sets of messages, words or commands that can be linked to that specific cell. 3. Choose the S S ymbol Set. Mind Express Zingui will show the available symbols in the list. O O ther can contain your own pictures and images. - Page 82 Zingui For more information about Other symbols see “Save and use own In E E xtra you can choose the cell to be a word prediction cell. A cell is sounds and images” on page 77. by default a symbol or text cell. You can also change the size of a cell.
-
Page 83: Save And Use Own Sounds And Images
Sounds folders. Those folders have the standard location C C :\Program Files\Mind Express English Zingui. To make sure that the content of these folders appear in Mind Express Zingui check the D D irectories: 1. Go in the menu to T T ools and select Directories or select the C C hange... -
Page 84: Styles
Zingui 3.3 Styles 1 is modified, all cells of the communication book with style 1 will be changed. Just keep style 1 as the default style. A cell can have a specific style that defines its background color, text font, shape 3. -
Page 85: The Content Of A Cell: The Action
4 - The content of a cell: the action 1. The default action in this example will be the spoken message “dog”. If Fill in Text and Level 1 is enabled, Mind Express Zingui will automatically complete the Text on screen, the message on level 1 and the wordtype (Noun - Other - Personal pronoun – Verb) as soon as you click on a symbol in the list. -
Page 86: Overview Of The Different Actions
2. Choose V V erb, N N oun, P P ersonal pronoun or O O ther depending on the part of Record a sound. speech of the message. Zingui uses this information for its grammar engine. 3. Complete data if necessary. -
Page 87: Command
Zingui 4.1.3 Command • Use F F ile > Open to open an existing file • To add a new page to your file select in the menu D D ocument > Add new page or click in the Page settings window after selecting D D ocument >... -
Page 89: Exporting And Importing Files
5 - Exporting and importing files 5.1 Exporting to the Zingui 3. Mind Express Zingui will show a list of the existing files on the Zingui and the file that is opened in Mind Express Zingui. 5.1.1 Exporting files to the Zingui When your communication book is ready and saved (for instance as new file) you can upload the file to the Zingui via the USB port of your computer. -
Page 90: Exporting Pictures To The Zingui
1. Go to F F ile > Export p p ictures. 1. Go to F F ile > Export sounds. 2. Select the files you want to export to the Zingui. 2. Select the files you want to export to the Zingui. -
Page 91: Import Files From The Zingui
To import files from the Zingui: 1. Go to F F ile > Import from Zingui. 2. Mind Express Zingui will show a list of the existing files on the Zingui. Select the file you want to import and then select open. - Page 93 Zingui Appendix - Phonetic transcription • V V owels and diphthongs (UK English) Symbol Transcription As in: I&$ ‘hI&$ here Symbol Transcription As in: E&$ ‘DE&$ there ‘bit beat U&$ ‘pU&$ poor ‘bIt ‘bEd • C C onsonants (UK English) ‘m@p...
- Page 94 Zingui Symbol Transcription As in: Symbol Transcription As in: ‘sIn ‘fOl fall ‘Sa&In shine ‘fUl full ‘va&In vine ‘ful fool ‘D@t that $.’la&U allow ‘zo&Un zone ‘kE0R+t curt ‘vI.Z$n vision ‘dOr door ‘hEd head e&I ‘fe&Il fail t&S ‘t&SE0+t&S church O&I...
- Page 95 Zingui Symbol Transcription As in: ‘bIt ‘dIg ‘gAt ? (glottal stop) ‘?it ‘f@t ‘Tin thin ‘sil seal ‘Sip ship ‘v@t ‘Den then ‘zil zeal ‘li.Z$R+ leisure ‘h@t t&S ‘k@t&S catch d&Z ‘d&ZE0R+.ni journey ‘m@n ‘n^t ‘R+InK ring...
- Page 97 Zingui DC power connector Headphones Actions 80 Light sensor Add new page 81 Microphone Always return to first page 56 On/off indicators Always return to level 1 56 On/off switch Switch input USB port (master) USB port (slave) Backup 41...
- Page 98 Headphone off 43 Noise reduction 37 Headphone on 43 Noun 80 Headphones 8 On/off indicator 7 Importing files 83 On/off switch 7 Increase Brightness 43 Open File 81 Installing Mind Express Zingui 71 Options 53 Introduction 1 Other 75 Language...
- Page 99 Row-column Li-ion battery Select on entire group highlight Mounting Select on entire group highlight (only with Row - column, Column - row) Recordings Safety precautions Snake (column) Storing the Zingui Tap same switch Strap Tap switch Temperatures Tap switch 2...
- Page 100 On press Switch input 10 On release Switch off 5 Optimize the selection characteristics Switch on 5 Post selection delay Switch on the Zingui 5 Selection indicator Symbol 16 Selection indicator 59 Symbol List 17 Sentence window 73 Symbol Name 17...
- Page 101 Zingui Word prediction 29 Abbreviations Auto-learn Case-sensitive Minimal length Recency priority Settings Startwords Word pairs Zingui commands 43 Zingui Plus 1 Zingui settings 39 Zingui Tool 39...
Need help?
Do you have a question about the Zingui Plus and is the answer not in the manual?
Questions and answers