Table of Contents
Advertisement
Quick Links
Advertisement
Table of Contents

Related Manuals for altimo 32DVDLED01


Summary of Contents for altimo 32DVDLED01
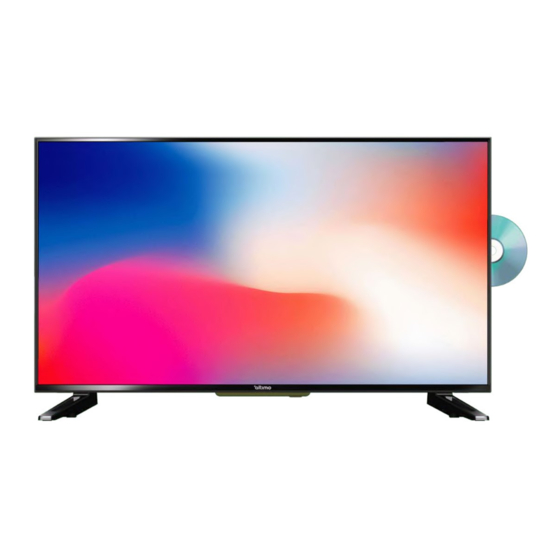
- Page 1 Instruction Manual 32" HD Ready LED TV with DVD Player 32DVDLED01...
-
Page 2: Table Of Contents
CONTENTS Important Safety Instructions Troubleshooting Safety Information Plug Replacement-UK and Ireland only Prepration SPECIFICATION What is Included Disposal Information Front View Rear View Installing the Stand Removing the Stand for Wall-Mounting 7 Remote Control Connecting External Devices Basic Features First time setup VIEWING TELETEXT How to select a page of text USING THE TIME SHIFT FUNCTION... - Page 3 The terms HDMI and HDMI High-Definition Multimedia and the Interface, HDMI Logo are trademarks or registered trademarks of HDMI Licensing Administrator, in the United States and other countries.
- Page 4 SAFETY INFORMATION This product contains electrical or electronic materials. The presence of these materials may, if not disposed of properly, have potential adverse effects on the environment and human health. Presence of this label on the product means it should not be disposed of as unsorted waste and must be collected separately.
-
Page 5: What Is Included
PREPARATION What is Included Remote Control with Batteries TV Set Four Screws Base Stand MINI AV cable Quick User Manual Start Guide User Manual Quick Start Guide MINI YPBPR cable... -
Page 6: Front View
PREPARATION Front View Press to adjust the volume. Press to select a channel. MENU Display the OSD (on screen display) menu. SOURCE Press to select among di fferent input signal sources. POWER Switch the TV between On / Standby mode. IR (Infrared Receiver) Receive IR signals from the remote control. -
Page 7: Rear View
PREPARATION Rear View 9. MINI AV Connect to the composite VIDEO and Power Cord AUDIO (L/R) output sockets on external Connect to AC power outlet. video devices. 10. MINI YPBPR Connect to AV devices with component (Y/Pb/Pr) video and audio output sockets. COMPONENT&VIDEO share with AUDIO IN(L/R)subscribe to. -
Page 8: Installing The Stand
PREPARATION Installing the Stand 1.Lay the TV face-down on a surface to avoid damaging or scratching. 2.Fix the base stand to the TV using the 4 provided screws. Removing the Stand for Wall-Mounting 1.Lay the TV face-down on a surface to avoid damaging or scratching. 2.Untighten the 4 pcs screws holding the stand assembly and remove them. -
Page 9: Remote Control
PREPARATION Remote Control playback... - Page 10 PREPARATION Remote Control...
-
Page 11: Connecting External Devices
CONNECTING EXTERNAL DEVICES... -
Page 12: Basic Features
BASIC FEATURES ’ First time setup ’ First Time Installation Language English Deutsch Espa駉l Country Environment Select Country Home Mode Auto Tuning Move Adjust Select Exit EXIT Select... - Page 13 BASIC FEATURES How to use your TV Let s get USING THE ELECTRONIC started PROGRAMME GUIDE EPG SELECTING INPUT SOURCE Digital TV DTV channels only You can connect multiple devices to your TV to improve Your TV has an Electronic Programme Guide EPG to your watching and listening pleasure help you navigate through all your possible viewing 1 Press the SOURCE button on the TV or on the remote...
- Page 14 BASIC FEATURES together Connections Bringing it all Select Primary region England Select Select Secondary region Yorkshire Select...
- Page 15 BASIC FEATURES...
-
Page 16: Viewing Teletext
BASIC FEATURES VIEWING TELETEXT How to select a page of text 1 Find the number of the page you wish to view and Digital TV DTV channels only enter it in the search panel using the 0 to 9 buttons on the remote control then press the OK button IMPORTANT Before viewing Teletext you need to turn 2 The page counter will search for your page you... -
Page 17: Using The Time Shift Function
BASIC FEATURES USING THE TIME SHIFT FUNCTION ’ Using the Time Shift function The Time Shift progress bar... -
Page 18: Using The Remote Control With
BASIC FEATURES RECORDING DTV PROGRAMMES / / / ’ Using the remote con trol with Time Shift... -
Page 19: Watching Recorded Programmes
BASIC FEATURES WATCHING RECORDED PROGRAMMES You can play a recorded programme from the recorded 3 Use the buttons to select MSTPVR and programme list from the USB storage device press OK button to confirm Note When a USB storage device is inserted into the USB port in your TV a message will pop up asking if you want to go directly to the USB MEDIA menu Use the buttons to select either Yes or No and press the OK... - Page 20 BASIC FEATURES List of functions...
-
Page 21: Picture Menu
BASIC FEATURES PICTURE MENU ’ PICTURE Picture Mode Standard Dynamic Movie Contrast Brightness Colour / : / Sharpness : Move Adjust Select Exit EXIT PICTURE Colour Temp Normal Cool Warm Aspect Ratio 16:9 Advanced Settings Move Adjust Select Exit EXIT... -
Page 22: Sound Menu
BASIC FEATURES SOUND MENU ’ ’ ( . . SOUND 1/10 Sound Mode Standard Personal Music Treble Bass Balance Auto Volume Level Adjust Move Select Exit EXIT SOUND PLEASE NOTE 6/10 Switches the virtual surround sound feature on or off. Surround Sound Digital Audio Output Audio Description... -
Page 23: Channel Menu
BASIC FEATURES Auto Tuning CHANNEL MENU ’ Channel Tuning Tuning Mode CHANNEL Digital TV DTV + ATV Analogue TV Country Auto Tuning Digital Manual Tuning Auto Tuning Channel Edit Signal Information CI Information Move Adjust Move Adjust Select Exit EXIT Select Exit EXIT... -
Page 24: Analogue Manual Tuning
BASIC FEATURES Analogue Manual Tuning Digital Manual Tuning 1 Use the button to select Digital Manual Tuning only available in ATV mode and press OK on the remote control to display the IMPORTANT This feature is not available in the UK as submenu analogue signals are no longer broadcast 1 Press the... -
Page 25: Channel Edit
BASIC FEATURES Channel Edit Signal Information Channel Edit 1 Barnkanalen 2 C1 CI (Common Interface) 3 C2 4 C4 1 BBC1 2 S-03 Rename Delete Move Skip Favorite Select Back MENU... - Page 26 BASIC FEATURES Schedule List Recorded List Use the button to select Scheduled List from the menu Use the button to select Recorded List from the menu and press the OK button to display the menu and press the OK button to display the menu Note 20 : 37 125 Sep Edit...
-
Page 27: Lock Menu
BASIC FEATURES LOCK System Lock Set Password NOT E Channel Lock Parental Guidance Key Lock LOCK MENU Move Adjust Select Exit EXIT System Lock Set Password ’... -
Page 28: Channel Lock
BASIC FEATURES TIME Auto Sync Channel Lock Clock 20:44 On Time Sleep Timer Move Adjust Select Exit EXIT TIME OSD Timer 15 S 30 S Auto Standby Time Zone London GMT Move Adjust TIME MENU Select Exit EXIT Auto Sync ’... - Page 29 BASIC FEATURES Sleep Timer Off Time / / / / / / OSD Timer On Time Auto Standb y Time zone...
-
Page 30: Settings Menu
BASIC FEATURES SETTINGS SETTINGS MENU 11/12 HDMI CEC Version info SETTINGS 1/12 Language English Deutsch Espa?ol Audio Languages English Audio Languages2 Move Adjust English Select Exit EXIT Subtitle Language English Subtitle Language2 English Move Adjust Select Exit EXIT ’ SETTINGS 6/12 Hearing Impaired PVR File System... -
Page 31: Language
BASIC FEATURES Language Hearing Impaired PVR File System First Time Installation Software Update (USB) -
Page 32: Restore Factory Default
BASIC FEATURES Restor e Factory Default Select to restore the TV to factory default A warning window will pop up asking if you wish to reset the TV to the factory settings select YES or NO to reset the TV or HDMI CEC Turn on C onsumer Electronics Control CEC so that you can control up to 15 CEC enabled devices that are... -
Page 33: Using The Usb Features
BASIC FEATURES USING THE USB FEATURES PICTURE SOUND CHANNEL LOCK TIME NETWORK SETTINGS USB MEDIA... -
Page 34: Viewing Movies
BASIC FEATURES Viewing Movies List of functions Device /usb/sda1 Directories:1 Files:0 Total:11 Return 桵STPV RP music 3840x2160 Press ?Menu?to open the control Tool Bar... -
Page 35: Listening To Music
BASIC FEATURES Listening to Music List of functions Use the buttons to select Music folder then press Maroon 5 - Sugar.mp3 the OK button 00:00:06 / 00:03:25 Repeat: Sequence Previous Next Pause Stop epeat Playlist Info TimePlay Previous Press to skip to previous track Device Next Press to move to next track Play Pause Press to play pause the programme... -
Page 36: Viewing Photos
BASIC FEATURES Viewing Photos List of functions 0(1).jpg Repeat: Sequence Play Rotate - Rotate +R Previous Next Pause S t op Enlarge Shrink Move epeat Playlist Info Device –:... -
Page 37: Viewing Files
BASIC FEATURES Viewing Files Device /usb/sda1 Directories:6 Files:1T otal:7 Press 揗enu? to open the control Tool Bar... -
Page 38: Important Safety Instructions 2 Troubleshooting
TROUBLESHOOTING If your TV does not operate normally or cannot be turned on, please check the following troubleshooting questions. Remember also to check any other connected electronic device, such as DVD or Blu-ray player to pinpoint the problem. If the TV still fails to operate normally, please contact technical support. - Page 39 TROUBLESHOOTING The audio function does not work ‡ Press the VOL +/- buttons. ‡ Sound muted? Press the MUTE button. Picture OK but no sound ‡ Try another channel. The problem may be caused by the broadcaster. No output from one of the ‡...
-
Page 40: Prepration 4 Specification
Maintaining ‡ Do not use your TV in areas that are too hot or too cold, because the cabinet may warp or the screen may malfunction. Your TV works best in temperatures that are comfortable to you. ‡ Storage temperatures are 32° to 122°F(0° to 50°C) ‡... - Page 41 SPECIFICATION Panel Size 31.5 inch diagonally Display Type DLED Panel Technology Panel 60 Hz Vs. 120 Hz 60 Hz Display Resolution 720P Panel Resolution 1366x 768 Aspect Ratio 16:9 Dynamic Contrast Ratio-Panel 3000~5000:1 Brightness (Centre Typ.) Cd/M² 170~220 Response Time (G To G) 20 ms Lamp Life (Typ.
- Page 42 For customer service call: 0330 041 7490...
Need help?
Do you have a question about the 32DVDLED01 and is the answer not in the manual?
Questions and answers