Table of Contents
Advertisement
Quick Links
Shenzhen Ospri Intelligent Technology Co., Ltd.
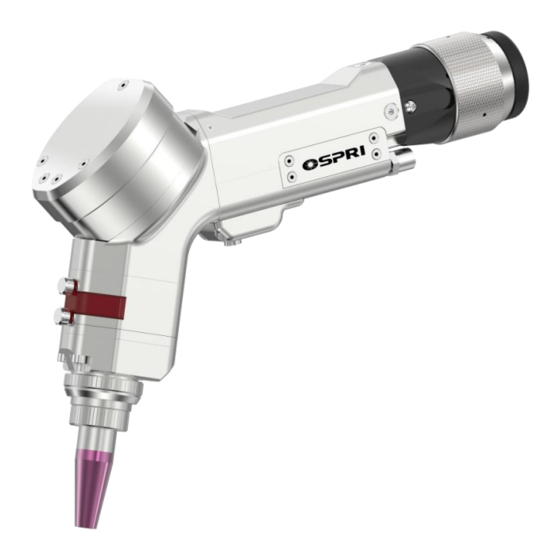
LHDW200S Handheld Wobble
Welding Head
User Manual
Shenzhen Ospri Intelligent Technology Co., Ltd.
Tel: +86 0755-85225225
Fax: 4008266163-19300
Mobile: +86 13915329830
Email: z.shi@sz-osprey.com/mj.chen@sz-osprey.com
Address: 2nF,Bldg.C,East Zone No.10, Shangxue Technology Park, Shenzhen,
China.
1
Advertisement
Table of Contents

Summary of Contents for OSPRI LHDW200S
- Page 1 Shenzhen Ospri Intelligent Technology Co., Ltd. LHDW200S Handheld Wobble Welding Head User Manual Shenzhen Ospri Intelligent Technology Co., Ltd. Tel: +86 0755-85225225 Fax: 4008266163-19300 Mobile: +86 13915329830 Email: z.shi@sz-osprey.com/mj.chen@sz-osprey.com Address: 2nF,Bldg.C,East Zone No.10, Shangxue Technology Park, Shenzhen, China.
- Page 2 Dear Users: Welcome to use LHDW200S handheld wobble welding head manufactured by Shenzhen Ospri Intelligent Technology Co., Ltd. It is our great honor to gain your trust in our products. In order to make you have an overall view of the product, convenient...
-
Page 3: Table Of Contents
Shenzhen Ospri Intelligent Technology Co., Ltd. Content Chapter 1 Application Method ...................... 4 Chapter 2 General Introduction ....................5 2.1 Product Principle ......................5 2.2 Product Parameter ......................5 2.3 Attention ..........................5 Chapter 3 Structure Features ......................6 3.1 Product Structure ......................6 3.2 Brief Introduction of Components ................... -
Page 4: Chapter 1 Application Method
Shenzhen Ospri Intelligent Technology Co., Ltd. Chapter 1 Application Method Method 1: Attach fiber through the ring Extension Spring Fixed Tube Working Platform Method 2: Extension Spring Fiber Working Platform Fixed Support Note: 1) When fiber through the rings, minimum bending radius is 150mm, otherwise the fiber would be broken possibly. -
Page 5: Chapter 2 General Introduction
Shenzhen Ospri Intelligent Technology Co., Ltd. Chapter 2 General Introduction 2.1 Product Principle The laser beam is generated by the laser, transmitted by the external optical path, focused by the focusing lens in the welding head, and then acted on the welded gap between the materials being processed. With the... -
Page 6: Chapter 3 Structure Features
Shenzhen Ospri Intelligent Technology Co., Ltd. Chapter 3 Structure Features 3.1 Product Structure Welding Head Body Protective Window Module Cooling Water Connector Button Switch Protection Gas Connector Diagram 3.1.1... -
Page 7: Brief Introduction Of Components
Shenzhen Ospri Intelligent Technology Co., Ltd. Reflector Mirror Module Collimation Lens Welding Head Body Protection Window Focus Lens Diagram 3.1.2 Attention: To avoid the dust from falling onto the collimation lens, please make sure the fiber optic is clean before inserting the fiber. -
Page 8: Wiring Diagram Of Electric Connection
Shenzhen Ospri Intelligent Technology Co., Ltd. 3.3 Wiring Diagram of Electric Connection LHDW200S Controller Instruction Controller Box Wiring Diagram : Controller Box Wiring Definition CN1(DB15 Female) DEFINITION PWM+ PWM- Laser Enable Red Laser... - Page 9 Shenzhen Ospri Intelligent Technology Co., Ltd. PIN 1, 9: given DA signal, to control the peak power of laser source; PIN 4, 13: PWM signal, to control the duty cycle of laser output; PIN 3, 11: control the laser enable and red laser, signal is PNP output;...
- Page 10 Shenzhen Ospri Intelligent Technology Co., Ltd. PIN 14, 7: 0V output of the controller; PIN 15, 8: 24V output of the controller; C. CN3(DB9 Female): Connect to the 7-inch touched control screen D. CN4(3 pins plug): Connect to the U, V, and W of wobbler motor E.
- Page 11 Shenzhen Ospri Intelligent Technology Co., Ltd. 3. Screen Operation Instruction A. Main Interface 1. Process Layer: There are 20 groups of process parameters to choose, from No.1~No.20. Each group of parameters can be saved separately. 2. Laser Source Power Parameter: Peak power ---to limit the peak power of laser output, set from 0~100%;...
- Page 12 Shenzhen Ospri Intelligent Technology Co., Ltd. B. Parameter Setting Interface: 1. Set protective function If foot pedal protection and grounded protection are cancelled, CN1 Pin 1, 9 and Pin 4, 13 will output signal when press switch button; Auto laser shutter enable. When press the welding head switch button, laser shutter will open by default;...
-
Page 13: Hose Connection
Shenzhen Ospri Intelligent Technology Co., Ltd. released, the system will auto stop the wobbling. Start re-wobble. The motor will go on wobbling at a low speed; Point/CW Mode---control whether laser output at intervals during the laser output. 2. The test mode is to check whether the IO port is normal or not. It should not be used unless in special occasion. -
Page 14: Qbh Installation
Shenzhen Ospri Intelligent Technology Co., Ltd. 3.5 QBH Installation Place the welding head horizontally, remove the dust-proof sealing plug ① and dust-proof cover. dust-proof cover Put the dust-proof sealing plug into the fiber tip protective cover. ② dust-proof sealing plug fiber tip cover Put the dust-proof cover onto the fiber tip. - Page 15 Shenzhen Ospri Intelligent Technology Co., Ltd. Align the red dot on the fiber head with the red dot on the QBH ⑤ connector, and slowly insert the fiber tip into the QBH connector. red dot mark ⑥ Turn the QBH connector to the locked state, that is, screw it toward the limit position clockwise (where can hear a “thud”...
-
Page 16: Chapter 4 Maintenance
Shenzhen Ospri Intelligent Technology Co., Ltd. Chapter 4 Maintenance 4.1 Maintenance of Protection Window The protection window locates under the focus lens module. The protection window will be damaged when there is impurities or foreign matters on the surface of it. Therefore, it’s necessary to clean the protection window regularly once a week. -
Page 17: Disassembly Of Protection Window
Shenzhen Ospri Intelligent Technology Co., Ltd. 4.1.1 Disassembly of Protection Window ① Pull out the protection window drawer from the welding head body, remove it to clean and dust-free environment, and seal the head body at the same time. clamp ring protection window 4.1.2 Cleaning of Protection Window...

Need help?
Do you have a question about the LHDW200S and is the answer not in the manual?
Questions and answers