Table of Contents
Advertisement
Available languages
Available languages
Quick Links
Advertisement
Table of Contents

Summary of Contents for E-Z Style 1900EZ-26FP
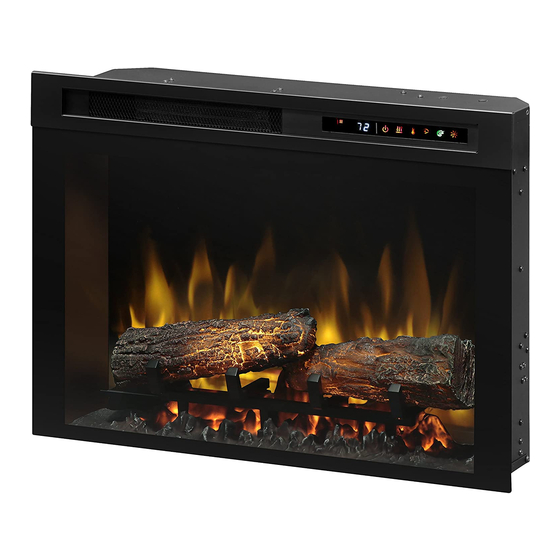
- Page 1 ELECTRIC FIREPLACE/ ELECTRIQUE CHEMINÉE / CHIMENEA ELÉCTRICA User’s Manual [English P1] Manuel utilisateur [Français P9] Manual de usuario [Españo P17] Model # 1900EZ-26FP PLEASE READ THIS MANUAL CAREFULLY BEFORE USING YOUR ELECTRIC FIREPLACE AND KEEP IT FOR FUTURE REFERENCE.
-
Page 2: Section1: Beginning
SECTION1: BEGINNING QUICK START GUIDE (1) Prior to first use verify that the circuit breakers are on. (2) The heating element on this unit may emit a slight, harmless odor when first used. This odor is a normal reaction to heating the internal heater parts for the first time. This odor will dissipate and should not happen again. - Page 3 authorized service facility for examination and/or repair. 8. If the supply cord is damaged, it must be replaced by the manufacture, its service agent or similarly qualified persons in order to avoid a hazard. 9. Any repairs to this heater should be carried out by a qualified service person. 10.
- Page 4 the manufacturer may cause fire, electric shock or injury to persons. 23. Always plug heaters directly into a wall outlet/ receptacle. Never use with an extension cord or relocatable power tap (outlet/ power strip). 24. See directions in Figure 1. This heater is for use on 120 volts. The cord has a plug as shown in figure 1.
-
Page 5: Section2: Preparing Fireplace For Use
SECTION2: PREPARING FIREPLACE FOR USE ELECTRICAL CONNECTION A 12.5 AMP, 120 Volts, 60 Hz circuit with a properly grounded outlet is required. It’s recommended that the fireplace be on a dedicated circuit, as other appliances on the same circuit may cause the circuit breaker to trip or blow the fuse when the heater is in operation. - Page 6 (1) On/Off /Main Power Button a. Press to switch the unit ON/OFF. b. The unit will turn on to its default factory settings. C. Child Lock. Unit is working, press power button 5 seconds enter Child Lock mode. Log set light will flicker 5 times and can’t choose any other function. Press Power button 5 seconds again, then Child Lock mode will off.
-
Page 7: Replacing Remote Control Battery
(1) Power: Press to turn the unit ON/OFF (2) Flame: Press to adjust the level of brightness of the flame: L6- L5- L4- L3- L2- L1- OFF. (L6 being the brightest and L1 the dimmest) (3) Timer: Press to adjust the duration of the heater: 30 min- 1H- 2H- 3H- 4H- 5H- 6H- 7H- 8H- 9H- OFF (4) Down Light: Turn the down light ON and OFF. - Page 8 The recycling of materials will help to converse natural resources. For more information about recycling of used batteries, please contact your local municipality waste disposal service. WARNING: Make sure the power is turned off before proceeding. Any electrical repairs or rewiring of this unit should be carried out by a licensed electrician in accordance with national and local codes.
-
Page 9: Troubleshooting
TROUBLESHOOTING Problem Root Cause Corrective Action Inspect the heater and check that the air inlets and outlets are not blocked as this may cause overheating. Unplug The thermostat sensor the heater for 30 minutes and allow it to cool down. Display shows “E2/E3”... -
Page 10: Guide De Démarrage Rapide
SECTION1: DEBUT GUIDE DE DÉMARRAGE RAPIDE (1) Avant la premiè re utilisation, vé rifiez que les disjoncteurs sont activé s.. (2) Lors de la première utilisation, l’élément chauffant de cet appareil peut dégager une lé gè re odeur inoffensive. Cette odeur est une ré action normale au chauffage des piè ces internes du ré... - Page 11 chauffage ou le renvoyer à un centre de service autorisé pour examen et / ou ré paration. 8. Si le cordon d'alimentation est endommagé , il doit ê tre remplacé par le fabricant, son agent de service ou des personnes de qualification similaire afin d'é viter tout danger. 9.
- Page 12 Pour éviter tout risque d'incendie, ne bloque pas les entrées d’air ni aucun é chappement. Ne pas utiliser sur des surfaces molles, comme un lit, où l'ouverture peut ê tre obstrué e. Un appareil de chauffage contient des piè ces chaudes. Ne l'utilisez pas dans des zones où...
-
Page 13: Connexion Électrique
SECTION 2: PRÉPARATION DU FOYER À L’UTILISATION CONNEXION ÉLECTRIQUE Un circuit de 12,5 ampè res, 120 volts, 60 Hz avec une prise correctement mise à la terre est requis. Il est recommandé que le foyer soit sur un circuit dédié, car d’autres appareils sur le mê... - Page 14 (1) Bouton marche / arrê t principal a. Appuyez sur pour allumer / é teindre l'appareil. b. L'unité activera ses paramè tres d'usine par dé faut. c. Verrouillage enfant L'appareil fonctionne, appuyez sur le bouton d'alimentation pendant 5 secondes pour passer en mode de verrouillage parental. Le jeu de journaux clignote 5 fois et ne pourra choisir aucune autre fonction.
- Page 15 Procédures de fonctionnement de la télécommande (1) Power: Appuyez pour allumer / é teindre l'appareil (2) Flamme: appuyez pour ré gler le niveau de luminosité de la flamme: L6- L5- L4- L3- L2- L1- OFF. (L6 é tant le plus brillant et L1 le plus sombre) Minuterie: appuyez sur cette touche pour ré...
- Page 16 ELIMINATION DES PILES USAGEES La batterie peut contenir des substances dangereuses susceptibles de nuire à l'environnement et à la santé humaine. Ce symbole inscrit sur la batterie et / ou son emballage indique que la batterie usé e ne doit pas ê tre traité e comme un dé...
- Page 17 DIAGNOSTIC DES ANAMALIES Problema Cause Action corrective Inspectez l'appareil de chauffage et vé rifiez que les entré es et sorties d'air ne sont pas obstrué es car cela L'é cran affiche Le capteur de thermostat pourrait provoquer une surchauffe. Dé branchez le «...
-
Page 18: Guía De Inicio Rápido
SECCIÓN 1: COMIENZO GUÍ A DE INICIO RÁ PIDO (1) Antes del primer uso, verifique que los disyuntores esté n encendidos. (2) El elemento calefactor de esta unidad puede emitir un ligero olor inofensivo cuando se usa por primera vez. Este olor es una reacció... - Page 19 8. Si el cable de alimentació n está dañ ado, debe ser reemplazado por el fabricante, su agente de servicio o personas calificadas de manera similar para evitar riesgos. 9. Cualquier reparació n de este calentador debe ser realizada por un té cnico calificado. 10.
- Page 20 gasolina, pintura o lí quidos inflamables 22. Use este calentador solo como se describe en el manual. Cualquier otro uso no recomendado por el fabricante puede causar incendios, descarga elé ctrica o lesiones a personas 23. Enchufe siempre los calentadores directamente en un tomacorriente / receptá culo de pared.
-
Page 21: Conexión Eléctrica
IMPORTANTE GUARDE ESTAS INSTRUCCIONES SECCIÓN 2: PREPARACIÓN DE LA CHIMENEA PARA SU USO CONEXIÓ N ELÉCTRICA Se requiere un circuito de 12.5 AMP, 120 voltios, 60 Hz con una salida a tierra adecuada. Se recomienda que la chimenea esté en un circuito dedicado, ya que otros electrodomé sticos en el mismo circuito pueden hacer que el disyuntor se dispare o queme el fusible cuando el calentador esté... - Page 22 (1) Botó n de encendido / apagado principal a. Presione para encender / apagar la unidad. b. La unidad se encenderá a su configuració n predeterminada de fá brica. C. Bloqueo infantil. La unidad está funcionando, presione el botó n de encendido 5 segundos para ingresar al modo de bloqueo para niñ...
- Page 23 Procedimientos operativos de control remoto (1) Encendido: presione para encender / apagar la unidad (2) Llama: presione para ajustar el nivel de brillo de la llama: L6- L5- L4- L3- L2- L1- OFF. (L6 es el má s brillante y L1 el má s tenue) (3) Temporizador: presione para ajustar la duració...
-
Page 24: Replacing The Remote Control Battery
REPLACING THE REMOTE CONTROL BATTERY Cuando el control remoto deja de funcionar o su rango parece reducido, es hora de reemplazar la baterí a por una nueva. 1.El compartimiento de la baterí a está ubicado en el extremo NOTA: Opere el control posterior del control remoto. - Page 25 original del cable, la codificació n de color y las ubicaciones de seguridad. ADVERTENCIA: El cableado del tomacorriente debe cumplir con los có digos de construcció n locales y otras regulaciones aplicables para reducir el riesgo de incendio, descarga elé ctrica y lesiones a personas. ADVERTENCIA: No use esta chimenea si alguna parte de ella ha estado bajo el agua.
-
Page 26: Solución De Problemas
SOLUCIÓN DE PROBLEMAS Problema Causa Acció n correctiva Inspeccione el calentador y verifique que las entradas y salidas de aire no esté n bloqueadas ya que esto puede La pantalla muestra "E2 El sensor del termostato causar un sobrecalentamiento. Desenchufe el calentador / E3"... -
Page 27: Fcc Statement
FCC STATEMENT NOTE: This equipment has been tested and found to comply with the limits for Class B digital device, pursuant to Part 15 of the FCC Rules. These limits are designed to provide reasonable protection against harmful interference in a residential installation. This equipment generates, uses, and can radiate radio frequency energy and, if not installed and used in accordance with the instructions, may cause harmful interference to radio or television reception. - Page 28 ÉNONCÉ DE LA FCC REMARQUE : Cet équipement a été testé et est conforme aux limites des dispositifs numé riques de classe B en vertu de la partie 15 de la réglementation de la FCC. Ces limites sont conç ues pour fournir une protection raisonnable contre les interférences dangereuses dans une installation résidentielle.