Table of Contents
Advertisement
Advertisement
Table of Contents

Subscribe to Our Youtube Channel
Summary of Contents for Enviolo City
- Page 1 MAY 2021 VERSION 1 Assembly Instructions CY 2021 enviolo Assembly Instructions...
-
Page 2: Table Of Contents
System Configuration – Mandatory System Configuration – Registration Assembly of the AUTOMATiQ Controller Setup of the CLiQ Pure Controller Setup of the CLiQ Plus Controller Setup of the CLiQ Pro Controller Setup of Integrated Systems Integrated System Calibration enviolo Assembly Instructions... -
Page 3: Envisioned Future
Envisioned Future You will see enviolo products in every city, every day. They will be available in many ways, so every person can afford them. We will maintain loyal business relationships to build a culture of Our products and services will empower bike makers to build personal authenticity and honesty with all stakeholders. -
Page 4: Product Overview
Product Overview City Trekking Heavy Duty Controller Twist Pure Twist Display Pure CliQ Pure CliQ Plus CliQ Pro & Pro & Pro Interface Manual Manual AutomatiQ AutomatiQ AutomatiQ Pure 44T Pro 40T Pro 44T enviolo Assembly Instructions... -
Page 5: Compatibility Matrix
Compatibility Matrix City Trekking Heavy Duty Twist Twist Display Manual Manual CliQ Pure CliQ Plus CliQ AutomatiQ Pure 44T AutomatiQ Pro 40T AutomatiQ Pro 44T enviolo Assembly Instructions... -
Page 6: For Your Safety
Please read the entire assembly instruction and pay special attention to all safety warnings before use, replacement of components or installation of enviolo components. Failure to follow the warnings or improper installation, set up, modification, or maintenance may result in material damage or in personal injury. -
Page 7: For Your Safety
The following tools are required: The following safety symbols identify the levels of danger and must be observed throughout this document: Do not open our components yourself. All components have to be maintained by trained service staff. enviolo Assembly Instructions... -
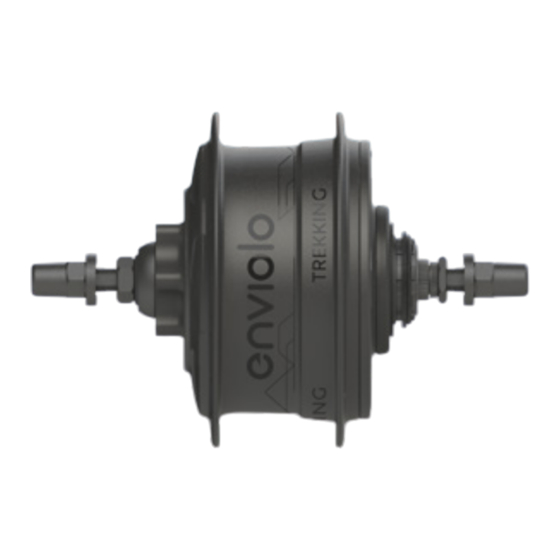
Page 8: Internal Gear Hub Components
Internal Gear Hub Components City & Trekking Internal Gear Hub 67.6 49.0 Centerline Chainline Ø 2.9 15.5 spoke hole ISO 6-bolt disc brake version Ø 125 32 and 36 spoke configurations available Ø 52.5 26.0 26.0 135 dropout width 183 axle width Heavy Duty Internal Gear Hub 67.43... - Page 9 Spacer, disc brake, 12 x 148 Spacer, LH (HW-DC-SPCR-OE) Spacer, RH Screw, button head, M5 x 0.8 x 16L, alloy (HW-BHS-M5X.8X16-OE) Syntace (HW-SPCR-LHSYN-OE) Syntace (HW-SPCR-RHSYN-OE) DT Swiss, Maxle, E-Thru DT Swiss (HW-SPCR-RHDTS-OE) (HW-SPCR-LH-OE) Maxle (HW-SPCR-RHMAX-OE) E-Thru (HW-SPCR-RHSHIM-OE) enviolo Assembly Instructions...
-
Page 10: Automatic Wire Harness
Please contact the J15 Hirose J15 Hirose drive system manufacturer for further information. For Yamaha we offer an alternative cable. Please contact the sales V_BAT team for further information. CAN_L CAN_H enviolo Assembly Instructions... -
Page 11: Step By Step Assembly Instructions
Step by Step Assembly Instructions Enjoy the ride! enviolo Assembly Instructions... - Page 12 Assembly Instructions enviolo Assembly Instructions...
-
Page 13: Wheel Building
This section assumes a level of knowledge and skill consistent with that of an experienced bicycle They should be 13 or 14 gauge. assembler or bicycle mechanic. enviolo Assembly Instructions... -
Page 14: Assembly Of The Sprocket
(4.3-4.5mm) thick, like belt cogs, the spacer should not be used. 4. If you are using the enviolo City+ hub you can also use a 3mm offset sprocket single speed chains (1/8"). The offset is facing inward, moving the chain closer to the internal gear hub. -
Page 15: Assembly Of The Manual Hub Interface
Manual Hub Interface Hub Interface Compatibility & Orientation 1. [A] Use the uninstalled enviolo hub interface to determine the desired orientation. Typical orientation is forward, parallel to the chain stay or seat stay cable routing. Move the enviolo hub interface along the dropout to ensure clearance at different axle positions. - Page 16 8. Thread the r.h. nut , serrations facing outward, onto the axle and tighten to 10-15 Nm (7-11 ft-lbs). Install the rear wheel. 9. [F] For the variants enviolo Heavy Duty 148 mm: Place the spacer on the hub and thread the LNUT onto the axle and tighten to 5-6...
-
Page 17: Assembly Of The Manual Controller
(re-adjust if necessary). E.g.: the controller not being too tightly mounted with the grip. Never ride without the handlebar grips. The turning grip of the controller could become loose. This can result in a severe injury. enviolo Assembly Instructions... -
Page 18: Assembly Of The Shift Cable Housing
The underdrive cable end should be colored green or black. The overdrive cable end will be underdrive uncolored. Ensure the housing diameter is correct. Too big or too small diameters can have a negative effect on shift forces and performance. enviolo Assembly Instructions... - Page 19 [C] goes completely flat (enviolo Twist Display), or that the grip rotates fully in the counter-clockwise direction shown (enviolo Twist controller, viewed from the right side of the bicycle). 5. Pass the underdrive shift cable through the UD cable stop [D] and secure the UD cable stop at the distance shown [D] while pulling the cable firmly.
-
Page 20: Assembly Of The Shift Cables
9. Pull the overdrive shift cable firmly at the manual hubinterface until it stops, checking to make sure that the shift indicator [E] goes into a steep hill (enviolo Twist Display controllers), or that the grip rotates fully in the clockwise direction shown (enviolo Twist controllers, viewed from right side of bicycle). -
Page 21: Set The Shift Cable Length
• Cut the cable flush with the cable stop fixture and tuck the position (display icon should be flat). remaining cable length into the OD latch. enviolo Assembly Instructions... -
Page 22: Assembly Of The Rear Wheel
1. Place the rear wheel into the rear frame, making sure not to obstruct shift cables. 2. a [A] For the variants enviolo City / Trekking / Heavy Duty 135 mm: Slide one no-turn washer (A) each onto each axle end. The serrations of the no-turn washer must bear against the dropout of the frame. - Page 23 Assembly of the Rear Wheel 2. b [C] For enviolo Heavy Duty 148 mm variants: • Place the disc brake rotor on the hub. 148 mm variants require an extra adapter to be placed under the rotor and need to be tightened with the longer bolts supplied with the kit.
-
Page 24: Adjustment Of Cable Slack
3. Cable slack of more than 2.0mm may cause decreased shift performance and shift cable durability. 4. For rear wheel removal, additional cable slack may be desired to ease shift cable hardware removal, which can be obtained with the barrel adjusters (B). enviolo Assembly Instructions... - Page 25 Assembly Instructions enviolo Assembly Instructions...
-
Page 26: Assembly Of The Sprocket Magnet Ring
Assembly of the Sprocket Magnet Ring 1. [A] The enviolo AUTOMATiQ systems come with a sprocket magnet ring (A) that must be secured onto the assembled sprocket snap ring. The twelve magnets on the sprocket magnet ring provide pedal cadence for the AUTOMATiQ system. -
Page 27: Assembly Of The Hub Magnet Ring
AUTOMATiQ system and therefore do not allow for proper function. Please ensure you use our OSS2 variant, which has a yellow serial # sticker instead of a white sticker (old systems). enviolo Assembly Instructions... -
Page 28: Assembly Of The Automatiq Hub Interface
5. [A] Orientation should be forward, parallel to the chain stay with the internal gear hub. automatic main connector facing forward. 2. enviolo City and Trekking (44T) have one axle diameter and Heavy 6. [B] Move the AUTOMATiQ hub Interface alongt he dropout to Duty (40T) have a different one. - Page 29 Assembly of the AUTOMATiQ Hub Interface For the variants enviolo City, Trekking and Heavy Duty (135 mm): 1. Remove the anti-shift retainer, if installed. 2. [C] Suspend the AUTOMATiQ Hub Interface over the right hand axle, and align the axle flats with the installation angle.
-
Page 30: Assembly Of The Automatiq App
1. [A] Ensure you have the correct AUTOMATiQ hub interface for your internal gear hub. 2. enviolo City and Trekking (44T) have one axle diameter and Heavy Duty (40T) have a different one. 3. Search for "enviolo AUTOMATiQ" in the Apple Store or Google Play Store. -
Page 31: System Configuration - Oem
Should you not login, you will only have access to the end consumer AUTOMATiQ. As an OEM you first have to register on our backend at access level. In total there are four app hierachy levels (enviolo, OEM, enviolo.com to set up your bike specification. -
Page 32: System Configuration - Mandatory
Once the QR code is scanned all data gets automatically transferred to the hub interface and your bike is ready to go. Option A: Make use of our backend at AUTOMATiQ.enviolo.com and select the necessary system parameters. Afterwards save the settings and generate a QR code. -
Page 33: System Configuration - Registration
2. System data analysis in the diagnostics tab the shift system changes the ratios while riding. 3. System data collection in the logistics tab 4. Ride settings in the dashboard tab Both of these settings can be adjusted in the configuration tab. enviolo Assembly Instructions... -
Page 34: Assembly Of The Automatiq Controller
3. Position the controller such that the button can be easily reached with the thumb, while riding. 4. The enviolo CO controller can be mounted to either right or left side of the handlebar. Assembly of the CLiQ Plus Controller [B] 1. -
Page 35: Setup Of The Cliq Pure Controller
Once the LED flashes green only, the device is paired. Setup 1. The enviolo CliQ Pure controller [B] can be used to adjust the desired cadence. 2. The buttons are assigned by lower cadence (UP) (B), calibration (CENTER) (C) and higher cadence (DOWN) (D). -
Page 36: Setup Of The Cliq Plus Controller
LED lights continously in blue for 1 second the device is paired. Setup 1. The enviolo CliQ Plus [B] can be used to adjust the desired cadence. 2. The buttons are assigned by lower cadence (UP (C) or RIGHT (D)), power up (CENTER) (B) and higher cadence (DOWN (E) or LEFT (F)). -
Page 37: Setup Of The Cliq Pro Controller
Calibration 1. Turn system power on, Select no motor assist. 2. On the enviolo CliQ Pro controller press and hold mode and down buttons simultanously for 3 seconds until the rear hub begins shifting (5 - 7 seconds) and then release the buttons. While the calibration is active, the LED will flash blue. -
Page 38: Setup Of Integrated Systems
The eBike drive system usually integrated this functionality by simulating gears. Note: In case of the integration into the Bosch Intuvia displays a long press on the info button will get you directly to the cadence menu without having to click through all menu items. enviolo Assembly Instructions... -
Page 39: Integrated System Calibration
Integrated System Calibration 3. Calibration cont. [A] enviolo AUTOMATiQ calibration - Bosch Intuvia When • After enviolo AUTOMATiQ assembly; • After firmware update; • When system functions are not appropriate. How to - for Intuvia 1. Turn on the Bosch Intuvia system. Select no motor assist 2. - Page 40 Integrated System Calibration [C] enviolo AUTOMATiQ calibration - Bosch Kiox When • After enviolo AUTOMATiQ assembly; • After firmware update; • When system functions are not appropriate. How to - for Klox 1. Turn on the Bosch Kiox system. Select no motor assist.
-
Page 41: Troubleshooting
Troubleshooting enviolo Assembly Instructions... -
Page 42: Assembly Torque Specifications
Assembly Torque Specifications City, Trekking, Heavy Duty (135 mm solid axle) Heavy Duty (148 mm) Acorn nut (HW-ANUT-OE) 30 - 40 Nm Screw, button head, M5 x 0.8 x 16L, alloy 5.5 - 6.2 Nm (HW-BHS-M5X.8X16-OE) Brake adapter + Loctite® 277 or similar... -
Page 43: Replacement Of Controller Cables
6. Rotate the grip to position the next cable for installation and repeat step 4. and step 5. 7. Reinstall the bottom cover and screw. Torque to 0.2 - 0.3 Nm (2 - 3 in-lbs). enviolo Assembly Instructions... -
Page 44: Replacement Of The Freewheel
(E) if these components are being replaced. 7. [C] Install the serviced/new freewheel components. 8. Install the sprocket and hub interface. 9. Install the rear wheel. Set the enviolo hub in full overdrive with the controller or manual hub interface prior to removal. enviolo Assembly Instructions... -
Page 45: Replacement Of The Brake Configurations
55 - 65 Nm (41 - 48 ft-lbs). It is recommended to use a pneumatic/electrical 3. Install and torque left hand nut to 30 - 35 Nm (22 - 26 ft-lbs). torque wrench as the brake adapters are tightened with loctite. enviolo Assembly Instructions... -
Page 46: Disassembly Of The Rear Wheel For Manual Variants
(D) you have to carefully push aside the snap feature to remove the shift cable hardware. 3. a. [B] For the variants enviolo City, Trekking, Heavy Duty 135 mm: Loosen and/or remove the axle nuts (A), followed by the no turn washers. -
Page 47: Disassembly Of The Rear Wheel For Automatiq Variants
3. a. For the variants enviolo City, Trekking, Heavy Duty 135 mm: Loosen and/or remove the axle nuts (A), followed by the no turn washers. For rim and roller applications follow the manufacturer´s instructions. -
Page 48: Reset Cvp To Full Overdrive
2. If installed on the bicycle, shift the hub into overdrive "H" as far as possible and remove the rear wheel per chapter 4. 3. [A] For enviolo City, Trekking, Heavy Duty 135 mm Remove the right hand nut (A) that secures the manual hub interface, then remove the manual hub interface (B) by lifting carefully from underneath. - Page 49 8. The manual hub interface will be used to shift the hub into full overdrive in the following steps. 9. [D] Install the enviolo hub into a vice or fixture as shown, clamping on the left hand axle flats. If a vice is not available, installation in the bicycle frame is possible, tightening only the left hand no-turn washer and axle nut to allow rotation of the manual hub interface.
-
Page 50: Service Tools
To support your assembly and maintenance of our products we offer these simple service tools: BK-ADPT-TOOL HW-SNUT-TOOL Brake adapter / disc assembly Spline nut tool CE-HW-TOOL-SM-MLD CE-HW-TOOL-LG-CNC Cable hardware installation tool Cable hardware installation tool WL-SP/CA-TOOL Wheel lacing adapter enviolo Assembly Instructions... -
Page 51: Support & Service
Support & Service support.enviolo.com university.enviolo.com Intellectual Property Notice © 2020 enviolo. All rights reserved. enviolo Assembly Instructions... -
Page 52: Warranty Information
Warranty Information enviolo Assembly Instructions enviolo Assembly Instructions... -
Page 53: Warranty, Misuse And Exclusion Of Liability
Failure to use your enviolo shift solution as intended or to follow safety-relevant instructions can lead to an exclusion of liability for any material defects. Any misuse must therefore be avoided! Warranty will therefore not be covered if ... - Page 54 The following warranty is a voluntary two-year limited warranty • Damage to parts not manufactured by enviolo or its related entities offered by enviolo. It is offered to all purchasers of the enviolo city, (such as dropouts and chains). trekking and heavy duty (collectively, the “enviolo products”).
Need help?
Do you have a question about the City and is the answer not in the manual?
Questions and answers