
Related Manuals for E-MOOTIKA EMO000097

Summary of Contents for E-MOOTIKA EMO000097
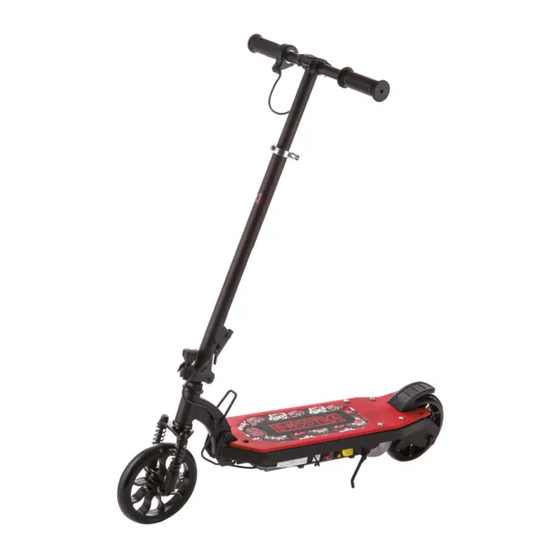
- Page 1 MANUALE DI ISTRUZIONI INSTRUCTIONS MANUAL MANUEL D’INSTRUCTION MONOPATTINO ELETTRICO ELECTRIC SCOOTER PATINETE ELÉCTRICO EMO000097-98-99-100...
-
Page 2: Avvertenze Di Sicurezza
MONOPATTINO ELETTRICO AVVERTENZE Leggere attentamente questo manuale e assicurarsi di comprendere le leggi e le regolamentazioni locali prima di usare il prodotto per la prima volta. Caricare il monopattino elettrico almeno 12 ore la prima volta e almeno 8 ore le volte successive. Non sovraccaricare, altrimenti potrebbe compromettersi la vita utile della batteria e del caricatore. -
Page 3: Prima Di Iniziare
MONOPATTINO ELETTRICO Non guidare il monopattino in condizioni di umidità o con ghiaccio e non immergere mai lo scooter in acqua, poiché i componenti elettrici e di guida potrebbero essere danneggiati dall’acqua o comportare pericoli. Il monopattino è stato progettato per essere utilizzato su superfici piane e asciutte, senza detriti, sabbia, rocce e ghiaia. Superfici bagnate, sci- volose, accidentate, non piane o ruvide potrebbero far perdere attrito e contribuire a possibili incidenti. -
Page 4: Utensili Richiesti
MONOPATTINO ELETTRICO UTENSILI RICHIESTI 1 chiave inglese da 8mm/10mm (inclusa) 1 chiave inglese da 12mm (non inclusa) 1 chiave inglese da 13mm (non inclusa) 1 chiave inglese da 17mm (non inclusa) 1 brugola esagonale da 2,5mm e 2 da 5mm (incluse) 1 cacciavite a stella (non incluso) ATTENZIONE: UTILIZZARE SOLO PARTI DI RICAMBIO IN ZINCO AUTENTICO. -
Page 5: Prima Dell'utilizzo
MONOPATTINO ELETTRICO Attrezzi richiesti: una brugola esagonale da 5mm e una chiave inglese da 8/10mm. Ruotare “a” in posizione verticale e mettere “b” nell’apposita fessura. Ruotare in senso orario e avvitare “b”. Allineare il manubrio orizzontalmente e verticalmente sull’attacco verticale del manubrio e posizionare il fissaggio del manubrio alline- andone i fori e inserendo i bulloni e i dadi. -
Page 6: Riparazione E Manutenzione
MONOPATTINO ELETTRICO DISPOSITIVI DI PROTEZIONE INDIVIDUALE Indossare sempre un casco di protezione, le ginocchiere, le gomitiere e le scarpe da ginnastica. Non utilizzare mai il monopattino a piedi nudi o indossando dei sandali. Assicurarsi che le scarpe siano ben allacciate e che i lacci non ostacolino le ruote e le varie articolazioni del prodotto. BATTERIA Spegnere sempre il monopattino quando non è... - Page 7 MONOPATTINO ELETTRICO Attenzione: Se non si è grado di eseguire le operazioni sopra descritte, si prega di contattare il servizio clienti o un meccanico qualificato per biciclette o motocicli. La catena deve sempre essere tesa ma non troppo, altrimenti il motore o altre parti del monopattino potrebbero danneggiarsi. RIPARAZIONE E MANUTENZIONE Sostituzione della ruota anteriore Attrezzi richiesti: una chiave esagonale da 8 mm e una chiave inglese da 17mm e una brugola esagonale da 5mm.
-
Page 8: Risoluzione Dei Problemi
MONOPATTINO ELETTRICO RISOLUZIONE DEI PROBLEMI Problema Possibile causa Soluzione Il monopattino non fun- La batteria non è carica. Caricare la batteria completamente: per almeno 12 ore la prima ziona. I cavi o le parti di connessione sono allentati ricarica e almeno 8 ore le successive. o scollegati. - Page 9 MONOPATTINO ELETTRICO ESPLOSO Manopola dell’acceleratore Blocco di fissaggio del manubrio Barra orizzontale del manubrio Impugnatura sinistra Parte superiore del tubo dello sterzo Regolatore dell’altezza dello sterzo Parte inferiore del tubo dello sterzo Bullone a testa piatta Canotto Forcella anteriore Ruota anteriore Piano Batteria Controller...
-
Page 10: Acceptable Riding Practices And Conditions
ELECTRIC SCOOTER IMPORTANT Be sure to study this manual and learn the local laws and regulations before using it for the first time. Charge this scooter at least 12 hours for the first time and at least 8 hours for subsequent charges. Do not overcharge it, otherwise the life of the battery and the charger may be compromised. -
Page 11: Using The Charger
ELECTRIC SCOOTER • Elbow pads and knee pads. • Long sleeved shirt, long trousers and gloves. • Lace up shoes with rubber soles, never ride barefoot or with sandals, and ensure that shoelaces are tied and kept out of the way of wheels and drive system. -
Page 12: Required Tools
ELECTRIC SCOOTER REQUIRED TOOLS 1x8mm/10mm Spanner (included) 1x12mm Spanner (not included) 1x13mm Spanner (not included) 1x17mm Spanner (not included) 1x2,5mm 2x5mm Hexagon Wrench (included) 1x Philips Head Screwdriver (not included) WARNING: ONLY USE GENUIN ZINC REPLACEMENT PARTS. The scooter has been built to certain Zinc design specifications. The original equipment supplied at the time of sale was selected on the basis of its compatibility with the frame, fork and all other parts. -
Page 13: Before You Ride
ELECTRIC SCOOTER Align the handlebar vertically and horizontally onto the handlebar stem’s clamp, align the handlebar top clamp and insert the bolts and nuts. Adjust the handlebar and tighten the bolts and nuts evenly and securely with a 5mm hex wrench and a 10 mm spanner. The throttle should be on your right hand as you stand on the scooter’s deck. - Page 14 ELECTRIC SCOOTER Failure to follow these instructions may damage your product and void the warranty. Warning: Be sure that you are in a safe and open area before starting your scooter. Never rotate the thumb trigger and start the scooter until you have taken good hold of the steering handle and balanced yourself on the scooter.
-
Page 15: Repair And Maintenance
ELECTRIC SCOOTER REPAIR AND MAINTENANCE Front Wheel Replacement Tools required: one 8 mm hex wrench and one 17mm spanner, one 5mm hex wrench. Using a 8 mm hex wrench, and a 17mm spanner, loosen and remove the front axle by turning the wrenches counterclockwise. Reinstall the new wheel ensuring to note the order and location of all components. -
Page 16: Troubleshooting
ELECTRIC SCOOTER TROUBLESHOOTING Problem Possible Cause Solution Scooter does not run. Battery is not charged. Fully charge the battery. Charge the battery for at least 12 hours Wires or connectors are loose or unplugged. for the first time and at least 8 hours for a subsequent charging. Charger is not working Dismantle the scooter and check the power connection and controller connection for any loosening. -
Page 17: Exploded View
ELECTRIC SCOOTER EXPLODED VIEW Acceleration throttle Handlebar clamp Handlebar Left grip Upper part of stem tube Lock spanner Under part of stem tube Locked cap nuts Headset Front fork Front wheel Deck Battery Controller Rear brake Brake cut off switch Spring plate Chain cover Chain... - Page 18 PATINETE ELÉCTRICO IMPORTANT Lisez attentivement ce manuel et assurez-vous de comprendre les lois et les règlementations locales avant d’utiliser le produit pour la première fois. Rechargez la trottinette électrique au moins 12 heures la première fois et au moins 8 heures les fois suivantes. Ne surchargez pas la batte- rie car cela pourrait compromettre la vie utile de la batterie et du chargeur.
-
Page 19: Avant De Commencer
PATINETE ELÉCTRICO TENUE VESTIMENTAIRE APPROPRIÉE POUR LA CONDUITE. Portez toujours des équipements de protection individuelle, comme : • Un casque de sécurité conforme aux normes. Le casque pourrait être requis légalement, en fonction des lois et des règlementations locales. • Coudières et genouillères. -
Page 20: Outils Nécessaires
PATINETE ELÉCTRICO OUTILS NÉCESSAIRES 1 clé anglaise de 8mm/10mm (incluse) 1 clé anglaise de 12mm (non incluse) 1 clé anglaise de 13mm (non incluse) 1 clé anglaise de 17mm (non incluse) 1 clé Allen de 2,5mm et 2 de 5mm (incluses) 1 tournevis cruciforme (non inclus) ATTENTION : UTILISEZ UNIQUEMENT DES PIÈCES DE RECHANGE EN ZINC AUTHENTIQUE. -
Page 21: Avant L'utilisation
PATINETE ELÉCTRICO Outils nécessaires : une clé Allen de 5mm et une clé anglaise de 8/10mm. Tournez « a » en position verticale et mettez « b » dans la fissure dédiée. Tournez dans le sens des aiguilles d’une montre et vissez « b ». -
Page 22: Réparation Et Entretien
PATINETE ELÉCTRICO trop usées ou datées. ÉQUIPEMENTS DE PROTECTION INDIVIDUELLE Portez toujours un casque de protection, des genouillères, des coudières et des chaussures de sport. N’utilisez jamais la trottinette pieds nus ou avec des sandales. Assurez-vous que les chaussures soient bien attachées et que les lacets n’atteignent pas les roues et les différentes articulations du produit. - Page 23 PATINETE ELÉCTRICO Remettez en place les revêtements en utilisant le tournevis. Attention : Si vous n’êtes pas en mesure de réaliser les opérations décrites, veuillez contacter le service client ou un mécanicien qualifié pour vélos ou motos. La chaîne doit toujours être tendue mais pas trop, autrement le moteur ou autres parties de la trottinette pourraient s’endommager. RÉPARATION ET ENTRETIEN Remplacement de la roue avant Outils nécessaires : a clè...
-
Page 24: Résolution Des Problèmes
PATINETE ELÉCTRICO RÉSOLUTION DES PROBLÈMES Problème Cause possible Solution La trottinette ne fonctionne La batterie n’est pas rechargée. Rechargez la batterie complètement : au moins 12 heures la pas. Les câbles ou les parties de connexion sont première fois et au moins 8 heures les fois suivantes. desserrées ou débranchées. - Page 25 PATINETE ELÉCTRICO VUE EN ÉCLATÉ Poignée de l’accélérateur Bloc de fixation du guidon Barre horizontale du guidon Poignée de gauche Partie supérieure du tube du guidon Régulateur de hauteur du guidon Partie inférieure du tube du guidon Boulon à tête plate Manchon Fourche avant Roue avant...
- Page 26 Importato da/imported by/importé de: KASANOVA S.p.A. - Viale Monterosa 91 - 20862 Arcore (MB) MADE IN P.R.C...
Need help?
Do you have a question about the EMO000097 and is the answer not in the manual?
Questions and answers