Table of Contents
Advertisement
Quick Links
Advertisement
Table of Contents

Related Manuals for EV Hub EVBox Elvi

Summary of Contents for EV Hub EVBox Elvi
- Page 1 Elvi User Manual July 2021...
-
Page 2: Table Of Contents
Contents EVBox Elvi - Installation Details ..................... 3 Introduction ............................ 4 Get in touch..........................4 Safety precautions .......................... 4 Warning: Risk of electric shock ....................4 Components & Features ........................ 5 Product Classification ......................5 Elvi - Socket ..........................6 Elvi –... -
Page 3: Evbox Elvi - Installation Details
1 EVBox Elvi - Installation Details To be completed by the Installer. Keep this Manual safe, for your records. Model Number: Lead or Socket version: Max kW Rating: Registration #: Security Code: Installer Company: Installer Name: Installer Contact Details: Commission Date:... -
Page 4: Introduction
2 Introduction Thank you for choosing the EVBox Elvi. This User manual tells you how to use and fault find any potential issues with the EVBox Elvi. Carefully read the safety information before you start. These instructions are valid for several models of the charging station. It is possible that some features and options described may not apply to your charging station. -
Page 5: Components & Features
4 Components & Features 4.1 Product Classification • EV Supply Equipment connected to AC supply network • Permanently connected • AC EV Supply Equipment • Outdoor use • Equipment for locations with non-restricted access • Stationary equipment, mounted on walls, poles or equivalent means: surface mounted •... -
Page 6: Elvi - Socket
4.2 Elvi - Socket 1. Operating system EVBox Elvi is connected via a built-in dual band WiFi connection or via an optional UMTS modem. Start and stop your charging session with your charge card, key fob or remotely via the app. -
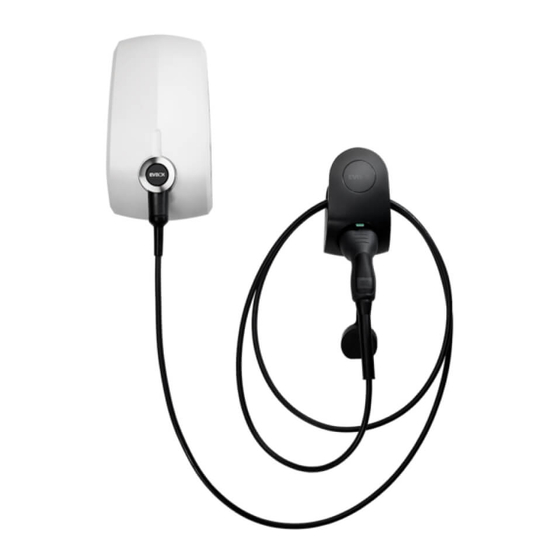
Page 7: Elvi - Tethered Lead
4.3 Elvi – Tethered Lead Page 7 of 22 www.ev-hub.com.au... - Page 8 Page 8 of 22 www.ev-hub.com.au...
-
Page 9: Activate Evbox Elvi
Once you have set up your Account in the App, Smart Charge will either connect the Smart RFID card or Key Fob that was sent with the EVBox Elvi Charger or send you a new one. Please email the support@smart-charge.com.au with your requirements. -
Page 10: Smart Charging
6 Smart Charging EV chargers draw a relatively large electrical load, between 2.2 kW and 22 kW, dependent on a single or three phase connections. These additional loads may exceed the design capacities of the electrical supply circuits within a home or business, and on the distribution networks. A household main supply is typically - single phase 60 Amps. -
Page 11: Charge With Evbox Elvi
The EVBox Elvi LED ring turns green when it stops charging. 3. Unplug your charging cable from your vehicle and EVBox Elvi and place it back into your car. Alternatively, you can unplug your charging cable from your vehicle, if a tethered lead, and hang it back up safe and securely. -
Page 12: Network Options And Accessibility
8 Network Options and Accessibility Your EVBox Elvi Charger can be set up on the Smart Charge Electric Vehicle Charging network, in the following ways: Public, Semi-Public and Private chargers: Public: Charging stations that can be viewed and used by any EV drivers on the Smart Charge network. -
Page 13: Accepting One-Off Payments, As A Private User
8.1 Accepting One-off Payments, as a Private User To be able to receive one-off payments from ‘Guests’, Smart Charge are able to set up your EVBox Elvi with a QR Code – that can be fixed to the front of the Charger (similar to this image). -
Page 14: Maintenance Instructions
4. Remove the two unlock tools from the wall dock. 9.2.2 Replace the charging cable See the corresponding illustrations in the EVBox Elvi Installation Manual. Note: When working on the station, place the station on a soft surface to protect it from damage. Be careful not to damage the locking tabs on the station. -
Page 15: Remove Station
Be aware that the charging station is still fixed on the connector (socket) of the wall dock, and it requires some force to pull it off. Take out the keys from EVBox Elvi wall dock. Page 15 of 22 www.ev-hub.com.au... -
Page 16: Troubleshooting
Contact your service technician in constantly. case of doubt and for solving the local grounding situation. • Check that the charging cable plug is inserted into EVBox Elvi properly • Vehicle is on a timer (check by user). • Vehicle is fully •... - Page 17 • If your EVBox Elvi is equipped with the optional UMTS module, check that EVBox Elvi is in contact with the local cellular network and that it has proper reception. (check by charging point operator) Page 17 of 22...
-
Page 18: Evbox Elvi - Specification
12 EVBox Elvi – Specification Charging capacity Upgradable 3.7–22 kW Charge mode Mode 3 (IEC 61851-1) Number of connectors Connector options Fixed cable or Type 2 socket Fixed cable type Type 2 (IEC 62196-2) plug Fixed cable length 4 m or 8 m for Elvi models without dynamic load... -
Page 19: Warranty
13 Warranty 13.1 EVBox warrants to Customer on delivery and for a period of three (3) years thereafter that the Products are free from material defects in material and workmanship and conform in all material aspects with the specifications as explicitly listed in the Documentation, except for charging cables, their connectors and software, for which the warranty is limited to three (3) months from delivery. -
Page 20: Disclaimer
The present document is drawn up by way of information only and does not constitute an offer binding upon EV Hub. EV Hub has compiled the contents of this document to the best of its knowledge. No express or implied warranty is given for the completeness, accuracy, reliability or fitness for particular purpose of its content and the products and services presented therein. -
Page 21: Smart Charge - App Operation
15 Smart Charge - App Operation Download the App www.smart-charge.com.au #1.1 - Find and Install the App #1.2 - Register your Account #1.3 - Choose Pricing Plan Find the App on your App Once downloaded, click on Choose a Pricing Plan - either Store by either searching, ‘Open’... - Page 22 Page 2 – Charging your Vehicle @ Public location #2.2 - The Menu #2.3 - Wallet #2.4 - Locate your Charger Log in. Your Menu may show a To locate your Charger, look Click on and open the 'Menu'. 'Wallet’ if you have deposited for the Green flag on the Map.
Need help?
Do you have a question about the EVBox Elvi and is the answer not in the manual?
Questions and answers