Advertisement
Quick Links
Advertisement

Summary of Contents for Active Arm Supports LuxArm
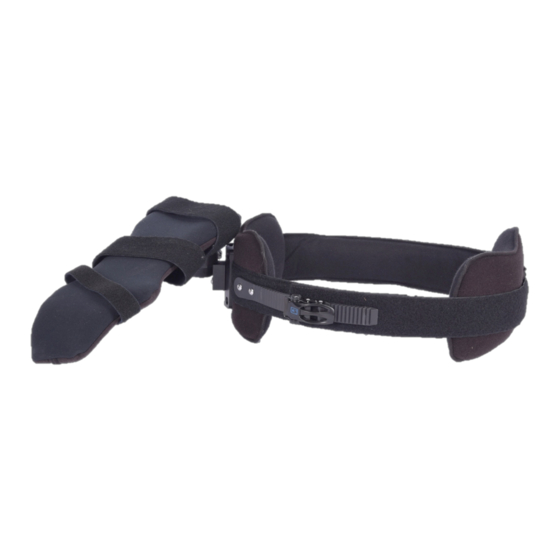
- Page 1 Shoulder Subluxation Brace and Arm Support System Fitting Instructions...
- Page 2 Shoulder Subluxation Brace and Arm Support System IMPORTANT Fitting Instructions: We strongly recommend the fitting be completed with an occupational therapist. It is imperative to your comfort and the effectiveness of the system that it is properly customized. Please read and follow the fitting instructions thoroughly before using the LuxArm System. Please reference our website at https://activearmsupports.com for additional instructions and consumer tips. The LuxArm has been numbered to help you follow the fitting steps. It should take about 20 minutes initially, but small daily adjustments can be made quickly by anyone to accommodate comfort and positioning needs. A second person is necessary to complete the initial fitting process. We recommend the client sits edge of bed to allow for multiple stands and sitting rest breaks as needed during the process & so the assistant can easily access the whole system to make adjustments. Feel free to contact us at info@ActiveArmSupports.com if you have questions regarding your LuxArm.
- Page 3 Step 1: ___________________________________________________________________ Separate the belt from the forearm piece. To do so, find the connection point where the belt and the arm piece meet. Gently roll the clear rubberized ball downward to unlock and slide the forearm pin/arm piece out of the track. Locked= Ball Up Unlocked= Ball Down Separated Parts Step 2: ___________________________________________________________________ Without the forearm piece attached, size the belt for comfort. Before putting the belt around the waist to size, make sure the ratchet buckle on the front is set near the middle notch. This will allow the greatest flexibility of tightening and loosening the belt during the day as needed in the future. The ratchet buckle works the same as a ski boot buckle for tightening and loosening. Now unzip the cover at the back of the belt and pull apart the Velcro stays. Keep the front ratchet buckle engaged and place the belt around your high waist, entering through the open back. Center ratchet buckle on front Unzip cover at back of belt...
- Page 4 Keep front buckle closed and use Velcro stays in back for initial fitting around high waist. The colored dots are there to reference when creating a SNUG fit. Make sure the connection bracket and pad are sitting directly on top of the hip of your weak side. Close the Velcro stays back together around the waist. BE SURE IT IS SNUG TO GET THE BEST RESULTS! IF the opposite hip pad is not centered on top of the other hip, it may be pulled off and repositioned on the Velcro belt. The dots are there as reference points if you need to adjust the Velcro stays a second time to get a more secure fit. Back view of a snug fit where pad sits on top of the hip on the affected side and just slightly forward (Right arm affected in this picture) Side view of correct alignment (Right arm affected in this picture) Move hip pad on unaffected side as needed to achieve proper alignment and comfort on top of hips (Left arm affected in this picture) ...
- Page 5 Zip the cover back up to conceal and secure the Velcro stays. Unless you have a significant weight change or change in your body shape, this step will never need to be done again. The front ratchet is now ready for putting your LuxArm System on/off and ready for tightening/loosening as desired on a daily basis. with zipper Back cover Front buckle for daily adjustments and removal Step 3: ___________________________________________________________________ Belt sung around waist & hip pads squeeze top of hip bones Once the belt has been sized at the waist region, you are ready to customize its shape to reduce the chance of the belt rotating while wearing and to maximize the belt’s comfort. The stays in the belt are malleable so you can form the belt to fit your shape. Using a flat hand at the front and back of the belt, simultaneously press both hands together to snug the fit. An oval belt shape tends to work best. Now squeeze the hips pads and belt to “grab” your sides. The LuxArm is more secure and will support the weight of your arm consistently if the belt is snugly molded. It is important that the belt sits around your WAIST and hugs the top of your HIP bones. If the belt is too low you will not get the support to correct the subluxation.
- Page 6 If the hippads are not grabbing your sides, the belt may rotate during wear. Step 4: ___________________________________________________________________ Once the belt has been sized and contoured to your body shape, we suggest you practice putting on and taking off just the belt component to get comfortable with the ratchet system. This step can be learned one-handed if you are sitting on a surface without arm rests. It is also suggested you practice tightening and loosening the ratchet after it is engaged. Many people find they are most comfortable loosening the belt a couple notches while seated, but need to tighten the belt back up before transferring, standing or ambulating in order to provide the most consistent arm support. To tighten ratchet = Lift long end To loosen or remove = Lift short end Step 5: ___________________________________________________________________ You are now ready to customize the forearm/hand component. There are an endless number of positions the fingers and wrist can be molded into to fit the needs of your affected arm. The position you...
- Page 7 choose should be based on pain management needs, therapeutic stretch and proper alignment. An occupational therapist is recommended to help you make these positioning decisions. Because of the durability of the device, you can re-adjust your forearm, wrist and finger positions any time during your recovery to accommodate your changing arm. We recommend making all custom bends by hand and/or gently using the edge of a table to assist you. Please note that when the forearm piece is oriented correctly, there will be a black circular pin on the underside near the elbow. We recommend a snug and secure fit of the soft elastic straps, but not tight as you don’t want to create skin irritations. Reference the strapping pictures to see the suggested location for each of the 3 straps across the arm. We have avoided crossing any joints with the straps and purposely left the thumb free as this is often a very sensitive part of the hand and found it typically rests comfortably along the side. See examples of the most common wrist, finger and forearm positions below, but use the position that meets your needs.
- Page 8 Wrist extended, fingers extended Wrist and Fingers 1 Wrist extended, fingers flexed Wrist and Fingers 2 Wrist extended, fingers flexed, forearm slightly supinated Wrist and Fingers 3 Wrist neutral, fingers flexed Wrist and Fingers 4 A- Distal to the elbow crease B-Proximal to the ulna head C- Across the back of the hand on a diagonal; do NOT include the thumb or cross joints...
- Page 9 Step 6: ___________________________________________________________________ Next, re-connect the forearm component to the belt. Align the pin found on the underside of the forearm piece (near the elbow) to the “U” shaped slot on the connector piece of the belt. After sliding the pin all the way into the slot, gently roll the rubberized ball up to ‘lock’ it into place. Slide circular pin under elbow into “U” shaped connection on belt to connect Roll rubberized ball up to lock 2 pieces together...
- Page 10 Step 7: ___________________________________________________________________ Finish the fitting process by making important ergonomic adjustments for the shoulder joint. There are 2 adjustments that need to be made with the included Allen wrench to achieve the most optimal fit of your LuxArm System. The FIRST is on the underside of the forearm piece, which can only be accessed when the 2 pieces are separated. Before you disengage the forearm piece, look at the position of the elbow in relation to the hip from a side view while the entire LuxArm System is on. The elbow should be positioned slightly FORWARD or IN FRONT of the hip. If it is not, use the Allen Wrench to loosen the pin and slide it along the track until the elbow rests slightly anterior to the hip, then retighten. This is important, as it will help ensure that the humeral head is aligned in the glenohumeral socket properly when you lift the whole arm to correct the shoulder subluxation. Use Allen wrench under the forearm piece to move the elbow slightly forward of hip for proper alignment of the humeral head in the glenohumeral joint.
- Page 11 Step 8: ___________________________________________________________________ The SECOND adjustment is made on the belt where the connection joint attaches to the vertical sliding track on the affected side. The forearm piece will need to be reconnected to the belt and the arm straps fastened to complete this last step. An occupational therapist can help you identify your shoulder subluxation correction needs for this step. IF you can see or palpate the shoulder subluxation when the entire LuxArm System is on, then loosen this screw and slide the block UP toward the ceiling to lessen the subluxation. Look at the symmetry of your shoulders from a front view. IF you notice the affected shoulder is positioned higher than the other shoulder, then loosen this screw and slide the block DOWN the track until the shoulders are even. IF you cannot palpate a subluxation AND the shoulders are of equal height, then there is no need to make any more adjustments; your shoulder is correctly aligned in the joint. To correct any size shoulder subluxation, use Allen wrench on vertical track of belt piece to move the whole forearm piece up/down. Look for symmetrical alignment of shoulders and palpate for the subluxation to determine if the shoulder is being effectively supported.
- Page 12 Congratulations, your LuxArm System is ready to support you throughout your rehabilitation needs! If you have any questions, concerns or feedback on please feel free to contact us at info@ActiveArmSupports.com...
Need help?
Do you have a question about the LuxArm and is the answer not in the manual?
Questions and answers