Table of Contents
Advertisement
Quick Links
Advertisement
Table of Contents

Summary of Contents for Lumibird Quantel ABSOLU
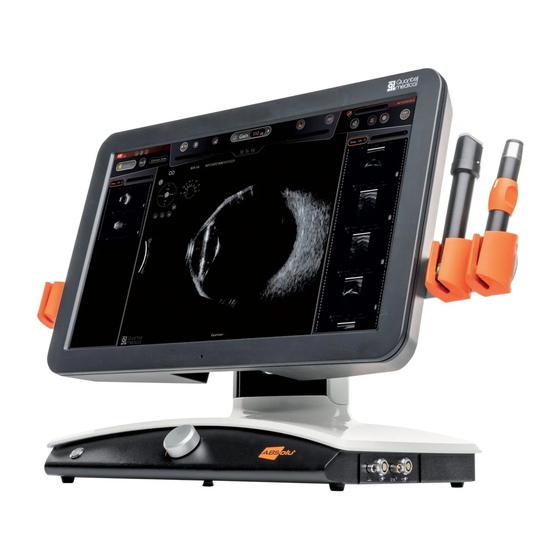
- Page 1 Ultrasound Platform SERVICE MANUAL A/S/B Scan & UBM FEBRUARY 2020 11, rue du bois joli - CS 40015 63808 Cournon d’Auvergne Cedex FRANCE Tel.: +33 (0) 473 745 745 Fax: +33 (0) 473 745 700 E-mail: contact@quantel-medical.fr Web site: www.quantel-medical.com...
- Page 3 This QUANTEL MEDICAL equipment, including the associated software and documentation are proprietary products of QUANTEL MEDICAL under international copyright law and all rights are reserved. This manual may only be reproduced in whole or in part with written permission of QUANTEL MEDICAL. This manual is furnished for informational use only and QUANTEL MEDICAL reserves the right to modify the equipment characteristics and manual without previous notice.
-
Page 5: Table Of Contents
CONTENTS REV 24/02/2020 INTRODUCTION ............................1 USER MANUAL TERMS AND SAFETY SYMBOLS ................1 WARNINGS & CAUTIONS ........................1 3.1. Servicing the unit warning & cautions ................1 3.2. Using the unit: warnings and cautions ................2 3.3. Probes: warnings and cautions ..................3 3.4. - Page 7 10.3.3. Calibration procedure ..................28 10.4. Check the image of the rings (only B20-5A) ..............30 10.5. Solving noise problems (with B and Linear probes in acquisition mode) .... 32 10.6. Probes care ........................... 33 11. DATABASE MANAGEMENT ......................... 34 11.1.
-
Page 8: Introduction
Service manual INTRODUCTION This service manual gives ABSOLU technical information such as: The technical specifications The accessories and spare parts Disassembling the unit and connectors pin description Probes management and calibration Database management Servicing the unit USER MANUAL TERMS AND SAFETY SYMBOLS WARNING Potential hazards which, if not avoided, could result in serious injury or death... -
Page 9: Using The Unit: Warnings And Cautions
Service manual 3.2. Using the unit: warnings and cautions Tissue exposure to ultrasound energy: the ABSOLU unit is designed for use in ophthalmology only. While QUANTEL MEDICAL is not aware of any reports of adverse effects from using ophthalmologic ultrasound unit, even at FDA pre-enactment levels, no other use is intended or implied. -
Page 10: Probes: Warnings And Cautions
Service manual CAUTIONS Considering the current concern for possible unknown hazards, and despite the extremely low output intensities used in ultrasound biometry, QUANTEL MEDICAL recommends that patient exposure time during measurement be minimized. To preserve the finish of the case, avoid the use of abrasive cleaners. If possible, clean spots before they dry. -
Page 11: Precautions To Take Concerning Wastes And Elimination Of Device And Accessories
Service manual 3.4. Precautions to take concerning wastes and elimination of device and accessories Product category: This product complies with the WEEE Directive (2012/19/UE) marking requirements. The ABSOLU is an electrical / electronic product and must not be discarded with domestic household waste Do not dispose with domestic household wastes! With reference to the equipment types in the WEEE Directive annex I, this product is classed... -
Page 12: Absolu Technical Specifications
Service manual ABSOLU TECHNICAL SPECIFICATIONS 4.1. Classification The system is intended for continuous operation and has the following classification: Electric security class EN 60 601-1 Standard Protective class Type B (protection against electrical shocks) Protection degree IP20 (protection from solid substances > 12,5mm) 4.2. -
Page 13: Dimensions
Service manual 4.4. Dimensions Width Min = 54,3 cm (21,4 in) (Without probe holders) Width Max = 75,0 cm (29,5 in) (With probe holders) Depth: 28,5 cm (11,2 in) Height: 44,5 cm (17,5 in) Weight: 10,6 kg (23,37 lbs) (without probes) 4.5. -
Page 14: Ultrasound System Probes Specifications
Service manual ULTRASOUND SYSTEM PROBES SPECIFICATIONS 5.1. Standardized A probe Probe Reference STD-A Frequency 8 MHz Focal Length Non focused Emission running mode Pulsed Emission Repetition 67 Hz Rate Axial resolution 0.2 mm (at - 6dB) 5.2. Biometry probe TP-01-b (Tono-Probe) Probe Reference or TP-02-las (Probeam) Frequency... -
Page 15: 20 Mhz Annular B-Scan Probe (Option)
Service manual 5.4. 20 MHZ Annular B-SCAN probe (option) Probe Reference B 20MHz-5A Sector angle 50° Frequency 20 MHz Emission-running mode Pulsed Emission Repetition Rate 21600 Hz Focal length 22mm Active diameter Axial resolution 78µm Lateral resolution 190µm 5.5. 50 MHZ Linear probe Probe Reference Lin50 Scanning amplitude... -
Page 16: Block Diagram
Service manual BLOCK DIAGRAM Superior part Inferior part Service Manual – 9 / 63 XE_ABS_MT_AN_200224... -
Page 17: Main Unit And Accessories
Service manual MAIN UNIT AND ACCESSORIES 7.1. Main units, probes and options CODE ITEM MAIN UNITS ABSolu B Mode including: PCBX0037A1B 15Mhz B Probe, 2 Probe Holders, Footswitch, Protective Cover, Mouse Pad, Clinical Echography of the Eye and Orbit Monograph, User Manual, Quick Start, Power Cord ABSolu A/B Mode including: PCBX0037A1AB 15Mhz B Probe, Biometry... -
Page 18: Accessories And Consumables
Service manual PROBES PCSX0005 15 MHz B Probe including: Probe Holder, Finger Grip Sleeve and Installation Software on USB key 50 MHz Linear Probe including: 1 Pack of 10 Filmed Windows + 1 Cap, Calibration Tool, PCSX0007 Distilled Water (pack of 5 unidoses), 2 ClearScan, Probe Holder, and Installation Software on USB key PCSX0009 Biometry Option including: Biometry Probe, Test Bloc and Installation Software on USB Key ProBeam™... -
Page 19: Footswitch
Service manual 7.4. Footswitch Single Footswitch functions in B mode: Acquisition state Unfrozen image (during acquisition) Frozen image Action on Short pressure Long pressure Short pressure Long pressure (>1s) footswitch (<1s) (>1s) (<1s) Unfreeze the Allows to: Freeze the image or acquisition Save image Single Footswitch... -
Page 20: Disassembling The Unit To Replace Defective Spare Parts
Service manual DISASSEMBLING THE UNIT TO REPLACE DEFECTIVE SPARE PARTS 8.1. Removing the back cover Before any intervention on the ABSOLU device: Turn off the device. The main switch has to be toggled to the “0” position. Unplug the mains cord located at the back of the unit and remove all connections. To remove the main cover: 1/ Unscrew the probe holders and remove them. -
Page 21: Replace The A-15-50 Erm Board With A S-15-50 Erm Board
Service manual 3/ On the bottom left, you will find the ABSOLU A- 15-50 MHz ERM board or the ABSOLU S-15-50 MHz ERM board. A-15-50MHz or S-15-50 MHz Board 8.2.1. Replace the A-15-50 ERM board with a S-15-50 ERM board 1/ Unscrew the bottom left cover under the device. -
Page 22: Remove The Screen From The Base Of The Device
Service manual 8.3. Remove the screen from the base of the device 1/ Remove all the back and bottom cover of the unit. 2/ Unplug all the cables that connect the screen to the base of the device. It concerns the following cables: CN24, CN25, CN26, power supply cable, ground cable and orange/green switch cable. -
Page 23: Open The Screen
Service manual 8.4. Open the screen 1/ Unscrew the 10 screws and remove the back cover. 2/ Remove the metal frame and unscrew the loudspeaker to have access to the hard drive and the boards. Service Manual – 16 / 63 XE_ABS_MT_AN_200224... - Page 24 Service manual Description of the internal elements of the screen: Cables of the orange/green switch Service Manual – 17 / 63 XE_ABS_MT_AN_200224...
- Page 25 Service manual 8.5. Remove the power supply 1/ Unscrew all 24 screws located at the bottom of the unit and remove all the covers. The power supply is located under the frame. 2/ Unscrew all 8 screws that maintain the white cover (in each angle and border length) and lift it.
-
Page 26: Absolu Device Display - Adjust Magnifier Tool
Service manual 8.6. Fuse replacement WARNINGS & CAUTIONS Disconnect the power supply before cleaning the unit case. Only use a damp cloth for cleaning the unit. Do not use any solvent or alcohol. Disconnect the power cord before any intervention on the unit. Fuse replacement: Fuse specifications: ... -
Page 27: Probes Management And Calibration
Service manual 10. PROBES MANAGEMENT AND CALIBRATION 10.1. Standardized (A-Std) / regular biometry (A) probe WARNING Anytime a probe is replaced or changed, it is necessary to check / adjust the calibration. 10.1.1. Adding or removing a standardized / regular biometry probe & calibration Each probe has specific parameters. -
Page 28: Tissue Sensitivity Determination For A-Std Type Of Probe (Only When S Mode Is Activated)
Service manual WARNING: - The serial numbers of the listed probes should correspond (and only correspond) to the serial numbers of the probes actually connected or used on the unit! - Two probes of the same type cannot be displayed in the list. The probe not currently in use on the unit has to be removed from the list. -
Page 29: Measurement Test Regular Biometry Probe Calibration
Service manual AUTO MODE: Place a drop of water on the surface of the tissue model and position the probe vertically in contact, on top of the tissue model. Follow the indications on the screen. After 10 measurements, the automatic acquisition is stopped. The measurements average is calculated and displayed at the bottom of the result table. - Page 30 Service manual ABSOLU : Put a drop of water on the Test-Block and position the probe on the test block to be as much perpendicular and well centered as possible. A tracking starts: the purpose is to record the measurement with the highest posterior face echo.
- Page 31 Service manual By using QM.Absolu.Presentation.Main, this screen appears: Two values are displayed: “Best =” is the measurement corresponding to the best image. “Current =” is the measurement corresponding to the current position of the probe. For a good calibration, the probe should measure a thickness situated in between 10.00 and 10.11mm.
-
Page 32: Measurement Test Regular Biometry Probe Calibration
Service manual 10.1.5. Measurement test regular biometry probe calibration Follow the procedure below to set the zero value, also refer to the document entitled “A-Probe calibration” (XE_ABSPBIOPBEAM_NI_ANFR): SETTING UP THE ZERO VALUE Start the ABSOLU software using the QM.Absolu.Presentation.Main.Setup shortcut located under: C:\Quantel\Absolu Select the general setup icon (displayed on the top left of the screen) then “6-Probe... -
Page 33: Adding / Suppressing Other Probes (B15, B20-5A And Lin50Mhz)
Service manual 10.2. Adding / suppressing other probes (B15, B20-5A and LIN50MHz) Each probe has specific parameters. The list of already installed probes parameters is displayed in the probe setup screen as shown below: This list should correspond to the serial numbers of the probes currently in use on the ABSOLU unit. -
Page 34: Linear Probe Calibration Check
Service manual 10.3. Linear probe calibration check WARNING To use the probe for sizing: the probe calibration should systematically be checked. 10.3.1. Calibration tool Each probe is delivered with a calibration tool that has been checked against a master tool. DESCRIPTION LIN 50 The probe type is “engraved”... -
Page 35: Calibration Procedure
Service manual C. LIN 50 CAUTION Place the removable window on the probe. Fill up the calibration tool with demineralized water. Position the probe on the calibration tool. The probe is now ready to be checked: perform the checking procedure as described in the following section. - Page 36 Service manual Press the footswitch to freeze the image: 6. Place calipers as follows: C1: Measure of the distance between the calibration tool pins. Check the C1 measurement result (measure of the distance between the calibration tool pins). This result should correspond to the D value (with its tolerance) written on the label slicked on the calibration tool border.
-
Page 37: Check The Image Of The Rings (Only B20-5A)
Service manual 10.4. Check the image of the rings (only B20-5A) Delete the B20-5A probe parameters installed on the ABSolu Software: right click on the line and select “delete”: Install the “B20_Serv.uprb” file you will find under the following link: “C:\Quantel\ABSolu\AppData\ConfigFiles\ProbesFiles”: Service Manual –... - Page 38 Service manual Start an exam and check all the different rings in the scroll-down menu: 4. The images have to be similar to the following: Ring 1 Ring 2 Ring 3 Ring 4 Service Manual – 31 / 63 XE_ABS_MT_AN_200224...
-
Page 39: Solving Noise Problems (With B And Linear Probes In Acquisition Mode)
Service manual Ring 5 Delete the B20-5A service probe when the check has been carried out. 6. Reinstall the B20-5A probe parameters you will find under the following link: C:\Quantel\ABSolu\AppData\ProbeFile NOTE Check that the B20-5A probe serial number on the ABSolu software is the same mentioned on the probe label. -
Page 40: Probes Care
Service manual Check the probe cable is not in contact with: o The unit power supply module, o The unit screen, o The printer USB cable, Check the probe cable is straight (not entangled), Try to switch off the light, air conditioned system, phone… (in the room or in another room), ... -
Page 41: Database Management
Service manual 11. DATABASE MANAGEMENT 11.1. Data information Database: The database information is stored in the “D:\Quantel” folder: “ABSolu” folder includes the AVI, EMR, JPEG, PDF, Hotline folders, “Dicom” folder includes the DICOM file, if the DICOM is not activated, this file will not be present. -
Page 42: Procedure To Save Only Data: Images, Cineloop
Service manual 11.2.2. Procedure to save only data: images, Cineloop… (without database) Copy “ABSolu” and “Quantel” folders under “D” disk. 11.2.3. Procedure to save all data (database + data: images, Cineloop…) You have two ways to copy all data: Manually backup: follow steps 11.2.1 –... -
Page 43: Procedure To Install The Database Factory
Service manual 11.3.1. Procedure to install the database factory Close the ABSolu software, by using: Alt + F4. Copy the file called “Database Factory V1.03_20190415.zip”, in the “C:\QM Tools” directory, if necessary. Unzip the file called “Database Factory V1.03_20190415” by clicking on “Extract All…”: 4. - Page 44 Service manual The following window will be displayed, enter the password “EKOAdmin” 6. Click on “Ok”, the “Database Factory V1.03_20190415” folder is created in the “C:\QM Tools” directory. WARNING The next action will definitively erase all data. Launch the “Import_QM_Base.bat” software, which is located in the “C:\QM Tools\Database Factory V1.03_20190415\ Database Factory V1.03_20190415”...
- Page 45 Service manual 8. The following window appears: 9. When “Press any key to continue…” message is displayed, the procedure is completed (press a key on the keyboard): 10. Data of the database has been definitively erased. 11. Erase the folder “Database Factory V1.03_20190415”, which is located in the “C:\QM Tools” directory.
- Page 46 Service manual 13. Erase all folders located in the “D:\Quantel” directory, except “Documentation” folder: 14. Copy the “Exams” folder, which is located in the “C:\QM Tools\Database Factory V1.03_20190415\ Database Factory V1.03_20190415” directory: 15. Paste it in the “D:\Quantel” directory: 16. Erase the files located in the folders called: “AVI”, “EMR”, “Hotline”, “JPEG” and “PDF”, which are located in the “D:\Quantel”...
-
Page 47: Calibration Of The "A-Bio" And "A-Probeam" Probes
Service manual 11.3.2. Calibration of the “A-Bio” and “A-ProBeam” probes After installing the A-Bio and / or A-ProBeam and / or A-Std probes in the unit, these ones have to be calibrated: Perform the A-Bio / A-ProBeam probe calibration in the “Probe Settings” menu of the General Setup screen: refer to ABSolu user manual –... -
Page 48: Install The Master Absolu Database In The Destination Absolu Software
Service manual 11.4.2. Install the Master ABSolu database in the Destination ABSolu software A specific tool is necessary to import the “Master ABSolu” database in the “Destination ABSolu” software: “Database import_20190709.zip”. Follow the below procedure to install the Database: Close the ABSolu application, by using: Alt+F4. Copy the file called “Database import_20190709.zip”, in the “C:\QM Tools”... - Page 49 Service manual 4. The following window is open, click on “Extract”: The “Database import_20190709” folder is created in the “C:\QM Tools” directory of the “Destination ABSolu”. 6. Copy the file called “Absolu.bak” of the “Master ABSolu”, located in the “Quantel 2019- 07-10 12;25;12 (Full)\Quantel”...
- Page 50 Service manual 8. Launch the “import_database.bat” software, which is located in the “C:\QM Tools\Database Import_20190709\Database Import_20190709” directory: The following window appears: 10. When “Press any key to continue…” message is displayed, the procedure is completed (press a key on the keyboard). 11.
- Page 51 Service manual 12. Cut all folders located in the “D:\Quantel” directory of the “Destination ABSolu”, except “Documentation” folder (as indicated below): 13. Paste them in a new folder called “Archives” in the “Destination ABSolu”: 14. Copy the “Dicom”, “Exams” and “OfficialDocument” folders, which are located in the “Quantel 2019-07-10 12;25;12 (Full).”...
-
Page 52: Calibration Of The "A-Bio" And "A-Probeam" Probes
Service manual 15. Paste them in the “D:\Quantel” directory of the “Destination ABSolu”: Note: Paste the “AVI”, “EMR”, “Hotline”, “JPEG” and “PDF” folders of the “Master ABSolu” in the “Destination ABSolu”, if you have previously saved them. Located, by default, in the folder “ABSolu”... -
Page 53: Update Software
Service manual 12. UPDATE SOFTWARE The “Update Software” will allow you to: Make an automatic backup of the ABSolu data (settings, exams, reports…) Install the new software. Refer to the document Software Information Guide (XE_ECHO_SIG_AN) to be aware of all existing ABSolu software. - Page 54 Service manual 6. Click on “Update ABSolu” and the following window will be displayed: The procedure will be completed when the above window will be closed and the following window will be open, with the message” “Software update completed”: NOTES Suppress the “ABSolu VXXX_20XXXXXX.zip”...
-
Page 55: Upgrade Of The Intel Graphics Driver
Service manual 13. UPGRADE OF THE INTEL GRAPHICS DRIVER The ABSolu application may crash when accessing to the exam screen, or by starting an exam. In this case, the problem is probably due to the “Intel ® HD Graphics 520” driver, which is not compatible with ABSolu resources. -
Page 56: Installation Of The Recommended Driver Version
Service manual 13.2. Installation of the recommended driver version Select the USB key, Launch the “igxpin.exe” software located in the “Intel_HD Graphics 520_Driver_24.20.100.6025\win64_24.20.100.6025”: The following window is open, click on “Yes”: 4. The following window is open, click on “Next”: Service Manual –... - Page 57 Service manual The following window is open, click on “Yes”: 6. The following window is open, click on “Next”: The following window is open, wait that the “Next” is available: Service Manual – 50 / 63 XE_ABS_MT_AN_200224...
- Page 58 Service manual 8. The following window is open, click on “Next”: 9. The following window is open, click on “Finish”, to restart the unit: Service Manual – 51 / 63 XE_ABS_MT_AN_200224...
-
Page 59: Suspend Automatic Update
Service manual 13.3. Suspend automatic update Follow the below procedure to avoid that the unit installs new Windows drivers, if this procedure is not followed, you risk that the last “Intel ® HD Graphics 520” driver will be automatically installed (25.20.100.6323). Select the “Control Panel”... -
Page 60: Installation Of Cobian Application
Service manual 14. INSTALLATION OF COBIAN APPLICATION Launch “Cobian Backup 11”, called: « cbSetup.exe » and click on “Yes”. Choose the language and click on “Next”: Select “I accept the conditions” and click on “Next”: Service Manual – 53 / 63 XE_ABS_MT_AN_200224... - Page 61 Service manual 4. Check that “Create start menu icon” and “Install the Volume Shadow Copy requester” are selected, if not, select them and click on “Next”: Select “Application (auto-start for all users) and click on “Next”: Service Manual – 54 / 63 XE_ABS_MT_AN_200224...
- Page 62 Service manual 6. Click on “Install”: The following window will be displayed and the procedure may take several minutes: Service Manual – 55 / 63 XE_ABS_MT_AN_200224...
- Page 63 Service manual 8. When the procedure is finished, click on “Done”: Service Manual – 56 / 63 XE_ABS_MT_AN_200224...
-
Page 64: Absolu Setup
Service manual 15. ABSOLU SETUP The “ABSOLU” shortcut is displayed on the computer desktop. However, another shortcut can be found in the folder: C:\Quantel\ABSolu Close regular ABSOLU program (Alt+F4) double click “Absolu.Presentation.Main.Setup” shortcut. This other shortcut allows the user to access some hidden features (for service only) that are not available in normal use: 1. -
Page 65: Contact Us Message
Service manual 15.2. Contact us message Select the “?” menu and click on “contact us…” This section allows you to have access to the Quantel Medical information in case you want to modify the information: the information can be only modified in ABSolu Setup. 15.3. -
Page 66: Activate Axial Length
Service manual 15.4. Activate Axial Length Service Manual – 59 / 63 XE_ABS_MT_AN_200224... -
Page 67: Hipaa Compliance
Service manual 16. HIPAA COMPLIANCE The Health Insurance Portability and Accountability Act (HIPAA) regulations include elements that focus on securing medical records in order to ensure patient privacy. QUANTEL MEDICAL has implemented the following technical measures to be compliant with the HIPAA regulations: 16.1. -
Page 68: Contingency Plan
Service manual 16.2. Contingency plan Implementation Regulation Specification Features implemented specification The covered entity must A backup of the Quantel Medical "establish and implement device can be done on network, on procedures to create and DVD or external hard drive, by using Data Backup 164.308(a)(7)(ii)(A) maintain retrievable... -
Page 69: Audit Controls
Service manual 16.4. Audit controls Implementation Regulation Specification Features implemented specification The covered entity must “implement hardware, software, and/or Requires This function may be controlled by procedural mechanisms auditing of the Windows Operating System and 164.312(b) that record and examine information set by the IT person (by using the activity in information... -
Page 70: Transmission Security
Service manual 16.7. Transmission security Implementation Regulation Specification Features implemented specification The covered entity must “implement security measures to ensure that The Integrity Controls depend upon electronically transmitted the network configuration and to the Integrity 164.312(e)(2)(i) electronic protected authentication policy of the hospital. Controls health information is not Third party software may be used to...
Need help?
Do you have a question about the Quantel ABSOLU and is the answer not in the manual?
Questions and answers
Can I combine two patients with different ID numbers.