Table of Contents
Advertisement
Quick Links
Eddystone Broadcast Ltd.
26, Arden Rd.
Arden Forest Industrial Estate
Alcester, Warwickshire
B49 6EP, England
Tel. 44 (0)1789 762278
Fax. 44 (0)1789 766033
www.eddystone-broadcast.com
Print Date 04/01/11
Eddystone Broadcast
----
XE150/300 Series
FM Exciters
nd
(2
Series)
----
Installation
and
Operation
----
Issue 4
E2165-00MA-04
January 2011
Page 1 of 42
----
E2165-00MA-04
Advertisement
Table of Contents

Related Manuals for Eddystone Broadcast XE150 Series

Summary of Contents for Eddystone Broadcast XE150 Series
- Page 1 Series) ---- Installation Operation ---- Issue 4 E2165-00MA-04 January 2011 ---- Eddystone Broadcast Ltd. 26, Arden Rd. Arden Forest Industrial Estate Alcester, Warwickshire B49 6EP, England Tel. 44 (0)1789 762278 Fax. 44 (0)1789 766033 www.eddystone-broadcast.com Print Date 04/01/11 Page 1 of 42...
- Page 2 Intentional blank page Print Date 04/01/11 Page 2 of 42 E2165-00MA-04...
-
Page 3: Table Of Contents
Index SECTION ONE : INTRODUCTION 1.1 : GENERAL DESCRIPTION………………………………………………………………… Page 5 1.1.1 : Front Panel Module………………………….…………………………..……………...… Page 5 1.1.2 : Main and Input/Output Boards……….………………….………..………………..……. Page 6 1.1.3 : 150/300W Amplifier Module, Control and Power Supply………………………….….. Page 7 1.1.4 : 12V Supply and Fan Control Board……………………….……………….….……..…. Page 8 1.1.5 : Stereo Encoder Module (/S option only)…………….…………………..………………... - Page 4 SECTION THREE : OPERATION 3.1 CONTROLS AND DISPLAYS………………………………………………………..……… Page 39 3.2 STATUS, PERFORMANCE AND LEVEL MONITORING…………….………….………. Page 40 3.2.1 MAIN Display Mode………………………………………………..………………..……… Page 40 3.2.2 MENU (of Modes) Display Mode…………………………………..………………….….. Page 40 3.2.3 SYSTEM Display Mode…………………………………………………………………….. Page 40 3.2.4 OPTIONS Display Mode…………………………………………………………………..Page 40 3.2.5 METER Display Mode………………………………………………………………………...
-
Page 5: Section One : Introduction
Eddystone Broadcast S7600 or S7900 Series, if greater output power is required. Remote control and monitoring of the Exciter can be by serial RS232 or TCP/IP connection (internal preset link) using asynchronous data. -
Page 6: Main And Input/Output Boards
1.1.2 : Main and Input/Output Boards The Main Board contains all the basic baseband input circuitry (Composite/MPX, RDS, SCA and Mono) the modulator and associated frequency synthesiser, the main hardware control and monitor microprocessor and all connections to other boards, modules and options within the Exciter. The associated Input/Output Board connects to a socket on the Main Board and carries all the parallel and RS232 serial control and monitoring connections to a 25 way ‘D’... -
Page 7: 150/300W Amplifier Module, Control And Power Supply
and also automatically mutes the Exciter’s output. The microprocessor also generates a mute signal under various circumstances (e.g. when the synthesiser is out of lock) this signal being directed via the safety ‘Interlock’ relay. This relay will itself provide an over-riding mute signal if the external Interlock line is open-circuited, irrespective of any internal Exciter condition. -
Page 8: 12V Supply And Fan Control Board
1.1.4 : 12V Supply and Fan Control Board This board contains a 20W DC-DC converter, which provides a regulated +12V dc supply from the main 36V (XE150) or 48-50V (XE300) Power Supply. The +12V supply is further processed and regulated to provide +5V, +22V and - 12V at point of delivery. The board also provides accurately tapped outputs from the input 36/48-50V line and output 12V line to feed the A-D converter on the Main Board, thus enabling a display of these voltage levels on the Front Panel or remotely. -
Page 9: Composite Input Module (/M Module Only)
1.1.6: Composite Input Module (/M Module only) This optional module provides an additional Composite/MPX input, which is selectable from the Exciter front panel, or remotely, when two optional modules are fitted (see sections 1.1.5 and 1.1.7). This input is in addition to the standard Composite input, SK09, which is permanently connected. The input to the module is via a rear panel, floating, 75Ω... -
Page 10: Technical Specifications
1.3 TECHNICAL SPECIFICATIONS The XE150/300 Series of FM Exciters is designed to meet or exceed ETSI Standards :- EN 301 489-01 : ERM/EMC for Radio Equipment, Part 1, Common Technical Requirements. EN 301 489-11 : ERM/EMC for Radio Equipment, Part 11,Special Conditions for FM Transmitters. EN 302 018-02 : ERM (Spectral Occupancy) for the FM Radio Broadcast Services EN 60215:1989 : Safety Requirements for Radio Transmitting Equipment. - Page 11 Spurious and In the range 9kHz to 1000MHz : - Harmonic Better than or equal to –75dBc - typically better than –85dBc Emissions In the range 87.5MHz to 137MHz : - Better than or equal to –85dBc at greater than 500kHz removed from carrier. Measured in a 10kHz bandwidth, with and relative to, an unmodulated carrier.
- Page 12 Mono/AES Input Overall frequency response : better than ±0.4dB over 5Hz - 15kHz (rel. 1kHz) Measured with deviation set to 18dB below ±75kHz (±9.4kHz) at 400Hz (except when modulation - fixed test level to pre-emphasised input then causing deviation Stereo Encoder /S to rise with modulation frequency.
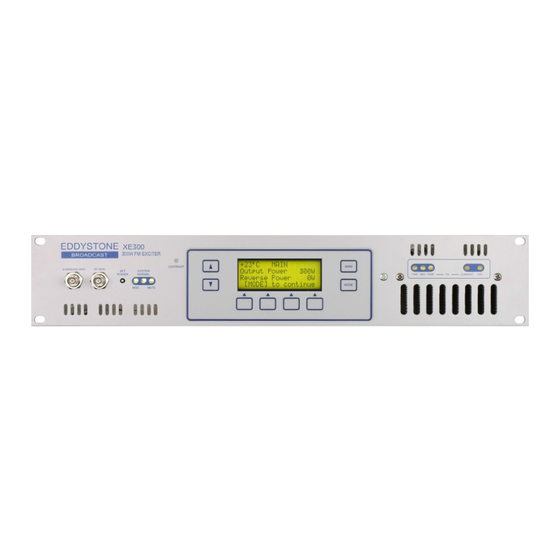
- Page 13 Status Indications Four line by 20 character back-lit LCD display with selectable screens showing output frequency, forward and reverse power and instantaneous deviation level ; individual system normal status components ; settings of any optional modules fitted ; comprehensive bargraph and digital readout metering of analogue levels (including peak hold and kHz/percentage displays of deviation) ;...
-
Page 14: 2: Stereo Encoder Module Specifications (/S Option Only)
1.3.2: Stereo Encoder Module Specifications (/S option only) Mono/AES Input Standard AES/EBU serial, digital, stereo audio Input via 3 pole XLR connector. Sensitivity : adjustable from rear panel. Input impedance : 110Ω floating/balanced, transformer isolated Note that a valid AES/EBU signal at this input will take precedence over the left/right analogue inputs to the Stereo Encoder module. -
Page 15: 3: Composite Input Module Specifications (/M Option Only)
1.3.3: Composite Input Module Specifications (/M option only) Composite Input DC to 100kHz input via floating 75Ω BNC connector. Input impedance internally preset to :- balanced 75Ω or 20kΩ (coaxial screen floating) or unbalanced 75Ω or 13.3kΩ (coaxial screen internally grounded) Input sensitivity for ±67.5kHz deviation (exc. -
Page 16: 4: Re-Broadcast Receiver Module Specifications (/R Option Only)
1.3.4: Re-Broadcast Receiver Module Specifications (/R option only) RF Input Single preset frequency within range 87.5 to 108MHz, via rear panel 50Ω ‘N’ Type coaxial connector (frequency must be specified at time of ordering). Operating input level : approximately -80dBm to at least –20dBm. (Ultimate signal to noise ratio reached at approximately –55dBm) (rejection and Image rejection : an unwanted modulated signal, at 21.4MHz below the wanted... -
Page 17: Section Two : Installation
SECTION TWO : INSTALLATION ! CAUTION ! These Exciters operate at high RF power levels, internal supply energy levels and mains supply current levels. They also incorporate devices containing toxic BeO. Before commencing installation, it is recommended that the complete INSTALLATION section is read and understood. The instructions should then be strictly followed, by suitably qualified personnel, otherwise sub- standard or even dangerous operation may result. -
Page 18: Rack Mounting
Typical Description Function Quantity For connection to Composite Input BNC type 50Ω or 75Ω coaxial free (Composite plug(s) plus coaxial cable as req’d Input /M option only) For connection to Antenna Input N type 50Ω coaxial free plug plus (Re- coaxial cable as req’d Broadcast /R option... -
Page 19: External Conections
2.2 EXTERNAL CONECTIONS All permanent external connections are made at the rear of the unit in accordance with system requirements. The connections required are made as described in the following sub sections. 2.2.1 Mains Supply Connector This is a standard IEC connector PL03, at the right rear of the unit, intended for connection to a single phase (plus protective earth) supply. -
Page 20: Sca1/Rds, Sca2 And Sca3 Input Connectors
2.2.3 SCA1/RDS, SCA2 and SCA3 Input Connectors These are 75Ω BNC type coaxial sockets SK08, SK07 and SK06 at the lower rear of the unit used for interconnection to RDS (Radio Data System) and/or SCA (Subsidiary Carrier Authority) modulating signals in the range 57 to 100kHz. 50Ω or 75Ω BNC plugs can be used for connections to these inputs, with matching screened coaxial cable, not exceeding three metres in length. -
Page 21: Composite Output Connector (And Loop Switch)
2.2.6 Composite Output Connector (and Loop Switch) This is a 75Ω BNC coaxial socket SK10 at the lower rear of the unit used for interconnection to external equipment, typically for RDS insertion, after which it is routed back to the Exciter’s Composite Input Connector (see 2.2.5) and thence to the modulator. -
Page 22: Left And Right Audio Input Connectors (/S Stereo Encoder Option Only)
2.2.10 Left and Right Audio Input Connectors (/S Stereo Encoder version only) These are two three pin XLR sockets at the rear of the unit (fitted to the rear of the /S Stereo Encoder module) used for interconnection to stereophonic modulating signal (or monophonic using a single input). -
Page 23: Status Connector
2.2.13 Status Connector This is a 25 Way D socket SK12 at the rear of the unit. This is used to enable basic external monitoring and control. Multi-core screened cable, not exceeding 3 metres in length, should be used for the interconnecting lead. The lead terminates in a 25 Way free D plug at the Amplifier end which is wired as follows :- Pin 1 Channel 2 select input (momentary ground for >1second to select) -
Page 24: External Standard Input Connector
2.2.14 External Standard Input Connector This is a 50Ω BNC coaxial socket SK13 at the lower rear of the unit used for interconnection to a 10MHz external frequency standard (typically derived from the GPS system). A 50Ω BNC plug is used for connection to this 50Ω... -
Page 25: Setting Up Procedures
2.3 SETTING UP PROCEDURES 2.3.1 Fuses If any problems occur after the Exciter has been installed and switched on, fuses may need to be checked and possibly replaced. However, a blown or high impedance fuse would generally indicate the presence of a fault, which would need correcting. The type, function and access to fuses is as follows : Type Function... -
Page 26: Internal Option Links
Type Function Access 1A (F) Fuse For protection of Driver Amplifier Remove top dust cover. Fuse is fitted in (for smd holders circuitry. a surface mounted holder on the printed ‘Littelfuse’ circuit board mounted at the rear of the R451501) If fuse blows, there will be a main heatsink, immediately in front of substantial... - Page 27 To access most links on the Main Board, the Input/Output Board must be removed (4 screwlocks holding Status and COM Port connectors to rear panel, one M3 screw holding Input/output Board to support pillar on Main Board – connectors unplugged as required). Lastly, links on the 150/300W Amplifier module are immediately accessible below the top dust cover.
-
Page 28: Output Frequency And Power Level Adjustment
The 150/300W Amplifier Module option switches/links are as follows :- Switch/Link Function Default (Factory) Setting Normal (link open) / Driver Mode (link closed) Normal (on rear board) Normal (link open) / Driver Mode (link closed) Normal (on front board) Normal mode gives an output range of at least 40W to 150W or 300W. Driver mode gives a lower range of typically 10W to 40W. -
Page 29: Channel And Frequency Selection And Setting During Operation
10) The channel frequencies (seven total) are stored in non-volatile ‘flash’ memory and are thus retained whilst power is removed. To load the frequency, entered in Channel 0, into one of the seven stored channels, press the left hand [∧] and [∨] keys as required to obtain the destination Channel number display. -
Page 30: External Channel And Frequency Selection And Locking
2.3.5 External Channel and Frequency Selection and Locking Channels 2-7 (not channel 1) may be selected externally by connecting the appropriate pin on the 25- way rear panel Status connector, SK12, to ground (see section 2.2.13) :- CHANNEL 25-way pin number None GROUND 14, 15, 18, 19... -
Page 31: Serial Remote Control And Monitoring
2.4 SERIAL REMOTE CONTROL AND MONITORING 2.4.1 Introduction Serial control via the rear panel COM PORT connector (section 2.2.12) uses asynchronous data (1 start, 8 data, 1 stop bit, no parity) at 2400, 4800, 9600 or 19200 Baud. Control commands and status monitor requests are detailed in section 2.4.2. - Page 32 Remote Input Commands (second byte sent from controller) Title Function ASCII Query_Status Status query (request to revert) Freq_Set_10M Channel 0 10MHz freq. (0, 8, 9, none) Freq_Set_1M Channel 0 1MHz frequency (0-9) Freq_Set_100k Channel 0 100kHz frequency (0-9) < Freq_Set_10k Channel 0 10kHz frequency (0 or 5) Channel_Set Channel (1-7, update or select)
-
Page 33: Reverted Status Monitor Information
2.4.3 Reverted Status Monitor Information The status of the Exciter is reverted in response to a ? command (see section 2.4.2). After the third byte is echoed back to the remote control unit, a further fifteen bytes are sent immediately from the Exciter, with no delays between individual bytes (each 1 start, 8 data, 1stop, no parity). - Page 34 Reverted Output Data Block (15 extra bytes reverted in response to # ? 0 sequence) Title Status Possible Values (ASCII) Op_Data1 Output data status request byte third byte echo fixed at 0 Op_Data2 Output forward power MSB (Watts) Null (blank) Op_Data3 Output forward power MSB-1 (Watts) 0 to 9 (inc)
- Page 35 Reverted Analogue#1 Data Block (15 extra bytes reverted in response to # ? W sequence) Title Status Possible Values (ASCII) Ana1_Data1 Analogue#1 request byte third byte echo fixed at W Ana1_Data2 Deviation MSB (kHz) Ana1_Data3 Deviation MSB-1 (kHz) Null (blank) Ana1_Data4 Deviation LSB (kHz)
- Page 36 Reverted Exciter Data Block (15 extra bytes reverted in response to # ? Y sequence) Title Status Possible Values (ASCII) Ex_Data1 Exciter data status request byte third byte echo fixed at Y Ex_Data2* Exciter system normal status N O X Ex_Data3 Exciter forward power status N L F X...
-
Page 37: Channel And Frequency Selection And Setting Under Remote Control
2.4.4 Channel and Frequency Selection and Setting under Remote Control Channel and frequency control commands do not operate in isolation but instead must be performed in a defined sequence (similar to that when using the local front panel controls – see sections 2.3.3, 2.3.4 and 2.3.5). - Page 38 Intentional Blank Page Print Date 04/01/11 Page 38 of 42 E2165-00MA-04...
- Page 39 SECTION THREE : OPERATION 3.1 CONTROLS AND DISPLAYS Marked Type Function SET POWER Preset (22T) To set output power level (anti-clockwise to reduce power). Potentiometer LED Display Red indicates deviation above 80kHz Green indicates deviation between 15 and 80kHz Off indicates deviation below 15kHz Amber indicates ‘Power-on-Reset’...
- Page 40 3.2 STATUS, PERFORMANCE AND LEVEL MONITORING Once installed as described in Section 2, most operations only involve monitoring Exciter status, performance and levels etc. The membrane switches grouped around the LCD display are used to select which parameter(s) to monitor, the results being displayed on the LCD. The displays are grouped into ‘modes’...
- Page 41 3.2.5 METER Display Mode If ‘Meter’ mode is selected, pressing the [∧] or [∨] keys steps through various system status levels (forward and reverse power, heatsink temperature, amplifier current, high and low voltages etc.). Levels are shown simultaneously in horizontal bargraph form and as actual digital values. Values are shown in ‘real-time’...
- Page 42 Intentional blank page --oOo— Print Date 04/01/11 Page 42 of 42 E2165-00MA-04...
Need help?
Do you have a question about the XE150 Series and is the answer not in the manual?
Questions and answers