Advertisement
Quick Links
Advertisement

Related Manuals for Greenlite G2

Summary of Contents for Greenlite G2
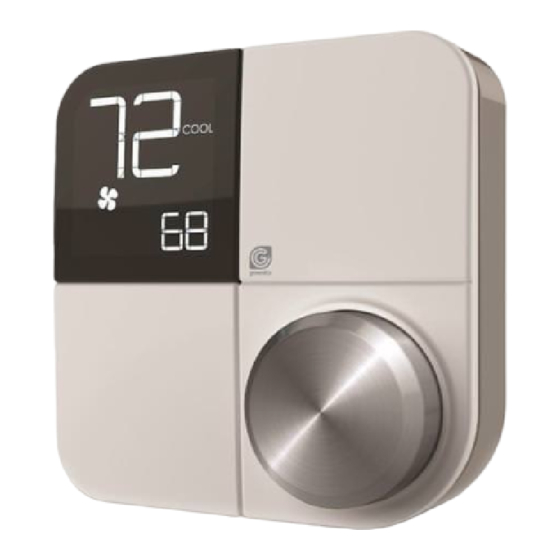
- Page 1 Installation Manual...
- Page 2 All you need to do is follow these simple steps and you’ll be on your way to saving energy and making your home even more comfortable. [Drill] Greenlite offers installation and product videos Please visit greenliteusa.com. To contact Greenlite Technical Support, please call 267.417.3277.
-
Page 3: Table Of Contents
1. START HERE What’s in the box? Greenlite G Power Bridge Trim Plate 2 TM Screws Wall Anchors Wiring Labels Tools Needed Optional Tools Phillips Screwdriver Smartphone Drill Optional: Wire Stripper Table of Contents 1. Start Here ..................2-6 2. Installing with a C-Wire..............7-10 3. - Page 4 Behind Greenlite’s Décor-snap® cover you will see a small, removable “quick guide” to installation and an icon-key label. The icons represent the display icons of your Greenlite Thermostat. You will also find important information for HomeKit and WiFi setup.
-
Page 5: Start Here
Step 1.1: Download the free Greenlite Thermostat App to your mobile device and create an account. Step 1.2: Set your phone aside and turn off the power at the circuit breaker to both your heating and cooling systems before performing any wiring. - Page 6 120-240VAC or High Voltage, your system is not compatible with HIGH Greenlite G . Please call Greenlite Technical 2 TM VOLTAGE Support at 267.417.3277 before proceeding with your installation. If you do not see any high voltage labels or wires, please continue with your installation.
-
Page 7: Installing With A C-Wire
INSTALLATION WITH C-WIRE Installing with a C-wire Before starting Turn off the power at the circuit breaker to both your heating and cooling systems before performing any wiring. You will not need the included Power Bridge. greenliteusa.com... - Page 8 Step 2.5: Separate Greenlite G from its 2 TM base. Pull the wires from your wall through the center hole of the Greenlite G base. 2 TM Secure the base to the wall using the included mounting hardware.
- Page 9 INSTALLATION WITH C-WIRE Option 1 - Conventional (Furnace) Systems: Step 2.6f: Following the terminal labels marked “Conventional” on the thermostat base, press the lever and insert each labeled wire into the top hole of the CONVENTIONAL W1 W2 HEAT PUMP W1 OB corresponding terminal.
- Page 10 Installation with C-wire Step 2.8: Securely fasten Greenlite G onto its base. Once it has 2 TM clicked into place, return power to your heating and cooling system. Step 2.9: After your thermostat powers up, you are ready to configure...
-
Page 11: Installing Without A C-Wire
INSTALLATION WITHOUT C-WIRE Installing without a C-Wire Using the Included Power Bridge Install and wire Install Power Bridge your G at your furnace 2 TM For installation without C-wire, you will need to access your furnace. Before starting Turn off the power at the circuit breaker to both your heating and cooling systems before performing any wiring. - Page 12 Installation without C-wire Hint: Helpful videos showing how to wire a thermostat with the Power Bridge are available at greenliteusa.com Step 3.1: Starting at your thermostat, confirm that you have one of the system configurations listed below: • Conventional 1H/1C (Y, G, W, R) •...
- Page 13 Terminal 4 • W2 Wire Terminal Conventional W2 (if W2 wire is present) Step 3.7: Securely fasten Greenlite G 2 TM onto its base. Step 3.8: Go to your furnace – remove the door or panel and locate your control board or transformer. In most cases, there should be four wires running from the furnace to your thermostat –...
- Page 14 Step 3.11: Return power to your heating and cooling system. If your system, including your thermostat, does not power up please call Technical Support. After Greenlite G powers up, you are ready to configure it for your 2 TM heating and cooling system and connect to a wireless network.
-
Page 15: Connecting To The Network
CONNECTING TO THE NETWORK Connecting to the Network Step 4.1: After your Greenlite G thermostat powers up, it will guide 2 TM you through the initial system configuration. Use the knob to change options and press the knob to confirm your selection. - Page 16 Step 4.3: After selecting “ON”, Greenlite G 2 TM will display “01”. You will then need to select “iOS” if you are using an Apple® device or “And” if you are using an Android® device. Step 4.4: After selecting “iOS” or “And”, your thermostat will display a large “02”, then “03”.
- Page 17 (iPhone or iPad ® ® ® Open your Greenlite Thermostat App, tap the + icon to add a new accessory, then select the accessory ID that starts with G Smart 2 TM Thermostat to start the connection process. Follow the instructions in the App.
- Page 18 ANDROID ® Open your Greenlite Thermostat App, tap the + icon to add a new thermostat. When prompted by the Greenlite Thermostat App, please use your phone’s Wifi settings to join your Greenlite G ’s Wifi 2 TM network. The network name and password can be found under the Décor-snap cover.
- Page 19 CONNECTING TO THE NETWORK Congratulations! Installation is complete and your G Thermostat is ready to go. Now 2 TM let’s save some energy and make your home more comfortable! greenliteusa.com | 19...
- Page 20 Conventional System With C-Wire Wiring Diagram Transformer HEAT (STAGE 1) HEAT (STAGE 2) COOL Notes: • The W2 terminal is used for 2 stage heating systems only • If you have both an RH and RC wire, please remove the red cap from the back of the thermostat 20 | 267.417.3277...
-
Page 21: Appendix
APPENDIX Heat Pump System With C-Wire Wiring Diagram Transformer AUX / EMER Heat CHANGEOVER VALVE COOL Notes: • The W1 terminal is used for Auxiliary/Emergency heat or on Dual Fuel systems greenliteusa.com | 21... - Page 22 Power Bridge Wiring Diagram Notes: • If you have a heat pump or dual transformer system, please call Tech support. • If you have any wires on your furnace not shown here, please leave them as is. 22 | 267.417.3277...
- Page 23 APPENDIX Apple HomeKit™ Use of the Works with Apple HomeKit logo means that an electronic accessory has been designed to connect specifically to iPod touch, iPhone, or iPad, respectively, and has been certified by the developer to meet Apple performance standards. Apple is not responsible for the operation of this device or its compliance with safety and regulatory standards.
- Page 24 If this unit fails because of defects in materials or workmanship within three years of the date of original purchase, Greenlite will, at its option, repair or replace it. This warranty does not cover damage by accident, misuse, or failure to follow installation instructions.
Need help?
Do you have a question about the G2 and is the answer not in the manual?
Questions and answers