Advertisement
Quick Links
VANITY CABINET ASSEMBLY GUIDE
Thank you for purchasing a Feather Lodge vanity. You are on your way to a beautiful, new
bathroom vanity. There are a few simple tools necessary, and some set up of your
preparation area before you get started. Our vanities go together easily, but you may
want to ask a friend for assistance when putting together larger vanities. One of you can
align the components while the other screws them together. Once you get going,
assembly gets easier as you improve your learning curve! By assembling your own vanity,
you are saving the thousands that companies charge for "semi-custom" vanities.
STEP 1
PREPARE VANITY FOR ASSEMBLY
Equipment: Phillips Head screw driver, flat head screw driver, cordless electric drill with the flat and
Phillips attachment bits (not necessary, but is a time saver). and rubber mallet.
Prep Area: A dirt free carpet or the foam sheets and cardboard from your cabinet will provide you
with a scratch free cushioned work area. To save your back, working at table height is
always a good idea.
Unpack your vanity components and spread out the panels on your smooth prep surface. Keep tools
and the package of hardware screws, brackets, etc close by, but not under any of the panels. Feather
Lodge Vanities ship with the hinges already secured to the door frame faces, making installation
quicker. We pre-drill all holes for easy acceptance of our hardware. All hardware, mounting brackets,
shelves, drawer pulls and screws(plus extra) are provided. Hardware is packaged separate from the
cabinet panels so there is no damage. Dovetailed drawers can be tapped together with a rubber
mallet.
�
PAGE
WELCOME TO FEATHER LODGE VANITIES
QUALITY, VALUE, BEAUTY
www.featherlodge.com
Advertisement

Summary of Contents for Feather Lodge VANITY CABINET
- Page 1 VANITY CABINET ASSEMBLY GUIDE WELCOME TO FEATHER LODGE VANITIES Thank you for purchasing a Feather Lodge vanity. You are on your way to a beautiful, new bathroom vanity. There are a few simple tools necessary, and some set up of your preparation area before you get started.
- Page 2 STEP 2 WHICH CLIP SYSTEM DO YOU HAVE? 2 PIECE CLIP SYSTEM PLASTIC CAM LOCK Seat female cam into Slide clip down into place place on top of male cam. Turn and fasten with phillips cam screw 180 degrees head screw included in clockwise with flat head hardware screwdriver to lock in place...
- Page 3 STEP 3 ATTACH SIDES TO FRONT Place front of vanity face down onto padded work surface. Line up fasteners on the side of the vanity to the front of the vanity. Lock fasteners in place. Repeat with other side of vanity. FRONT SIDE SIDE...
- Page 4 STEP 4 SLIDE IN VANITY FLOOR PANEL Identify the vanity floor panel. It is easy to identify because it is only finished on one side. Make sure that the finished side is facing the inside of the vanity. Slide the vanity floor panel into the dado joint (the shallow groove running along both sides of the vanity, close to the bottom).
-
Page 5: Toe Kick Installation
STEP 6 TOE KICK INSTALLATION Slide the toe kick into place onto fasteners. Lock fasteners to the toe kick. BACK PANEL TOE KICK STEP 7 INSTALLING SHELVING Slide clear acrylic clips into predrilled holes along sidewalls of shelves at height that works best for you. For a level shelf, count up the holes from the bottom before installing clips. - Page 6 STEP 8 SOFT CLOSE DRAWER GLIDES In the back of the vanity, at the level of the drawer, you will find pre-drilled holes. Identify the plastic L-shaped soft close mechanism from the bag of enclosed parts. Place L shaped soft close mechanism into predrilled holes.
- Page 7 STEP 10 PUT TOGETHER DRAWERS You’ll find five pieces that make up the drawers. All of our vanities have dovetailed joints. Just line up the holes and screw together. Line up the parts, then hang front edge over an elevated work surface. Gently tap joints together with a rubber mallet.
- Page 8 STEP 11 INSTALL DRAWER TO VANITY BOX Take assembled drawer and line it on top of the metal glides. Push the back of the metal glide into the pre-drilled hole located at the back of the drawer until it’s flush with the back portion of vanity. The mechanism will come together with a few clicks.
- Page 9 STEP 12 BRACING Screw in vinyl corner braces and you are done! Use the eight round-head 1/2” screws to fasten the brace to the vanity. OVERHEAD VIEW SIDE CONGRATULATIONS, YOU ARE DONE! PAGE QUALITY, VALUE, BEAUTY www.featherlodge.com...
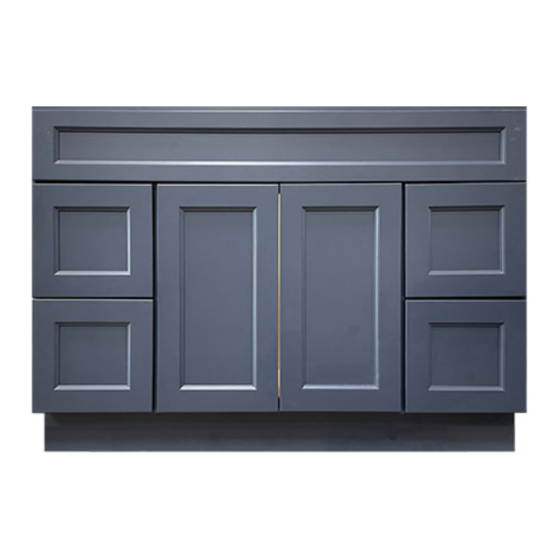
- Page 10 THE BLAIR SHAKER RTA VANITY Available in: Pacific Blue, Cunningham White and Old Harbor Grey For More Information Visit: www.FeatherLodge.com 24” 30” 36” (24 x 21 x 34.5”) (30 x 21 x 34.5”) (36 x 21 x 34.5”) 48” 60” (60 x 21 x 34.5”) (48 x 21 x 34.5”) PAGE...
Need help?
Do you have a question about the VANITY CABINET and is the answer not in the manual?
Questions and answers