Table of Contents
Advertisement
Advertisement
Table of Contents

Summary of Contents for Rynan R20
- Page 1 T H E R M A L I N K J E T P R I N T E R USER MANUAL...
- Page 2 Revise logs Version Update information Staff Date update Nguyen, Van Than V1.0 User manual Feb 26, 2020 Nguyen, Van Than V2.0 Update some information Mar 25, 2020 V3.0 Update the adaptor model Nong, Thi Hue Dec 08, 2020 Update speed table V4.0 Nguyen, Van Than Jan 06, 2021...
-
Page 3: Table Of Contents
............................... 15 ONTROLLER SETUP ..............................15 RINTHEAD CABLE SETUP ............................16 4.1. Use 1 printhead R20 PRO ......................... 16 4.2. Use 2 printheads R20 PRO ........................16 4.3. Use printhead R20 PRO Stitching ......................17 XTERNAL DEVICES CONNECTIONS ..........................18 5.1. - Page 4 1.6. Add Text object ............................43 1.7. Add Counter object ..........................44 1.8. Add Database object ..........................45 1.9. Add Barcode object ..........................47 1.10. Add Image object ..........................49 1.11. Add Datetime object ........................... 50 1.12. Add Shift Code object ......................... 50 1.13.
-
Page 5: Safety Information
SAFETY INFORMATION Ensure the printer is set to STOP before installing or removing a cartridge. Avoid using printer with high voltage and/or non-compatible power supplies or external electronic accessories. Ensure printer is installed and stored in a manner to prevent any strong impacts from ... -
Page 6: Emergency Case
EMERGENCY CASE FOR EMERGENCY SITUATIONS, E.G. SMOKE COMING OUT OF PRINTER, UNCONTROLLABLE CONTINUOUS PRINTING, FIRE, EXPLOSIVE SOUNDS, ETC., PLEASE REMOVE THE POWER SUPPLY IMMEDIATELY! ENVIRONMENTAL PROTECTION DON'T THROW PRINTER OR INK CARTRIDGES INTO REGULAR GARBAGE OR RECYCLING BINS. ENSURE PROPER DISPOSAL (E.G. -
Page 7: About The Printer
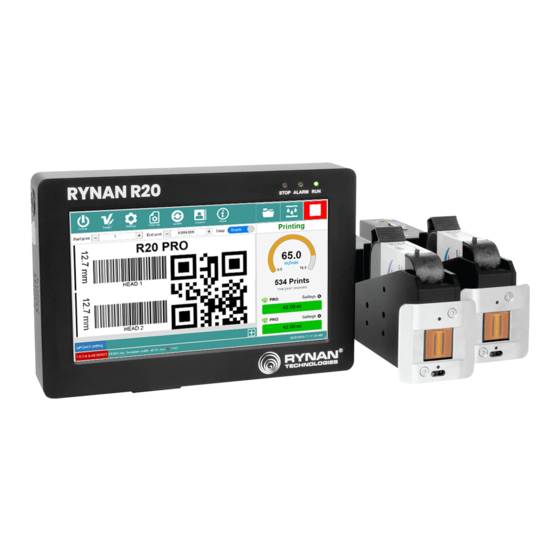
I. ABOUT THE PRINTER Thank you for purchasing the RYNAN R20 Thermal Inkjet Printer, a product of RYNAN TECHNOLOGIES (SINGAPORE). This printer is designed for packaging printing applications powered by Thermal Inkjet (TIJ) Technology. The RYNAN R20 produces crisp text, logos, variable data and barcodes on porous and non-porous media by automatically recognizes aqueous and solvent inks and applies the appropriate printing parameters. -
Page 8: Technical Specifications
1. Technical specifications DESCRIPTION SPECIFICATIONS Model RYNAN R20 – R20 PRO Controller (193 x 130.3 x 34.5 mm) Dimensions (L x W x H) Printhead max (216.4 x 49.1 x 65 mm) Controller (888 grams) Weight Printhead (412.4 grams) Power supply DC 24V-2.5A... -
Page 9: Printer Overview
600x120 600x150 600x200 600x300 600x600 3. Printer overview 3.1. Controller front side USER MANUAL V4.0 | Updated Jan 06, 2021... -
Page 10: Controller Back Side
3.2. Controller back side ITEMS DESCRIPTION (1) POWER button Take machine ON / OFF External fuse connected to mainboard, check (2) FUSE it if you can not turn on printer (3) POWER supply port Machine’s power supply port 24V – 2.5A Connect to other PC for POD transfer data (4) LAN Port Connect to Keyboard, Mouse, import Template... -
Page 11: Printhead
3.3. Printhead 3.3.1. Printhead 0.5 inch (1 cartridge, single Head R20 PRO) ITEMS DESCRIPTION (1) POWER and Printhead Port Machine’s printhead connection port Use for purge ink (2) PURGE Button Connect to External Sensor, External Encoder and Alarm beacon (3) EXTENDED Port... - Page 12 3.3.2. Printhead 1 inches (2 cartridges, stitching Head – 2 x R20 PRO) ITEMS DESCRIPTION (1) POWER and Printhead port of PH1 POWER and Data port of PH1 Use for purge ink PH1 (2) PURGE Button PH1 (3) POWER and Printhead port of PH2...
- Page 13 Port I, Port II Sensor hanging ability Stitching ability Size L x W x H: 216.4 x 77.1 x 75.8 mm NOTE: This printhead is created by combine 2 printheads R20 PRO on a plate. USER MANUAL V4.0 | Updated Jan 06, 2021...
-
Page 14: Installation
II. INSTALLATION 1. Component list USER MANUAL V4.0 | Updated Jan 06, 2021... -
Page 15: Printhead Setup
2. Printhead setup 3. Controller setup USER MANUAL V4.0 | Updated Jan 06, 2021... -
Page 16: Printhead Cable Setup
4.1. Use 1 printhead R20 PRO In this case, you use 1 printhead of R20 PRO only. And it should be connecting the same as above picture. The printhead will print data which you designed on Template 1 Design Tool only. -
Page 17: Use Printhead R20 Pro Stitching
4.3. Use printhead R20 PRO Stitching In this case, you use 2 printheads of R20 PRO. And they should be connecting one by one follow order on controller ports. The printhead will print data which you designed on template 1 & 2. Printed will be stitched into 1 inch wide bulletin. -
Page 18: External Devices Connections
5. External devices connections NOTES: Machine is able to operate with External Sensor, Encoder, Alarm at a time. Consult your supplier for further supports on the settings and connections. To connect machine with External Sensor, Encoder, Alarm, etc…, additional connector ... -
Page 19: Alarm Beacon
5.3. Alarm beacon Allows users to monitor printer operation from a distance via the light signals from the alarm. Pin diagram of Alarm beacon: PIN ON DB15 PORT VALUE DESCRIPTION The printer will Stop print because some of reasons below: 1. - Page 20 Have more than 1 kind of ink been plugged to printhead. Conflict Cartridge Make sure at the same times in printhead have Water base ink or Solvent base ink only. The value of Ink Level (any Active Head) on software are lower 5.0 ml.
-
Page 21: Software Using
6. SOFTWARE USING 6.1. Main interface 6.1.1. Tools bar ITEMS NAME DESCRIPTION Use this button to turn off your printer. Please do as below step: Power Off Printer 1. SHUTDOWN: Press this button to TURN OFF the printer. 2. RESTART: Press this button to RESTART the printer. Access the Template Design Tools to Create / Design Modify / Open template / Ink Calculate... - Page 22 Account Coming soon. View some information relate about firmware version, software version, hardware version, brand name and website address. About Show the Key or ID application. Use to unlock the Ink Authentication. Show private label for ink cartridge. Open exist template are saved on application Open template folder.
- Page 23 6.1.2. Print information INDEX DESCRIPTION VALUE Stopped Ready (normally status, no printing) Display status of software and printer. Printing (normally status, in printing) If you don’t use encoder, the value will equal number you input to Setting System Settings Encoder Internal Display the current speed.
-
Page 24: Designjet
Display the Printhead type that plug to Port 1 on controller. Display the ink volume of cartridge on head 1 (Port 1 on controller). Printhead type: R20 PRO / R20 MAX Display status of cartridge that plug to / R20 REACH Port 1 controller. - Page 25 6.2.1. Tools Bar ITEMS NAME DESCRIPTION Create new: You need to specify Template name, Number of head, Printhead type and Width of template. Edit: Edit Template name, Number of head, Template width and Printhead type of template has created. Open exist template are stored at application folder.
- Page 26 File manage: Use to manage (Copy file from USB Flash / Transfer file to USB Flash / Deleted file) all data of application. Included these data: 1. Template file (*.dsj). 2. Image file (*.bmp, *.png, *.jpg, *.tiff). 3. Database file (*.TXT, *.CSV, *.SQLITE, *.SQL, *.MySQL, *.JSON).
-
Page 27: Printing Parameters
6.2.2.b. Template Section All template will include 2 sections and each section will be corresponded with each printhead on each port of controller. 6.2.3. Object List Use these tool to adjust your object after put them to template. List all objects present on your template. Use Up / Down arrow to bring up or down one object over or under (layer index) other object. - Page 28 This setting will apply for all heads that connected to printer. The resolution will effect to speed of printer, higher resolution you selected slower printing speed you get. Channel ODD: Printer will to use the Odd side nozzle on the cartridge to print only. EVEN: Printer will to use the Even side nozzle on the cartridge to print only.
- Page 29 For web application Disable sensor Disable sensor is a distance between two sensor marks or it’s a product length. The purpose of this setting is prevent multiple print on one product and make sure at all time only one print on one product only (except in case the user adjusts Repeat Time of sensor mode to other value.
- Page 30 For web application For box application USER MANUAL V4.0 | Updated Jan 06, 2021...
- Page 31 Fixed length - On both Print mode: Sensor & Continuous Fixed length is distance between two repeat printing. Fixed length is used once Repeat Times value is different 0 with Sensor mode. 6.3.1.b. Calibrate voltage Some special case we need calibrate voltage for increase quality of print on special operating conditions.
- Page 32 6.3.2. System Settings 6.3.2.a. Encoder Internal Encoder Enable this option to allow the printer printing without the real encoder, you will able to adjust the simulate speed to software at speed text box. USER MANUAL V4.0 | Updated Jan 06, 2021...
- Page 33 External Encoder Enable this option to allow received the speed parameter from a rotary encoder. The encoder hardware must to connect to controller. PPR: 3600 (Default with our standard encoder), Diameter(mm): 48.51 (Default with our standard encoder). Rate scale is 1.00. If the encoder parameters are inconsistent, it will affect the print quality so please follow encoder formula (Page 15).
- Page 34 Default value of Repeat sensor is 0, maximum value is 255 times. That’s mean NO repeat printing required and printer will print normally. One times for one sensor signal. Continuous mode Continuous mode one of printing mode that allow the printer printing out without using the sensor.
- Page 35 6.3.2.e. Print static image This feature is used to print a static image and help improve printing performance. 6.3.2.f. Stitching Enable this feature when you use stitching head for printing. 6.3.2.g. Realtime In realtime printing. After sensor trigged, software immediately encode template and sending data to printheads.
-
Page 36: Advanced Settings
6.4. Advanced Settings 6.4.1. Display 6.4.1.a. Remember last printing After starting a new session, the printer will continue to print with the previous template and the counter will run continue. 6.4.1.b. Show printing data The main screen of the printer will show data that have printed from the database. 6.4.1.c. -
Page 37: Pod Settings
6.4.3. Common 6.4.3.a. Font name and Font size Set default font name and font size for some objects as: Text, Counter, Datetime, Barcode,… 6.4.3.b. Design unit Set default unit for printer system: Millimeter, Centimeter, Inch and Pixel. 6.4.3.c. Price unit Set the local currency, this setting will help in case Ink Calculate. - Page 38 6.5.1. POD Mode Control the behavior action of software when it gets the data from sender. 6.5.1.a. Print all The printer will print all message send from sender. Example: Printer received 5 messages (packet / telegram). Your result of printing will be: MESSAGE_0, MESSAGE_1, MESSAGE_2, MESSAGE_3, MESSAGE_4 After complete print MESSAGE_4, the printer will go to NO DATA status and wait for new messages.
- Page 39 MESSAGE_4, MESSAGE_4, MESSAGE_4… MESSAGE_4… The last message will be printed and the printer will save this messages for next print until new messages is coming. 6.5.2. Data type (POD) DRAW data/JSON 6.5.3. Rule (POD) 6.5.3.a. Split Character The separator uses to divide the sender’s data to multiple data fields. Support: Tab (‘\t’), Space (‘...
-
Page 40: Getting Started
III. GETTING STARTED Install the printer on your conveyor according to the installation instructions. Set print direction and appropriate throw distance to obtain best print quality (1-3 mm). Insert ink cartridge. Connect printhead cable, sensor and encoder. Plug the power cord into an appropriate power source to start up the printer. -
Page 41: Open Template
1.2. Open template Click Open and select a name at above to open. Click Open button to reload the template. USER MANUAL V4.0 | Updated Jan 06, 2021... -
Page 42: Save Template
1.3. Save template Click Save button to save the template. 1.4. Delete template and then select File manager. Select template need to delete, click Click on button delete button to delete file. USER MANUAL V4.0 | Updated Jan 06, 2021... -
Page 43: Save As Template
1.5. Save As template and then select Save as button. Save this template with other names. Click on button Naming the template and click icon of save button. 1.6. Add Text object and then select Text button to open the Text form. Input your desired Click on button content at text box, then select OK. -
Page 44: Add Counter Object
1.7. Add Counter object and then select Counter button to open the Counter setting form. Click on button Start counter: Set begin value of counter. End counter: Set stop value of counter. Once reach stop value the counter automatic return to Start counter. -
Page 45: Add Database Object
1.8. Add Database object and then select Database button to open the database form. Click on button 1.8.1. Load database Select Load database => Select Database type => Next. Select database file in list at left side. USER MANUAL V4.0 | Updated Jan 06, 2021... - Page 46 Select database fields USER MANUAL V4.0 | Updated Jan 06, 2021...
-
Page 47: Add Barcode Object
TEXT: Insert Text into template. DATETIME: Insert Date time into template. DATA FIELDS (F1, F2, F3): Select field. This value is match with the Column in database file. Row: Set the first row of database to print. Text: Change content of Text object above. Datetime format: Set format of Date time object above. - Page 48 1.9.4. Barcode Properties Advanced Depending on the barcode type, you can adjust different properties: Show as rectangle, Enforce binary encoding, Code format, Symbol size, Number of all symbol, Index of all symbol, File ID. USER MANUAL V4.0 | Updated Jan 06, 2021...
-
Page 49: Add Image Object
1.10. Add Image object and then select Image button to open the image form. Click on button Image type: Support Static and Database. Static: Choose the path and select image file => Click Open to add image to template. Database: Support print with variable image. USER MANUAL V4.0 | Updated Jan 06, 2021... -
Page 50: Add Datetime Object
1.11. Add Datetime object and then select Datetime button to open the Date / Time form. Click on button Add Date / Time / Expiry Date Format: Use Windows Date / Time format to display. Select format desired at List box. Expiry date: Use to create expire date follow format above. -
Page 51: Add Shapes Object
Example: Shift code 1 has time is 11h00 and Shift code 2 has time 12h00. At 11h00 Shift code 1 will be print. At 12h00 Shift code 2 will be print. 1.13. Add Shapes object and then select Line / Rectangle / Ellipse button to drawing some shapes Click on button into template. -
Page 52: File Manager
Set all parameters to calculate the ink cost for the template designed. Resolution / Density: Select your target parameter. Total pages: Set number of printed page that you need. Cartridge price: Add cost in your currency (depend on language such as: USD, VND, SGD, EUR, CND…) for each cartridge. - Page 53 1.15.1. File Type List of files that the software supported. a. Files (template file) This is template file with extension is *.dsj b. Database Database file such as: *.txt, *.csv, *. SQLite, *.SQL, *. MySQL, *. JSON. c. Image Image and photo file such as: *.png, *.jpg, *.bmp… 1.15.2.
-
Page 54: How To Print
2. How to print? 2.1. Step 1: Open template From the Main interface, click Open icon to open a template from folder of application. Template list: Select the template to print. Template Preview: View a content of the template. Click button to use the template. -
Page 55: Step 2: Adjust Printing Parameters
2.2. Step 2: Adjust Printing Parameters Before start printing, you should adjust and select printing parameter that suitable with your configuration. Click on Start button to begin your printing! 3. UPDATING INSTRUCTIONS 3.1. Update Software / Firmware / Keyboard / Font This tool will help you update your printers to newer Software / Firmware / Keyboard / Font. - Page 56 3.1.1. Task List Select the task: Update Software / Update Firmware / Update Keyboard / Update Font 3.1.2. USB List Select the USB that plugged to Controller from the drop list. 3.1.3. File Update a. Update Firmware Select the USB that plugged to Controller from the drop list and then choose correct file type Firmware file is *.r10 USER MANUAL V4.0 | Updated Jan 06, 2021...
- Page 57 b. Update Software Select the USB that plugged to Controller from the drop list and then choose correct file type Software file is setup.exe c. Update Keyboard Select the USB that plugged to Controller from the drop list and then choose correct file name. Only Chinese and Korean keyboard need to update.
- Page 58 d. Update Font Select the USB that plugged to Controller from the drop list and then choose font name need to update. 3.1.4. Buttons Refresh the list of USB once you plugged new USB to controller box or PC Start install new Software, Firmware, Keyboard and Font from the USB USER MANUAL V4.0 | Updated Jan 06, 2021...
-
Page 59: Trouble Shooting
V. TROUBLE SHOOTING Error code Description Solution Note 1. Press button "Refresh connection" No reply 2. Remove and re-insert data cable. SW 1.0.2.4 Can not received printhead (Code 1) 3. Restart controller. FW 1.4.G 4. Check grounding PE. 1. Press button "Refresh connection" No reply 2. - Page 60 3 firmware verison respectively FW 1.2 with hardware version as below: above 1. R20 PRO 1.0 2. R20 PRO 1.1 3. R20 MAX, R20 REACH 1.1 1. Try update again. Update firmware: SW 1.0.0 Connection not stable 2. Check grounding PE Fail checksum FW 1.2...
- Page 61 Remove CMOS battery and then connect it Controller (booting) again 1. Checking Smartcard on cartridge R20 MAX/R20 2. Checking Smartcard pin on R20 MAX/R20 REACH show No SW 1.0.2.4 REACH show No printhead (Maybe damaged) cartridge FW 1.4.G cartridge 3. Checking current firmware and...
Need help?
Do you have a question about the R20 and is the answer not in the manual?
Questions and answers
I want to print date batch no and msp in black on plastic pouch of 1 kg size, suggest smallest size of your printer, price, availability, post sell services.
Where is your service centre in NCR. I am Ghaziabad based doctor.